Birthdays, friends, family and fun – Grandchildren are such a joy!

Share

Well, another birthday has come and gone – and it just gets better and better – four grandsons, wonderful family, loving relationships, friendships and freedom – what could be better! Here are three of our four little munchkins. So cute. How blessed are we….. And here is The Birthday Song that I created for my grandkids – Sam the Broken Robot loves birthdays!Larraine Jack Noah Gabe Sept 2013 gorgeous


Share
Posted in Blog, Family, Raising Children | Tagged , , , | Leave a comment

A great side dish – mashed squash and sweet potato – cooking with kids – especially little ones!

Share


Roast a whole squash ( any kind – butternut is our favorite) in the oven for 1 hour in a roasting pan. Put two sweet potatoes next to the squash ( poke a few holes in them to let the steam escape).  When done, and soft to the touch, peel both vegetables ( discarding the seeds from the squash as well as the skin) and add butter and salt to taste – voila! The best side dish with chicken, fish, beef, or just about anything! The children love to watch me poking holes in the potatoes, turning on the oven, and peeling the veggies. And then of course mashing is smashing to them – and they love that too. Make sure the vegetables are cool to the touch because tasting WILL happen! ( You will be tempted too!)
Enjoy….Butternut Squash


Share
Posted in Blog, Family, Recipes, Recipes to Make with Children, Vegetables | Tagged , , , | Leave a comment

Try cooking with kids to engage them in healthy eating and family time – Artichokes are yummy!

Share

May 2012 Cooking Tilapia goats 044

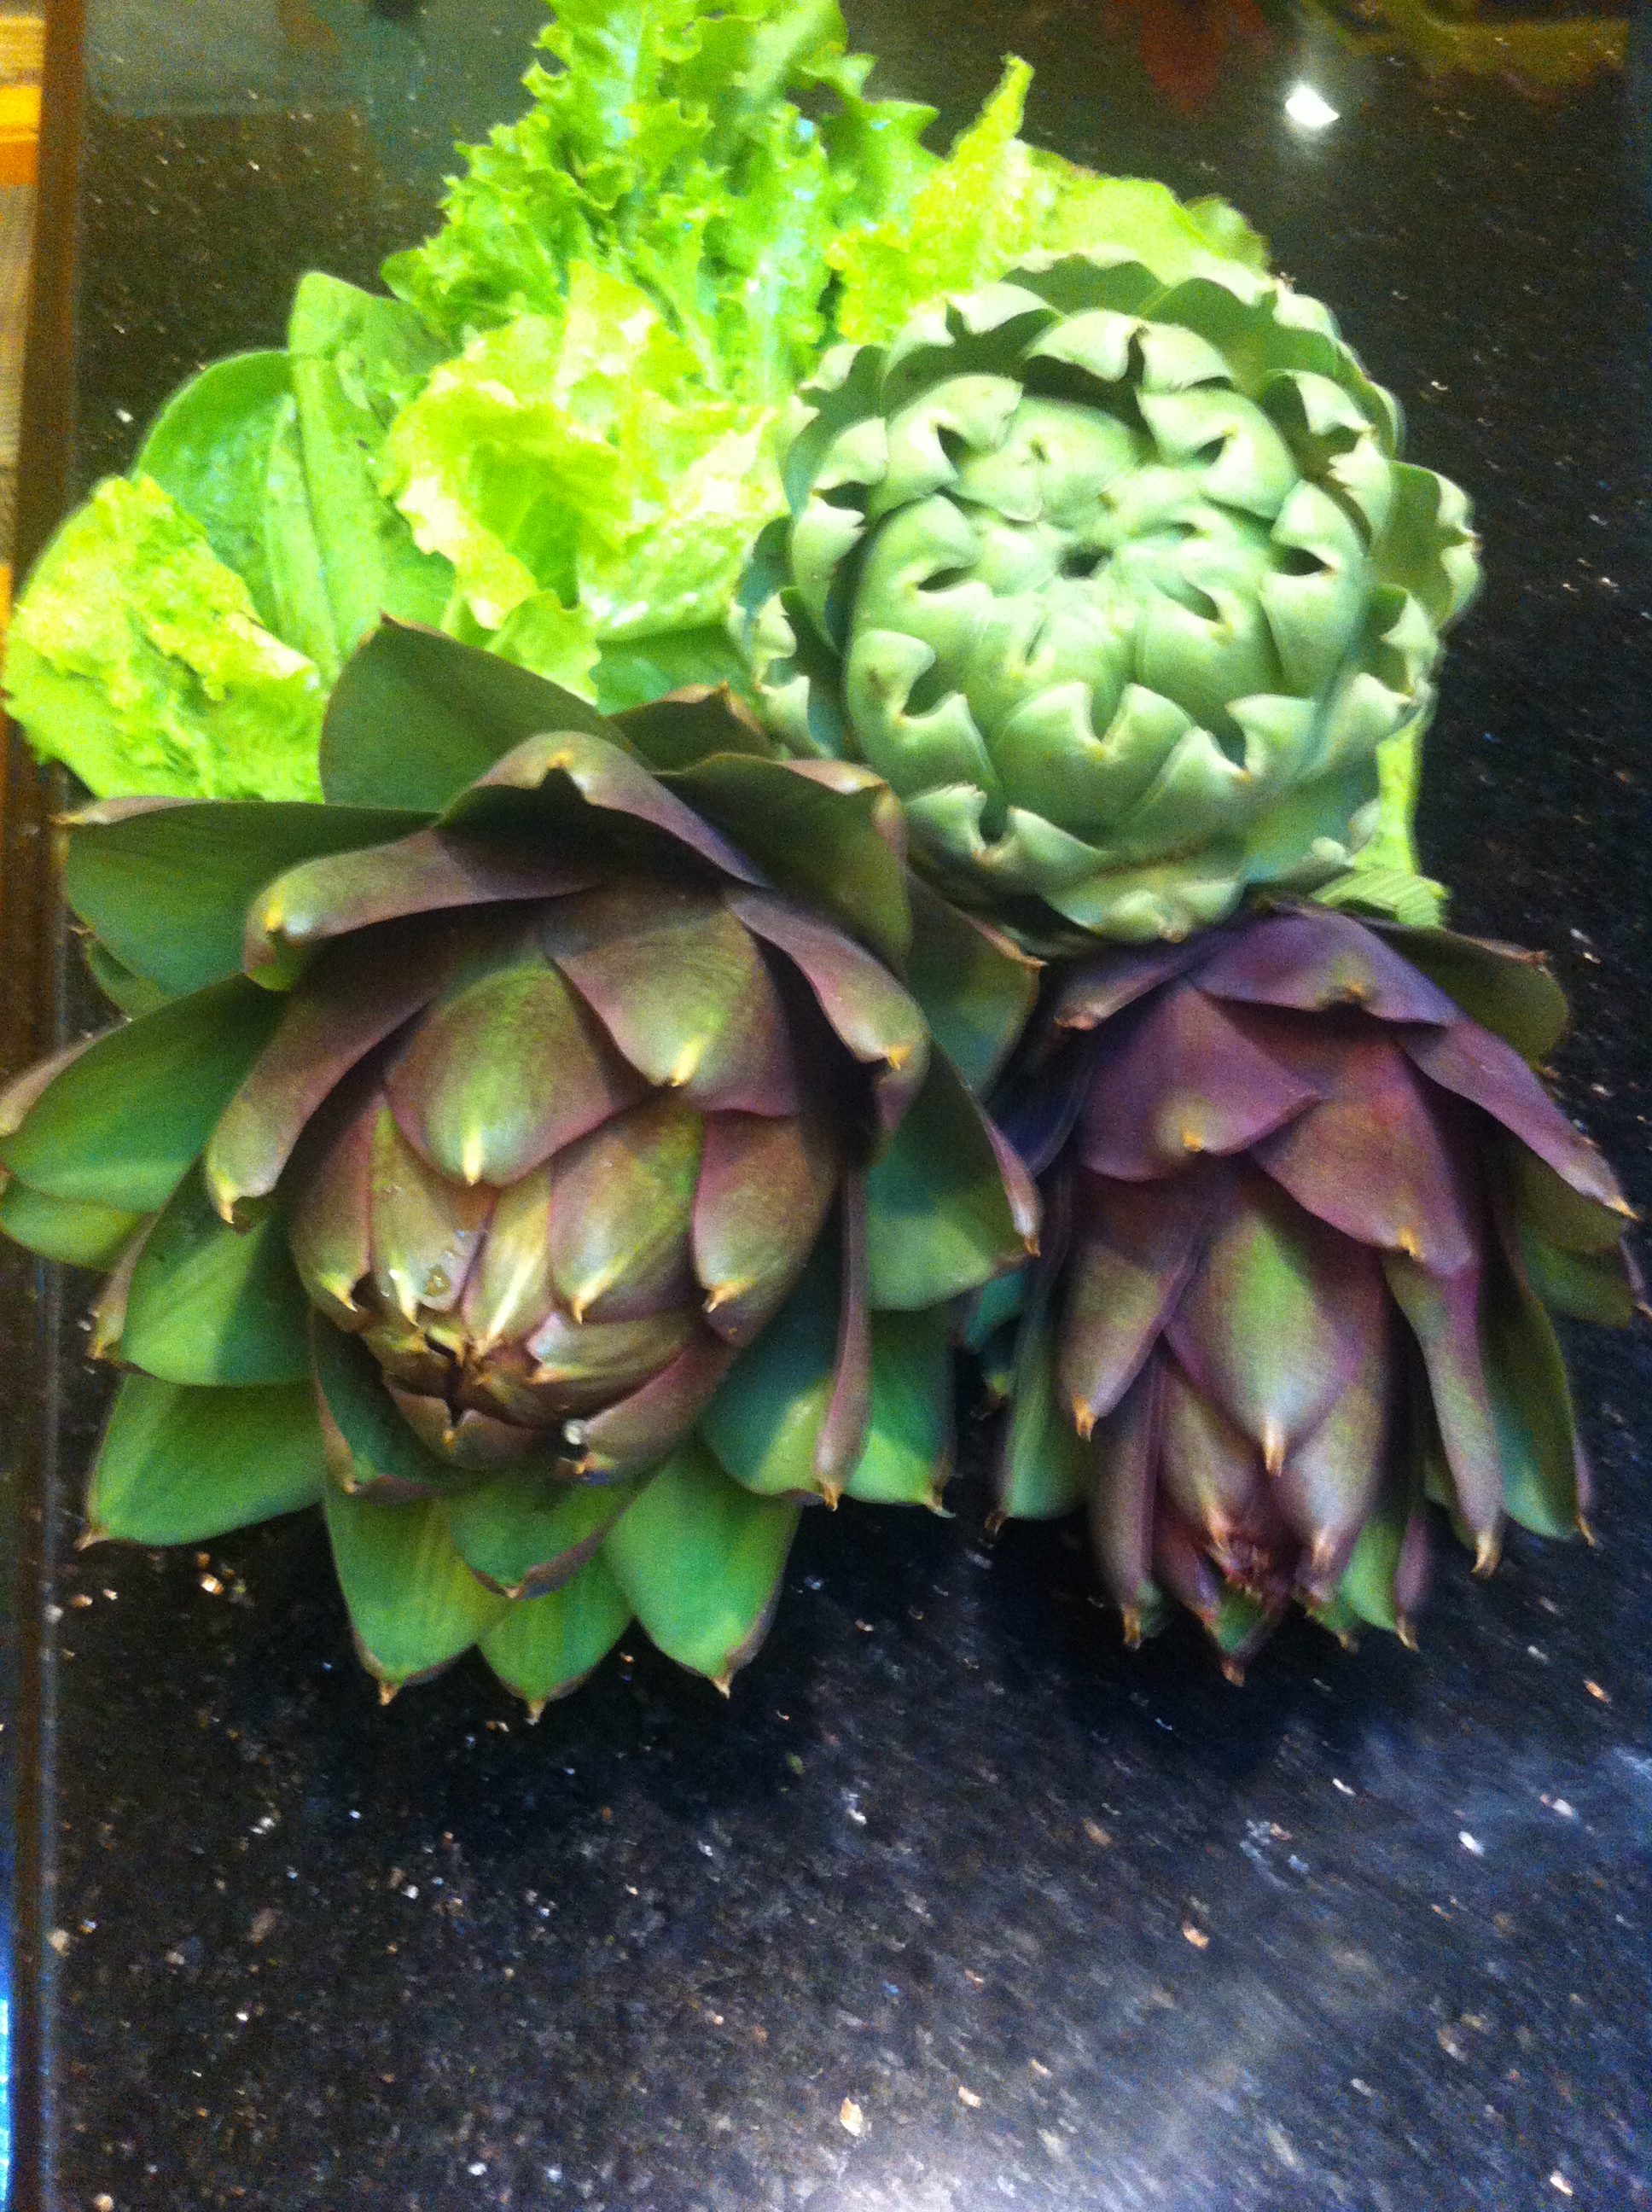
Have you ever eaten an artichoke? Its fun! And children ( once they get the hang of it) love it!. They are easy to cook too.

Just submerge them partially in about 2 inches of water in a pot, and boil until they are soft when you pluck off a leaf. One does not eat the whole leaf just the end part of it. And the ones that are shown above are from our Little Farm ( along with some lettuce we just picked too). We eat them a LOT! You can dip the leaves in butter, or dressing ( balsamic and olive oil ) or just lemon juice. Or just eat them as they are. They have a nutty fresh flavor ( no nuts involved).

You could eat artichokes as your whole meal – they are pretty filling – or as a starter. Another option is to use a vinegar, olive oil, chopped green olives, chopped red onion, lemon juice, with a teaspoon of sugar combination dressing.

All in all – healthy, delicious and fun to eat – a great summer food.

Share
Posted in Blog, Family, Recipes to Make with Children, Vegetables, Vegetarian Mains | Tagged , , , , , | Leave a comment

An Officer of the Order of the British Empire – OBE – what an honor in the UK and Commonwealth – and my sister has just been awarded it!

Share

An Officer of the Order of the British Empire – OBE – what an honor in the UK and Commonwealth – and my sister got it!

The family is so excited – my sister was informed that she has been awarded an OBE – and will go to Buckingham Palace to receive this award from the Queen/member of the Royal Family.

Here is the announcement by the British Breast Cancer Campaign – the charity of which she was formerly Chairman and CEO. And below a picture of my sister. We are SOO proud of what she has done. And how very proud our parents would have been – our father Jack Wolfowitz was such an anglophile, our mother Norma was born in London and our grandfather Harry Cohen was a cockney from the East End of London (remember Eliza Doolittle?). They must be having a good old party up there together and marveling that their daughter/granddaughter Pamela has achieved such an honor! YAY Pamela!

img640-pamela-goldberg pic

Baroness Delyth Morgan, Chief Executive of Breast Cancer Campaign is delighted to announce that Pamela Goldberg, the charity’s former Chief Executive, has received an OBE in this year’s Queen’s Birthday Honors, for charitable and public service through Breast Cancer Campaign and the General Advisory Committee on Science.

Pamela’s involvement with the breast cancer community spans more than 20 years; she was appointed Chair of Trustees to the charity in 1992 and became an Honorary Director in 1995. At this time, she oversaw all aspects of the charity’s operations, working with an administrator, a fundraiser and other part-time and voluntary help. In 1997, she became Chief Executive of the charity, which at the time had just four employees.

Since then the charity has gone from strength to strength; the first research grant awarded in 1997 was £103,000 and when she retired in 2011, the charity had a staff of over 70 and had funded almost £40 million of high quality, peer reviewed breast cancer research, which has helped to improve diagnosis and treatment for the 50,000 women who are diagnosed with breast cancer in the UK each year.

Pamela was seen as a leading player in the breast cancer community, helping Campaign to establish its reputation as a serious contributor in the field of breast cancer in the eyes of the medical research establishment, funders and donors. She was instrumental in creating a respected organization with award-winning fundraising campaigns such as wear it pink, which have captured the imagination of the public and raised millions of pounds to help fund breast cancer research.

Other key highlights of her tenure include establishing a Scientific Advisory Board of breast cancer experts to peer review all grant applications to ensure that only the best research is funded by the charity. The publication of the first Gap Analysis, a unique project that brought together more than 50 of the UK’s leading scientific minds to identify the gaps that exist in breast cancer research, was a ground-breaking study which identified the need for a breast cancer tissue bank to help advance research findings from the laboratory to the clinic. With Pamela’s influence, credibility and position within the science community, the daunting task of developing and opening the UK’s first national tissue bank was achieved, opening its doors in 2010 to scientists in the UK and Ireland. Six years later and the second Gap Analysis has now been completed and the findings will be published in the Autumn.

Delyth Morgan, Chief Executive of Breast Cancer Campaign said, “Pamela played a pivotal role in driving forward the substantial growth in funding that is now available to scientists working in the breast cancer field.  Behind every new advance in early diagnosis, prevention and treatment is a wealth of research, including vital work funded by Breast Cancer Campaign, and we are now seeing the benefits of this work with women living longer with the disease and enjoying a better quality of life.

“The Breast Cancer Campaign Tissue Bank really stands out among Pamela’s achievements and the challenge of getting this innovative project off the ground and building it into a world class resource for researchers is probably her greatest legacy to the breast cancer research community and to people with breast cancer.

“There’s still plenty of work to do but Breast Cancer Campaign will continue to thrive and grow and our work will help improve the lives of women with or at risk of breast cancer and we can thank Pamela for her role in making this possible.”

– See more at: http://www.breastcancercampaign.org/articles/former-campaign-chief-executive-pamela-goldberg-receives-obe#sthash.emrQVQzF.dpuf


Share
Posted in Blog, Family, Philanthropy, Women's Topics | Tagged , , , , , | Leave a comment

Making Monkey Bread ! KIDS LOVE IT! Cooking with kids is such fun

Share

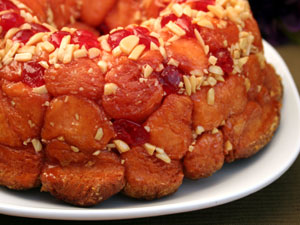
This is a great kids’ project.  Kids love handling and dipping the bread pieces and it really doesn’t matter how it’s put together.  Both you and the kids will have fun.Caramel Monkey Bread

Bread Mixes

Monkey bread is typically made with sugar for sweet treats and served as a pull-apart-loaf to be eaten with your fingers.  You can also make savory monkey bread and serve it with marinara sauce or olive oil.

I buy my monkey bread mixes from Prepared Pantry my affiliate. They have LOTS to choose from – and its so easy – however you do have to think about it and order it on line, and plan a little ahead because it will take a week or so to reach you.  Just look at the options for Monkey Bread that they offer!

  • Garlic and Herb Monkey Bread Mix
  • Cinnamon Sugar Monkey Bread Mix
  • Sticky Bun Monkey Bread Mix
  • Butterscotch Monkey Bread
  • Caramel Nut Monkey Bread.

Give these monkey bread mixes a try. 

You’ll find everything you need including the yeast and detailed instructions.

Recommended Monkey Bread Recipes

You can freelance but these recipes are great starting points.  They’ll give you amounts and baking times.  If you want to freelance, just make substitutes.  Be sure and give your monkey bread plenty of time to rise before baking.

This monkey bread is made with jam as part of the mixture to coat the bread pieces.  It calls for orange marmalade but you can use other jams.

This monkey bread recipe calls for maraschino cherries and almonds.

If you wish to make cinnamon sugar monkey bread from scratch, use the cherry almond recipe deleting the cherries and almonds but adding two tablespoons of cinnamon to the sugars for the coating.  (Do not add the cinnamon to the dough.)

Monkey Bread from a Spudnut Mix

Spudnuts are light, airy, yeast-risen donuts that are fried.  I made the dough exactly as instructed.  Then, I cut it into pieces, rolled it through butter and cinnamon and sugar, and layered the pieces in a bundt pan.  When I let the dough rise right to the max, the bundt pans that I used were completely filled.

I baked the monkey breads in both bronze-colored pans and a black pan.  Dark pans bake more quickly.  In the black pan, the monkey bread was baked in 35 minutes.  In the lighter colored pans, it took about 40 minutes.  Here is the recipe for this one:

Ingredients:

Daily Dozen Spudnut Mix
3/4 cup granulated sugar
2 tablespoons good quality cinnamon

3/4 cup butter

Directions

For the filling, mix the cinnamon and sugar together.  In another bowl, melt the butter in the microwave and set it aside.

Lightly flour a work area on a clean counter. Press the dough into a disk. With a sharp knife, cut the dough into walnut-sized chunks. Dip the chunks in the melted butter and then in the cinnamon and sugar mixture. Place the coated chunks in a bundt pan.  If you have any leftover butter or sugar mixture, pour it over the dough. Cover the pan and let the bread rise until doubled.

Preheat the oven to 350 degrees. Bake for 35 to 40 minutes or until it tests done with an internal temperature of 190 degrees using an instant-read thermometer. (Cover with aluminum foil the last ten minutes to avoid over-browning.) After five minutes, invert the bread on a large plate or serving platter.
Serve warm.

Try Prepared Pantry’s Spudnut mixes and make either monkey bread or raised Spudnut donuts.Caramel Monkey Bread large

So in summary – here are the Steps for Successful Monkey Bread

Though monkey bread is easy to make and the actual preparation time is modest, you do have to wait for the bread to rise.  Allow yourself plenty of time.

Step 1:  Mix the dough and add the goodies.   Monkey bread lends itself to freelancing; you don’t have to follow a monkey bread recipe and you can start with your favorite bread recipe.

To fill a bundt pan, you will need a recipe that calls for about four cups of flour. Mix as you would another bread.  I usually add several tablespoons of sugar for a little sweeter bread. For an egg-rich bread, add an egg. You can also add cocoa, dry fruit, or nuts.

Step 2:  Cut the chunks.  The easiest way to cut the dough is to roll or pat it out on the counter and cut across the dough with a sharp knife. The chunks should be no larger than walnuts.

Step 3:  Coat the chunks.  There are two ways to coat the chunks: dip the chunks in butter and roll them in a sugar mixture or make a buttery slurry of melted butter and sugar and cinnamon and dip the chunks in
the slurry.

Nuts, fruit, or jam can be added between layers if desired. If you want to top your monkey bread with nuts, place nuts in the bottom of the pan since the monkey bread will be inverted onto a platter after baking.

Step 4:  Load the pan.   You don’t have to use a bundt pan; any pan will do though tube pans and springform pans may leak.  You can use a jumbo muffin pan to make individual monkey breads.

Step 5:  Bake the bread.  Bake the bread at 350 degrees or as directed by the recipe. Once baked, let the monkey bread cool in the pan for about five minutes before inverting it onto a platter. This gives the glaze a chance to set up a bit so that it doesn’t run everywhere when inverted.   Serve the monkey bread warm.

Share
Posted in Blog, Desserts, Recipes to Make with Children | Tagged , , , , , , | Leave a comment

Omelets – I never really liked them – but the kids do! And they are pretty easy to make – give them a try!

Share

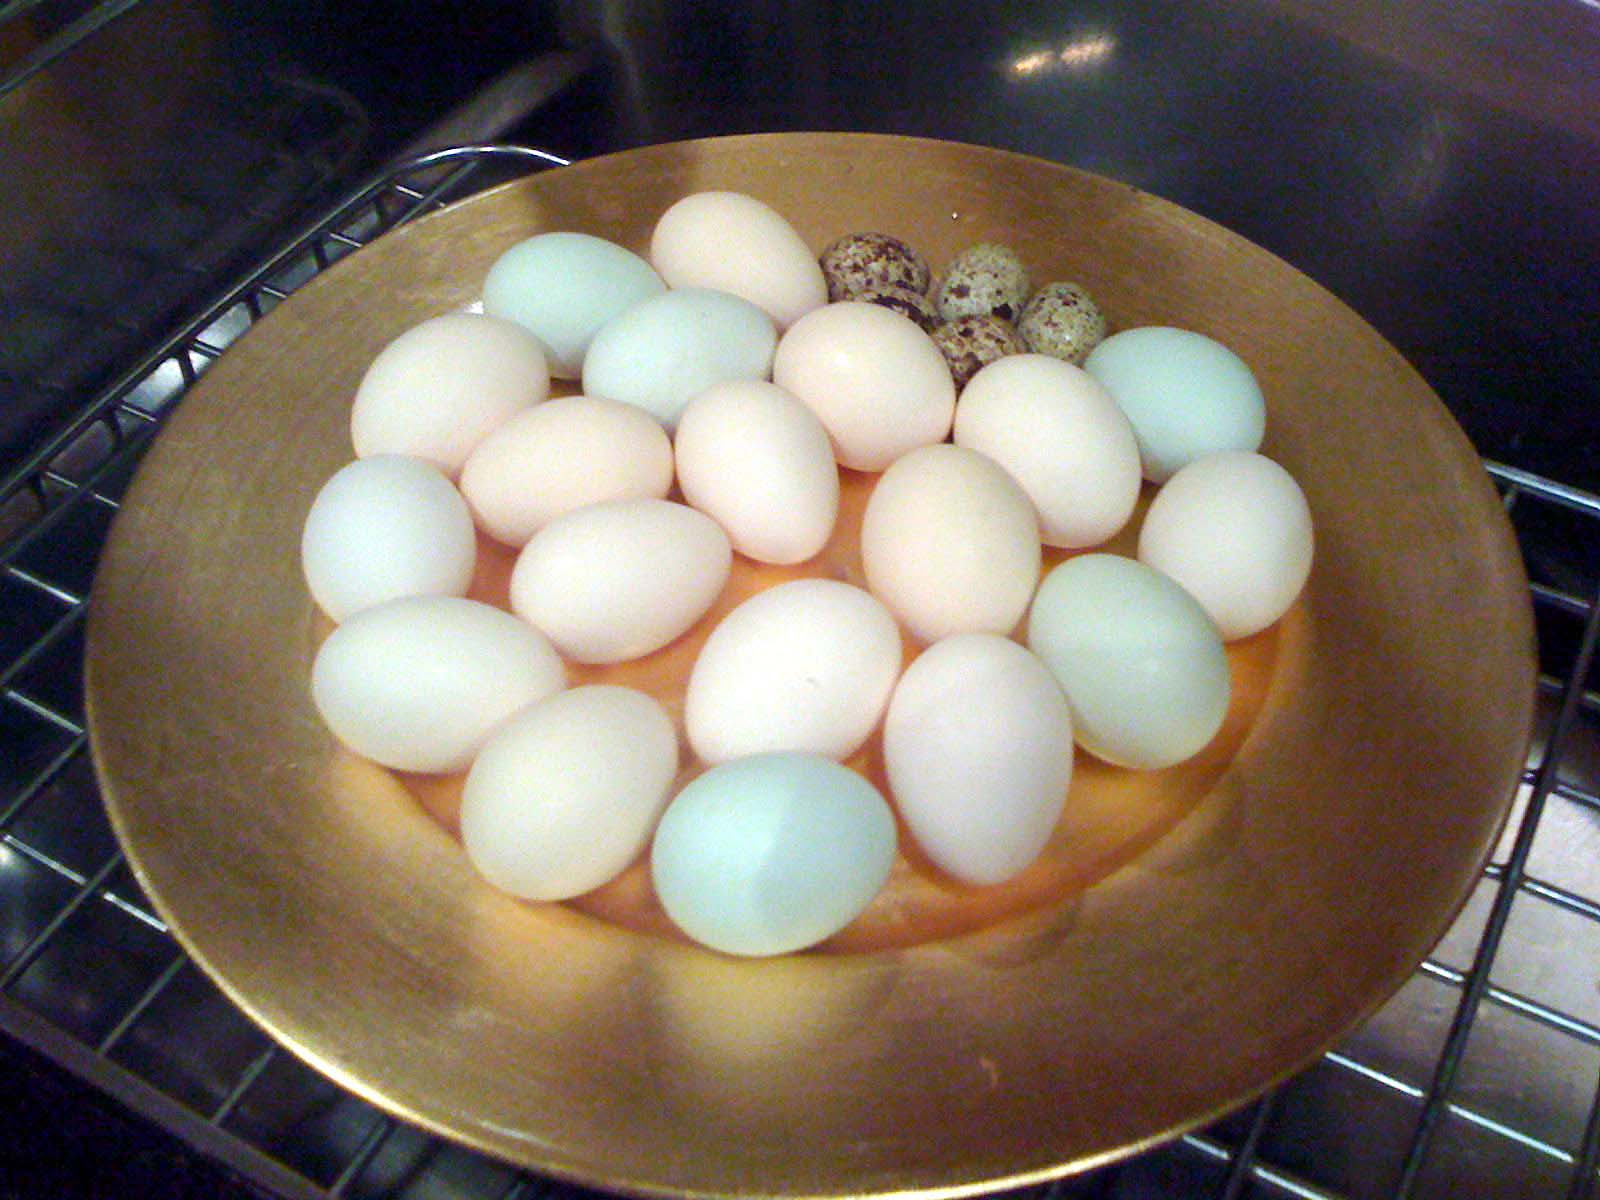
Omelets can be tricky. Some folks love them. My husband is one of them. I personally could live without them. Using only egg whites is a great way of getting the protein without the fat – lower in calories and almost as good.EggsfromLittleFarmChicks&Quail

Ingredients:

Eggs ( one per person unless you have a hungry bunch in which case two per person!)

Or

Egg whites only ( 4 per person)

A little milk

Salt and pepper to taste

Butter for the pan

Description:

Whisk the eggs/egg whites with the salt and pepper and a little milk while the butter is warming in the pan. If you are adding vegetables add them now and sauté until soft. If  not just add the eggs to the hot pan, scramble a bit then lower the heat.

Getting the omelet to cook through without over cooking the skin is a challenge. You can lift the edges of the omelet as it cooks to let the uncooked egg flow under the omelet and onto the pan surface. You can put a lid on top to trap heat coming from the hot pan. But for some omelets, that isn’t enough.

A surer method is start scrambling the eggs when they hit the hot pan, stopping when the eggs are partially cooked. Then pat the eggs into a smooth layer and let them finish cooking without a lid. It works. It’s quick and easy.

Instead of folding the omelet in the pan, simply tip the pan and let the omelet slide onto a plate. As the omelet slips onto the plate, twist of the wrist, and fold the omelet onto itself on the plate. (It’s easy to do; in two or three tries, you’ll have the method mastered.)

Yes, I did drop a few on the floor and our dog Sunny LOVES omelets. But I got the hang of it after a few failures.

You could also place a plate over the pan for just a couple minutes once you stop scrambling and then remove the plate before the omelet was cooked. That accelerated the cooking a little and gives you a warm plate on which to serve the omelet  – and it took about 5 minutes from start to finish!

Of course you can add sugar – or jam ( try some homemade like we do) and add it just before you serve/flip that fold of omelet over when serving.

Or you could sauté some vegetables in a little butter before putting the eggs in – then scramble etc as above. Literally anything will do – broccoli, onions, peas, peppers, tomatoes, chopped kale, Brussels sprouts, potatoes that have been boiled and chopped etc.

Try it out! Use organic eggs. We use our own from our chickens and quails.  YUM!Free Range Chickens

Share
Posted in Blog, Poultry, Recipes to Make with Children, Starters, Vegetables, Vegetarian Mains | Tagged , , , , , | Leave a comment

Make a strawberry dessert – then change it up – change the types of berries, types of cake, types of toppings – cooking with kids makes this FUN!

Share

Strawberry Desserts in Four Parts

There are four parts to our strawberry desserts:

  • The berries
  • The cake
  • The sweetener
  • The topping

You can make desserts with raspberries, peaches and mangoes too but lets just stick with the strawberries for this posting. I use low fat BISQUICK or you could go to THE PREPARED PANTRY my affiliate partner and buy their various cake mixes – angel food, or orange or many others. http://www.preparedpantry.com/Recipe-Angel-Food-Cake.html http://www.preparedpantry.com/OrangeAngelFoodCake.html Then you can add a variety of toppings – of course whipped cream without another thing, but what about Buttermilk Syrup added to the creamy topping? http://www.preparedpantry.com/old-fashioned-buttermilk-pancake-syrup-mix.aspx Chopped nuts and candies sprinkled over the dessert are great.  I particularly like chopped salted snack nuts sprinkled over the whipped cream.  I love the contrasts, the salty and the sweet, the smooth and the crunchy of salted nuts with whipped cream.

  • Chopped nuts.
  • Lemon candy and white chocolate decorations
  • Strawberry candy and white chocolate decorations.

And of course cooking with kids is so much fun when they can do all the ‘adding’ and tasting too! ENJOY! Here is our four year old little Jonah – painting – the things he likes most are: 1. Bessert ( ie Dessert) 2. Eating Bessert 3,Making Bessert and 4. Painting or coloring or drawing

Bless him – I kinda agree don’t you?Jonah painting May 2012

Share
Posted in Blog, Desserts, Family, Recipes, Recipes to Make with Children | Tagged , , , , , | Leave a comment

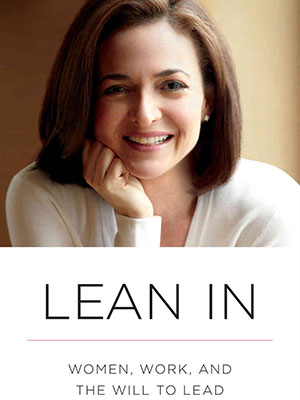
Sheryl Sandberg and Lean In – my Opinion piece in The Huffington Post on the topic – what do YOU think?

Share

Sheryl Sandberg from Facebook has been much in the public eye – and has written a very well created book called LEAN IN. Its a good concept – well researched and presented. And I have some feelings about it – since I think there is a whole group of women she has sheryl-sandberg-book-covercompletely missed in her analysis. Take a look at this article I wrote for The Huffington Post and let me know what you think?

http://www.huffingtonpost.com/larraine-segil/lean-in-small-business_b_3148866.html

Share
Posted in Blog, Philanthropy, Women's Topics | Tagged , , , | Leave a comment

Mini Cinnamon Buns -so delicious – the easy way! Cooking with kids and tasting too!

Share

How to Make Frosted Spudnut Cinnamon Bun Cupcakes – Cinnamon Roll Cupcakes

Do you start salivating when you walk through an airport and smell those Cinnabon desserts baking? It makes my mouth water and I have to apply great self control to just walk on by! Well now you can make those delicious desserts at home, where you do not have to pass them by and can bank some calories for a week or so beforehand – so that you can indulge!

It is not that difficult. Again I turn to Prepared Pantry to help me out the short and easy way. They have something called a  Spudnut mix. And it is incredibly easy  to make cinnamon bun cupcakes when using that mix – they come out fluffy and with terrific flavor as opposed to the ones I tried to make from scratch which come out doughy and hard.

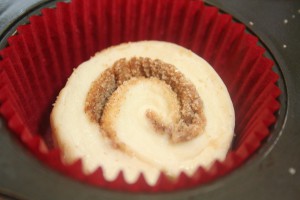
The concept is simple:  Make mini cinnamon buns and bake them in cupcake liners in a muffin pan.  They’re cute and they’re a more modest size, just right for most of us. Remember all those calories you have banked? You could even have two!

Mini Cinnamon BunsHere’s how to make them.  If you are using a bread or roll recipe, you may need to adjust the quantities in these directions.

Step 1:  Mix the dough and let it rise.

Mix the dough according to package instructions.  If you are using Prepared Pantry’s Spudnut Cinnamon Bun Mix, be precise in your water measurement.  Your dough should be soft and almost sticky.  The softer your dough, the lighter your buns will be.

Put your dough in a lightly greased bowl, cover it, and let it rise.  We stick the bowl in plastic proofing bags but you can cover your bowl with greased plastic wrap.  Because the dough is soft, it will stick to ungreased surfaces.

Let the dough rise until it is puffy.  The tendency is to be in too big of a hurry.   How long will depend on how warm your kitchen is.  Yeast is very sensitive to temperature.  In a cooler kitchen it may take an hour and a half or more.  If you want it to rise faster, put it in a warmer place like a sunny window sill or on top of the refrigerator.

Step 2:  Form the buns.Pic forming the buns

To form the buns, you want the dough rolled as thinly as possible and into a narrow strip.

Dust the countertop lightly with flour.  We use a flour and sugar shaker to get an nice, light coating of flour.

Form a long log with the dough about an inch and one-half inches in diameter.  With a rolling pin, begin rolling the dough lengthwise.  If you are using our mix, it will have a lot of gluten and therefore springback—the dough will try to bounce back rather than stay rolled and thin.  Be a little patient.  You may need to press firmly and roll it for several minutes.  It helps to let the dough rest for several minutes and then come back and put the finishing touch on your strip of dough.

Your rolled strip of dough should be about nine inches wide by 32 inches long.

Soften 1/3 cup of butter in the microwave but don’t melt it.  It should be just soft enough to spread.  Spread the butter evenly across the dough strip to 1/4 inch of the edges.

Take the cinnamon sugar packet from the mix and sprinkle the cinnamon sugar evenly across the butter.  If you are not using our mix, stir cinnamon into 1/2 cup of sugar.  Be sure to use a very good cassia cinnamon; the cinnamon will carry much of the flavor of the buns.  You can use as much cinnamon as you want.  If you are using a good cinnamon, you can use as much as two tablespoons.

Starting on the long edge closest to you, start rolling the dough pinwheel style into a log with the cinnamon trapped inside.  As you complete the log, pinch the edges to the log to seal in the filling.  Pinch the ends of the log to seal them.  Form the log with your hands, stretching it or compressing it in places, to make in roughly uniform in diameter and 32 inches long.

Fill a muffin pan with paper liners.  You will make 32 buns.  You may wish to spray the insides of the liners with a baking spray so that the cooled buns do not stick to them.

Cut the 32-inch log into four equal pieces and slice each of the four pieces into eight pieces so that you have 32 cinnamon buns.  As you slice them, place them in the paper liners.  Don’t worry about the slices being too neat.

Cover and let the buns rise.  Again this is easier with a proofing bag so that you can tent the covering over the rolls.  Let the dough rise until it is very soft.  An hour is not too long in most kitchens.

Preheat the oven to 350 degrees.  Bake the rolls for twelve minutes if you are using a dark muffin pan.  Lighter pans will take longer.  We have found that if we bake them longer, the buns tend to be crusty.  Less and they’re a little gooey.  But every oven is different.

When the buns are done, remove the buns in the liners to a cooling rack.  Spoon frosting over them, partially covering the tops.mini buns in cupcake holders and muffin tins

If you are using Prepared Pantry’s mix, you will find a frosting recipe.  Prepared Pantry’s premade cinnamon bun frosting is perfect.  You can use a recipe for a powdered sugar or cream cheese icing.

Serve these fresh.  They are best when warm.

Suggestions for extra rolls

Most of us don’t have the three muffins pans necessary to bake all thirty plus rolls at once.  Put the first dozen in your pan and the rest of the mini bun dough pieces in paper liners lined up on a baking sheet.  Cover and bake the buns in batches fifteen minutes apart as you free up your muffin pan.

If you don’t want to bake all the buns the same day, cover the pan with a proofing bag and place it in the refrigerator before letting the buns rise.  As the dough becomes cooler, the yeast will become dormant and the dough will quit rising.  You can store your unbaked rolls for up to four days this way.

To bake, remove the chilled buns in the pan from the refrigerator, let the dough warm to room temperature, and allow the buns to rise.  This may take several hours.

As another way to store them, baked but unfrosted buns can be wrapped and frozen.  To serve, let them thaw and reheat them in an oven set at 250 degrees.  Then add the frosting to the warm rolls.

What you’ll need

Try the Prepared Pantry’s Spudnut Cinnamon Bun Mix.  Your favorite recipe will work but this mix is delightful.

Try these cinnamon bun mixes and make these cute buns the easy way » and here is the short cut for all those working parents who don’t have time to mess around making frosting.

The cinnamon bun premade frosting is the perfect complement, designed for cinnamon buns.  It comes with in a tub with snap on lids so that you can use the frosting for multiple batches.

Get the cinnamon bun frosting here.Pic 2

Share
Posted in Blog, Desserts | Tagged , , , , , | Leave a comment

Chocolate Cake without frosting? Yes it’s a great dessert!

Share

Chocolate cake…..yum! The best part is the frosting right? But what happens if you ran out of frosting and don’t have time to make it from scratch? Happened to me – and below are just a few creative ways to make up for no frosting. And so I turn to my favorite affiliate supplier, The Prepared Pantry who provide all the mixes and more ( as well as my bread mixes for my bread machine).

No matter what all the recipes say – it is not necessary to frost a cake. Chocolate Cake without Frosting pic 1 It’s quicker and easier to top it.  And often better.  Whether you’re making a sheet cake or a round cake, something as simple as a scoop of ice cream or maybe whipped cream and a sauce can transform it into a terrific, fancy dessert.
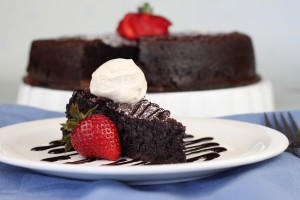
The pictures in this article are of flourless chocolate cakes—they’re dense and moist and luscious—but you can do the same with your favorite cake recipe.

Most of our cakes mixes are denser (they have pudding in the mix) than the light cakes in the store and so lend themselves well to this treatment.

You can also serve brownies this way.  New York style brownies are a little more cake-like, easier to cut cleanly, and lend themselves well to dessert treatment.

Choose your dessert here!

  • Legendary Flourless Chocolate Cake Mix
  • New York Brownies
  • Other moist, fudgy cake mixes

A Choice of Toppings

We suggest three choices—or a combination thereof: ice cream, whipped cream, and dessert sauces.  To these, you can add fruit or nuts—or even get a little crazy with things like peanut butter. Just use your imagination.

Your grocer’s ice cream freezer has a dozen good choices. You can make your own sauces—and we share some recipes in this article—but we sell a very nice selection of professional dessert sauces.  You can use ice cream toppings.  You can use fruit or cream pancake syrups.

But where it starts getting really wild is when you start making flavored whipped cream. The basic flavored whipped cream substitutes another flavor or extract for vanilla and usually brown sugar for the white sugar.  From there you can add cinnamon or ginger—maybe some pumpkin pie spice.  We often add an ounce of cream cheese for every cup of cream.  It adds flavor and stabilizes the whipped cream.  You can add nuts or peanut butter.  Click here to see whipped cream recipes.

Use the recipes below as templates to get your creative juices flowing.  Here are additional recipe ideas to try:

Chubby Cherry Cream Cheesecake Flourless Chocolate Cake:  Top the cake with cream cheese filling and then with Chubby Cherry Topping.  Add cherry cream cheese whipped cream.

Cherry Pineapple Cream Cheese Flourless Chocolate Cake.  Cream cheese filling and pineapple filling is a wonderful combination. Top your cake with cream cheese filling and then pineapple filling.  For color and flavor, chop maraschino cherries and sprinkle them over the top.

Turtle Flourless Chocolate Cake.  Cover the top of your cake with caramel ice cream sauce.  If it’s too thick, heat it just a bit in the microwave.  Sprinkle with pecans and drizzle with chocolate ganache.   Add a scoop of ice cream.

Rocky Road Flourless Chocolate Cake.  When the cake comes out of the oven, immediately sprinkle it with miniature marshmallows.  They should partially melt.  If they don’t put the cake bake in the oven for a couple minutes.  Remove the cake and drizzle with chocolate ice cream sauce or ganache and sprinkle with chopped nuts.


Flourless German Chocolate Cake

Everyone loves German chocolate cake.  This is a simple version made with a flourless chocolate cake.
One flourless chocolate cake, cooled
German chocolate cake topping (recipe follows)
whipped cream or ice cream
Top the chocolate cake with the German chocolate cake topping.  Cut into slices and serve with caramel whipped cream or ice cream.  Top with chocolate ice cream sauce.

German Chocolate Cake Topping 
3/4 cup canned evaporated milk
1/2 cup brown sugar
1/2 cup butter
1 1/3 cups sweetened shredded coconut
1 cup chopped pecans

In a small pan, bring the evaporated milk, brown sugar, and butter to a boil. Boil for three minutes. Remove the pan from the heat. Stir in the coconut and pecans. Set aside to cool to room temperature.

Strawberries and Cream Flourless Chocolate CakePic 4


This is a wonderful flourless chocolate cake to serve in the spring when the strawberries are in season. It is topped with Bavarian cream and fresh strawberries, then drizzled with strawberry sauce, and topped with strawberry cream cheese whipped cream.

One flourless chocolate cake, cooled
1 cups Bavarian cream pastry filling
fresh strawberries, sliced
strawberry sauce (recipe follows)
strawberry cream cheese whipped cream
Top the chocolate cake with Bavarian cream filling.
To serve, cut the cake into slices and place on dessert plates. Top each slice with strawberries. Drizzle with the strawberry sauce. Top with the whipped cream and serve immediately.

Strawberry Sauce
12 ounces, about 3 cups frozen, unsweetened strawberries
2/3 cup red currant jelly
about 1/4 cup sugar

  1. Thaw and puree the strawberries. Place the puree in a small saucepan. Add the jelly.
  2. Cook, stirring occasionally, until the jelly is completely melted and blended with the fruit. Sweeten to taste with the sugar while it is still hot. Stir to make sure that the sugar is dissolved. Let cool.

Strawberry Cream Cheese Whipped Cream
2 cups whipping cream
1 teaspoon strawberry flavor
2 ounces cream cheese, softened
1/3 cup granulated sugar
With an electric mixer, whip the sugar and cream cheese together.  Add the flavor and whipping cream and continue whipping until soft peaks form.
You can add pink food coloring to this recipe if you choose. 

Tin Roof Sundae Flourless Chocolate Cake

This is another fancy flourless chocolate cake fit for a special occasion.  It is made with a combination of Bavarian cream, peanut butter, and chopped peanuts all atop a flourless chocolate cake.Pic 5
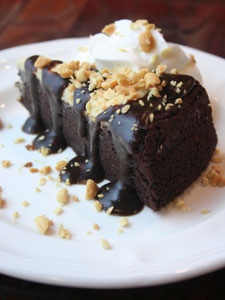
One flourless chocolate cake, cooled
1/4 cup creamy peanut butter
1 cup Bavarian cream pastry filling
peanut butter chocolate sauce (recipe follows)
whipped cream

Warm the peanut butter in the microwave until it is soft and easy to stir.  Mix the Bavarian cream and peanut butter together in small bowl. Top the chocolate cake with the peanut butter filling.
To serve, cut the cake into slices and place on dessert plates. Drizzle with the peanut butter chocolate sauce. Top with whipped cream and serve immediately.

Peanut Butter Chocolate Sauce
3/4 cup heavy cream
9 ounces dark chocolate wafers
1/3 cup peanut butter

Bring the cream to a boil. In a medium bowl, pour the hot cream over the chocolate. Stir until the chocolate is melted. Stir in the peanut butter. Let the sauce cool enough for serving.  If the sauce becomes too thick, reheat the sauce or stir in more cream.

Chocolate Cherry Cordial Flourless Chocolate CakePic 6

This makes a gorgeous, very fancy flourless chocolate cake—certainly fit for a special occasion and yet it is not very much work.  It is an easy flourless cake topped with a cherry pastry filling and drizzled with a chocolate amaretto sauce. (Amaretto is a flavor commonly used in cherry chocolate cordials.)

One flourless chocolate cake, cooled
1 cup cherry pastry filling (see notes)
powdered sugar for dusting
chocolate amaretto sauce (recipe follows)
whipped cream

Top the chocolate cake with the cherry pastry filling.  To serve, cut the cake into slices and place on dessert plates.  Dust each slice with powdered sugar.  Drizzle with the chocolate amaretto sauce.  Top with whipped cream and serve immediately.

Baker’s note:  Pastry filling is more intensely flavored and a finer texture than is pie filling.  In a pie, there is more filling than crust and the filling must be pleasing by itself.  In a pastry, there is more of balance between filling and pastry and hence the filling has more flavor. 

Chocolate Amaretto Sauce

3/4 cup heavy cream
9 ounces dark chocolate wafers
1 teaspoon amaretto flavor
3 tablespoons butter

Bring the cream to a boil. In a medium bowl, pour the hot cream over the chocolate. Stir until the chocolate is melted. Stir in the flavor and butter. Let the sauce cool enough for serving.  If the sauce becomes too thick, reheat the sauce or stir in more cream.

Raspberry Flourless Chocolate CakePic 2

This cake will please a crowd. We topped this cake with a delicious raspberry sauce, fresh raspberries, and ice cream. Raspberries alone are not tart and not flavored enough for a dessert sauce even when thickened with a starch.  There are two possible solutions:  Cooking the fruit down to concentrate the flavors or adding a jelly for thickness and flavor.  This recipe uses the latter.

One flourless chocolate cake
12 ounces, about 3 cups frozen, unsweetened raspberries
2/3 cup red currant jelly
about 1/4 cup sugar

  1. Thaw and puree the raspberries.  Strain them twice through a sieve/strainer or until nearly all of the seeds are removed.  Place the puree in a small saucepan.  Add the jelly.
  2. Cook, stirring occasionally, until the jelly is completely melted and blended with the fruit.  Sweeten to taste with the sugar while it is still hot.  Stir to make sure that the sugar is dissolved.  Let cool.
  3. Drizzle on the flourless cake and garnish with fresh raspberries.

Yield: About 1 1/3 cups of raspberry sauce.

ENJOY!

Share
Posted in Blog, Desserts | Tagged , , , , , | Leave a comment

Stuffed pancakes? SOOO easy and quick – I use Bisquik low fat – and make it with my grandkids – cooking with kids is SUCH fun!

Share

Step by Step:  How to Make Stuffed Pancakes


  1. Prepare the pancake batter from your favorite recipe or mix. It works best if the batter is a little thin.
  2. Preheat a skillet or griddle by melting a little butter over medium heat.  To assure that your pancakes cook all the way through, you’ll want the heat a little lower than for other pancakes.
  3. Pour an evenly round circle of pancake batter on the skillet.
  4. Let it cook until little bubbles form, then pop, and the indentations stay on the batter.
  5. Spoon a small amount of pastry filling  or jam on half of the pancake, making sure not to get too close to the edges and not to overfill it. A little goes a long way and it will press and spread as you fold over the pancake.
  6. Fold the uncooked pancake over the filling. The edge of raw batter on the top half should touch the raw batter edge on the other when folded.  It will continue to cook and seal itself on the griddle.
  7. Put on a lid over the pancake to help it cook through. Flip as needed to keep the browning even.  Let it cook until all the batter looks cooked through.
  8. To serve, dust the pancake with powdered sugar, pour on a little fruit pancake syrup, and top them with whipped cream.

Could that be any easier? And the kids can mix the batter and sample the first one!

Share
Posted in Blog, Desserts, Family, Raising Children, Recipes, Recipes to Make with Children | Tagged , , , , , , , | Leave a comment

Vanderbilt University Hospital for Children and the YWCA of Nashville – thanks Sam, the Broken Robot for his books and songs! THANK YOU SAM!

Share

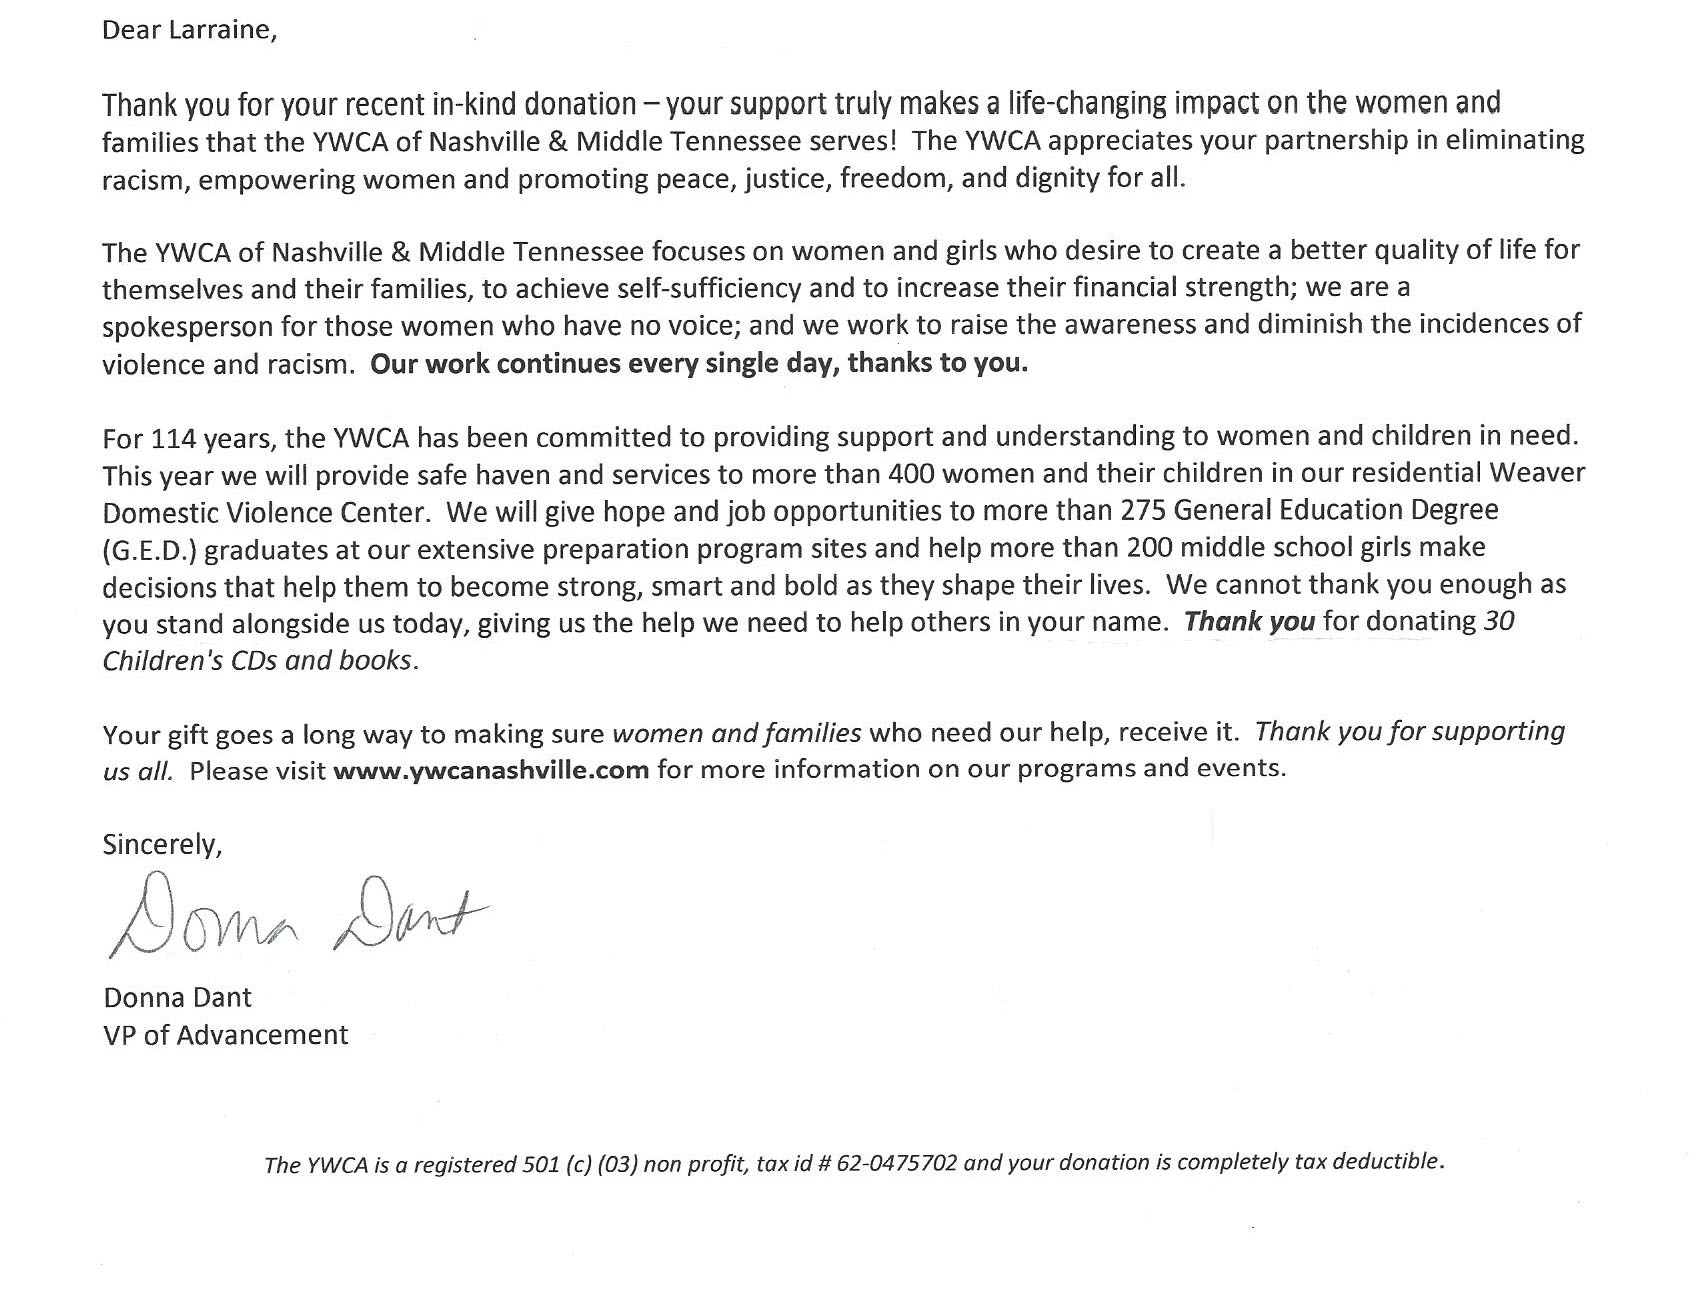
I was touched and thrilled to receive two wonderful letters of thanks today from two worthy institutions in Nashville TN where I recently gave a speech – and also donated a bunch of Sam The Broken Robot’s books and Song CD’s. Here they are. It makes us all so happy here at The Little Farm and RockinGrandmaMusic that children all over the place are enjoying Sam’s special words and music.  Here Sam and I are after doing a performance at the Zimmer Children’s Museum in Los Angeles.RockinGrandmaMusic and Sam ZimmerVanderbilt Childrens HOspital Letter of Thanks Cropped And then another lovely letter this time from the YWCA of Nashville.

Thank you all!

SAM SAYS BRING A SMILE TO SOMEONE’S HEART EVERY SINGLE DAY!YWCA Nashville letter of thanks Cropped


Share
Posted in Philanthropy, Raising Children | Tagged , , , , , , | Leave a comment

Red Cabbage – two great recipes for cooking with kids – cabbage with feta and cabbage with raisins

Share

We grow wonderful red cabbages in our Little Farm. Lots of them. And they are HUGE! So I am challenged in coming up with new recipes ( or adapting old ones) for using them. Here are two recipes that I have used that have been rather successful! We have made them a couple of times! Enjoy – and great for cooking with kids.

246

Starter Cabbage Salad with Feta

Ingredients:
1 large red cabbage

1/4 cup of Olive oil

1/4 cup of Rice Vinegar

1/4 cup of Soy Sauce

1/4 cup of Feta Cheese in small pieces (we make our own from our goats milk – if you want some let me know !)

1/4 cup of toasted almonds ( fry the almonds in 1 Tbsp of butter until browned)

Salt and Pepper to taste ( go light on the salt – the soy sauce has enough in it)

Directions:

Chop the cabbage into bite sized pieces.

Heat a pot and add the olive oil

Fry the cabbage lightly then add the soy sauce and toss

Remove from the heat and add the rice vinegar. Toss some more.

Add the feta and almonds and serve – a great starter salad or even a main course for lunch.

Cabbage Salad with Raisins

Here is a second recipe – also easy and fast – and healthy too.

Ingredients:
1 red cabbage chopped into bite sized pieces

1 cup of golden raisins

1/4 cup of olive oil

1/4 cup of rice vinegar

2 cups of seasoned croutons

Salt and pepper to taste

Directions:

Mix the chopped cabbage with all the ingredients and let sit in the fridge for a day so it all combines and macerates well. Easy eh? A great salad to serve with the Tilapia recipe that was a few blogs ago. Enjoy!

Share
Posted in Blog, Cheese, Recipes, Recipes to Make with Children, Salad, Vegetables, Vegetarian Mains | Tagged , , , , , | Leave a comment

Tilapia – a light healthy low cal fish – cooking with kids – serve it as a taco and they will love it!

Share

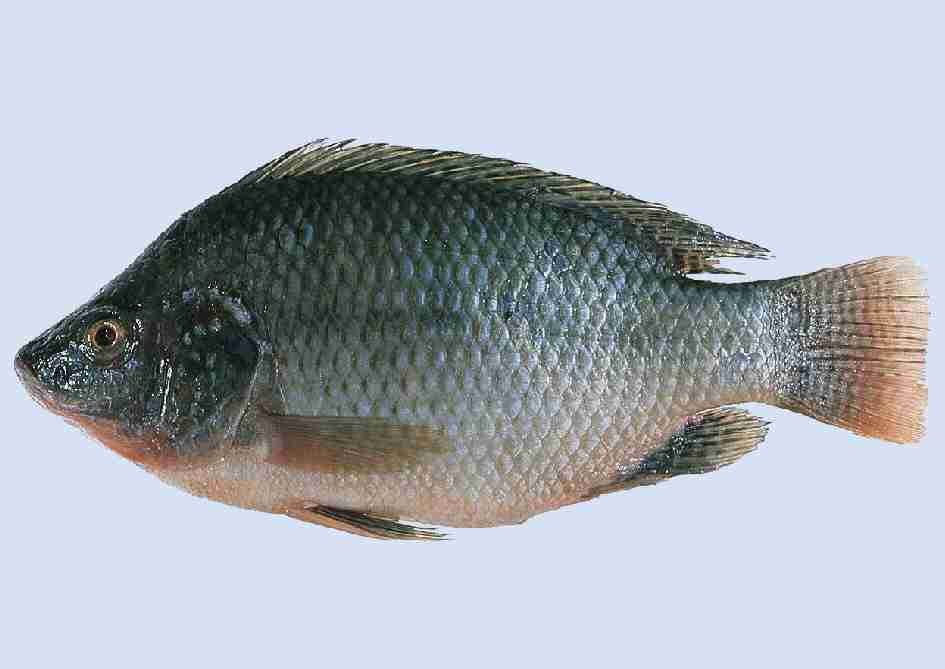
We raise our own Tilapia. Here they are! TilapiaSo we can actually ‘go fishing’ in our own little farm – we keep the Tilapia in a tank in a hatchery since they like warm water – about 85 degrees and so cannot be left outdoors during the winter months.

This recipe is pretty simple – a little fussy in the beginning ( I adapted it from MY RECIPES) but well worth it.

Tilapia Tacos

Ingredients

  • 1 tablespoon cumin seeds
  • 3/4 teaspoon salt, divided
  • 1/2 teaspoon paprika
  • 1/4 teaspoon freshly ground      black pepper
  • 2 garlic cloves, minced
  • 1 pound tilapia fillets
  • 1 tablespoon canola oil
  • 1 cup sliced peeled avocado
  • 2/3 cup finely chopped peeled  ripe mango
  • 1/4 cup chopped green onions
  • 1/4 cup finely chopped red onion
  • 2 tablespoons finely chopped fresh cilantro
  • 1 tablespoon fresh lime juice
  • 8 (6-inch) corn tortillas

Directions:

1. Heat a large skillet over medium heat. Add cumin seeds; cook 2 minutes or until toasted, shaking pan frequently. Place cumin, 1/2 teaspoon salt, paprika, and black pepper in a spice grinder; process until finely ground. Combine cumin mixture and garlic; rub over fish. Return the skillet to medium-high heat. Add oil to pan; swirl to coat. Add fish; cook 2 minutes on each side or until done. Remove from heat; keep warm.

2. Combine the remaining 1/4 teaspoon salt, avocado, and next 5 ingredients

3. Heat tortillas according to package instructions. Break fish into pieces; divide evenly among tortillas. Top each tortilla with 2 tablespoons salsa. Fold tortillas in half; serve immediately


Share
Posted in Blog, Family, Fish, Little farm products, Recipes, Recipes to Make with Children | Tagged , , , , , , , , | Leave a comment

A new way with Chicken – throw in some strawberries and arugula – and YUM a great salad for lunch or dinner

Share

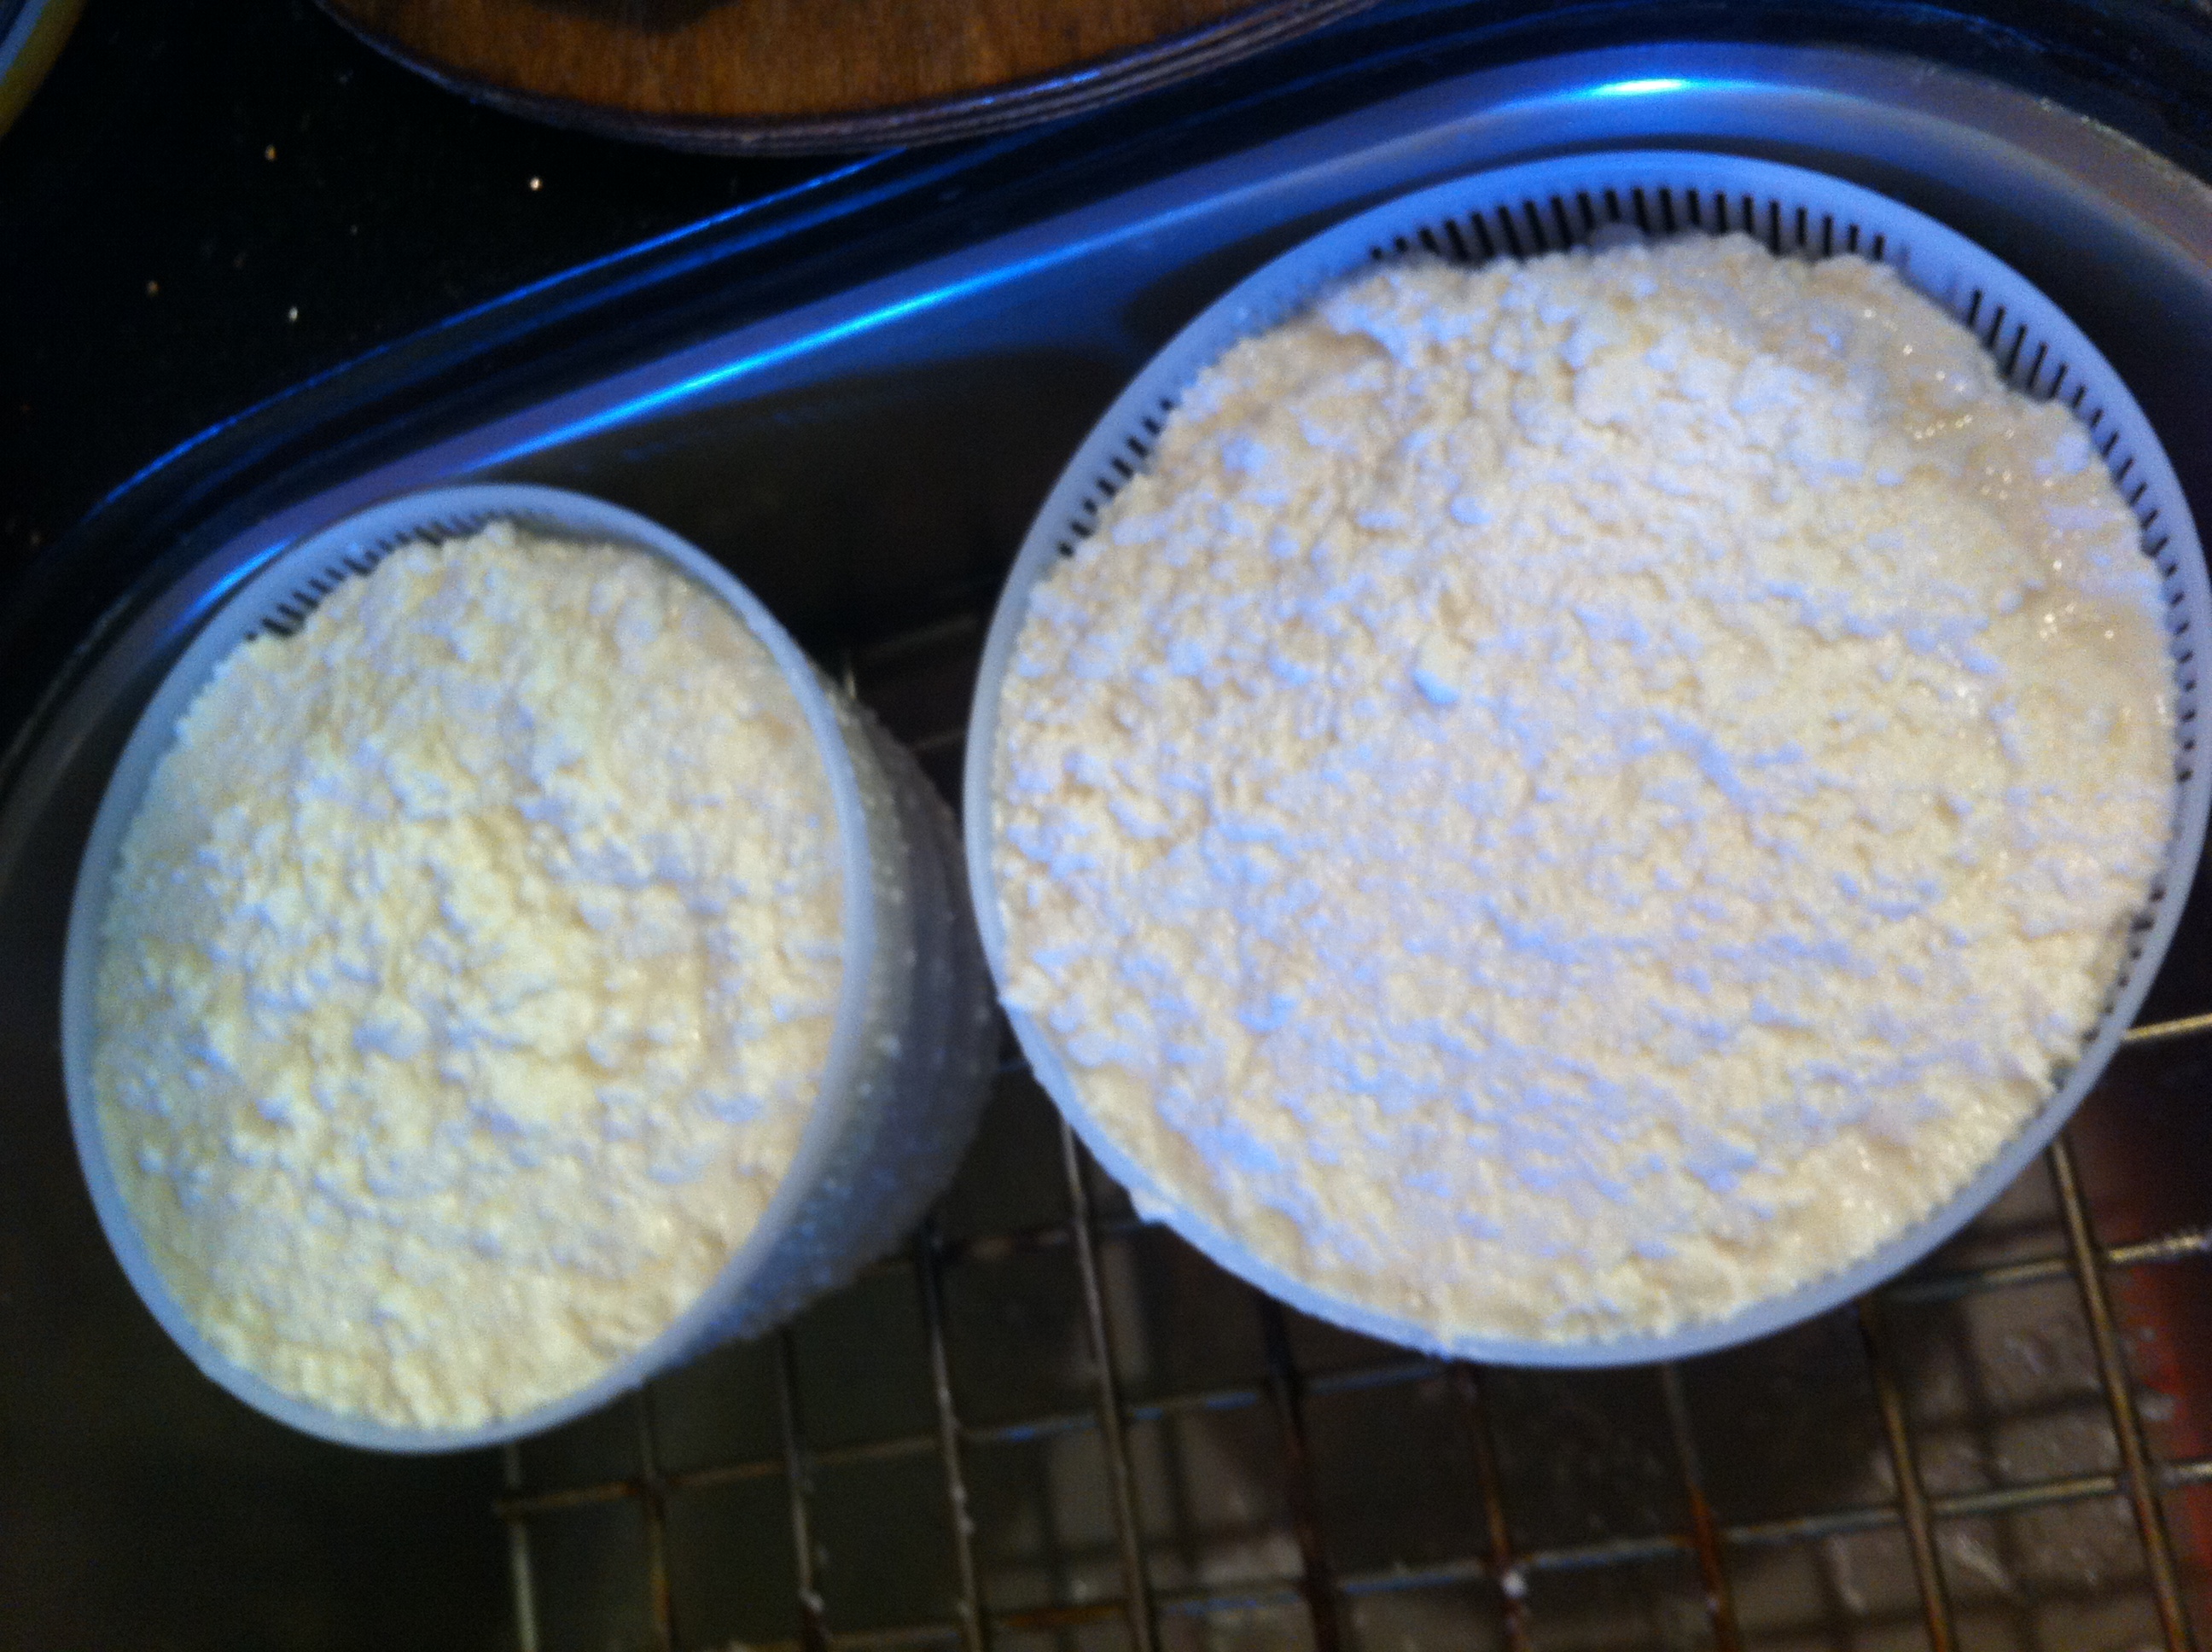
I adapted this recipe from COOKING LIGHT – my favorite magazine – to accommodate those who do not like eating cheese and chicken together. And my grandkids will eat this – but tend to eat the strawberries first, then the chicken then the cheese – and no lettuce – oh well – I do not care what order they eat it in, just that they get all the food groups! Below is some of the Queso Blanco that I make from our goats milk – delicious!Queso Blanco

Chicken Strawberry Salad

Ingredients

Dressing:

  • 1 tablespoon sugar
  • 2 tablespoons red wine vinegar
  • 1 tablespoon water
  • 2 tablespoons extra-virgin olive oil
  • Salt and pepper to taste

Salad:

  • 4 cups any kind of lettuce – Boston, Romaine
  • 4 cups arugula
  • 2 cups quartered strawberries
  • 1/3 cup vertically sliced red onion
  • 12 ounces skinless, boneless rotisserie chicken breast, sliced
  • 2 tablespoons almonds which you have salted and browned in one tablespoon of butter ( if you are adding cheese you should not salt the almonds – if no cheese – the salt adds tang)
  • 1/2 cup (2 ounces) crumbled blue cheese ( optional – some folks do not like eating cheese with chicken – so omit this if you are one of those!)

Preparation

1. To prepare dressing, combine first 3 ingredients in a small bowl. Gradually drizzle in oil, stirring constantly with a whisk.

2. To prepare salad, combine lettuce and next 4 ingredients (through chicken) in a bowl; toss gently. Place about 2 cups chicken mixture on each of 4 plates. Top each serving with 1 1/2 teaspoons almonds and 2 tablespoons cheese if you are using cheese. Drizzle about 4 teaspoons dressing over each serving.

Share
Posted in Blog, Cheese, Family, Little farm products, Poultry, Recipes, Recipes to Make with Children | Tagged , , , , , | Leave a comment

Strawberry Shortcakes with Whipped Cream PLUS! Easy when cooking with kids

Share

How to Make Rich Shortcakes from a Biscuit Mix

3 cups Biscuit mix( you can buy this from Prepared Pantry or use  Bisquick Low Fat Mix)

2 large eggs

milk

1/3 cup sugar

  1. Measure the mix into a medium bowl.
  2. Add the eggs to a 2-cup measuring cup.  Add enough milk to make just over 3/4 cup of liquid.
  3. Add the sugar and whisk the liquids and sugar together.
  4. Make the biscuits per package directions.

With the extra sugar, the biscuits will brown a little quicker.  Turn the temperature down 25 degrees and watch the time.  They’ll usually come out a minute or two earlier than what the package says even with the temperature down.

To assemble your strawberry shortcakes, slice the strawberries into thin slices using a strawberry slicer and toss them with a little sugar.  Sprinkle just a little sugar over the prepared strawberries five minutes before serving.  If you put the sugar on to early, the sugar will draw the juices from the berries and make them soupy.

Split the shortcake open with a fork and add the sweetened strawberries.  Top with flavored whipped cream.

What You’ll Need


Choose a flavor for your whipped cream.

Don’t settle for vanilla whipped cream when it’s so easy to make flavored whipped cream.  Often it’s as simple as using another flavor.  Sometimes you’ll want to sweeten your whipped cream with brown sugar instead of granulated sugar.  If you are making lemon or orange whipped cream, add a little zest.  The zest adds flavor and the colored flecks are pretty. In most cases, we add a stabilizer to keep the whipped cream from melting as quickly.  Either meringue powder or cream cheese will work.  Add one or two tablespoons of meringue powder per batch. If you use cream cheese, beat the sugar and cream cheese together before adding the cream.  Two ounces of cream cheese will do.  Here are some sample recipes to get you started.

Butterscotch Whipped Cream

2 cups whipping cream

1/2 cup brown sugar

1 teaspoon butterscotch flavor

Whip the cream to soft peaks.  Add the sugar and flavor and continue whipping.

Lemon Cloud Whipped Cream

2 cups whipping cream

1/2 cup granulated sugar

2 teaspoons lemon flavor

1 teaspoon lemon zest

Whip the cream to soft peaks.  Add the sugar, flavor, and zest and continue whipping.

Caramel Whipped Cream

2 cups whipping cream

1/2 cup brown sugar

1 teaspoon caramel flavor

Whip the cream to soft peaks.  Add the sugar and flavor and continue whipping.

Chocolate Whipped Cream

This makes a very nice whipped cream.  With this much dairy against the chocolate, it is very much like a milk chocolate. The cream cheese makes the whipped cream hold its shape longer.

2 ounces cream cheese softened

1/2 cup sugar

1/2 teaspoon Madagascar vanilla

2 cups heavy whipping cream

3 tablespoons Ramstadt Breda Rich Dark Cocoa

Beat the cream cheese and sugar together to break down the cream cheese, soften it, and avoid lumps.  Then add the remaining ingredients and continue beating.

ALL of these recipes are so simple that children can add the ingredients, do the whipping, use the strawberry slicer and so on. WE LOVE doing this as a family! Here are our twins after a baking morning!Noah and Gabe having breakfast Dec 29 2012 Cropped_edited-1

Share
Posted in Blog, Desserts, Family, Recipes to Make with Children | Tagged , , , , , , , | Leave a comment

Cooking with Kids – and playing with babies – the joys of being a grandma!

Share

I truly believe that the happiest time of my life is right now! There again, I have been blessed to believe that many times in my life- except when I was writing exams – which seemed to have lasted for decades – I guess with 4 degrees 3 of which are post graduate, it did last for decades! Even my work life did not seem as important as the time I now spend with my grandchildren. I watch them change and grow every day – and I can contribute mightily to that process. What a great joy! The twins Noah and Gabriel are now walking. WOW! It’s true that having children while young is important – the energy that it takes to keep up with them, while watching that the four and five year olds don’t get themselves into trouble – its a job for more than one grandma! Fortunately Noah and Gabe love their rolly cars – so I spend a fair amount of time running up and down the street with them in their cars -here I am one recent Sunday-  aren’t they adorable?Noah Gabe Larraine Rolling babies 2013 March

And a few months ago – they change fast!

Noah and Gab jan 2013

Fortunately all four grandkids love my music and so we play a lot of the CD about Sam, the Broken Robot and they love to dance to the songs.My Sam, The Broken Robot CD is fortunately one of their favorites! And I am gratified that at four years old, Jonah will turn on the CD in his room ( which he shares with his big brother) and listen for half hour on his own. Makes me SOOO happy!

The Tickle Me Song is one that they play a lot. I hope you enjoy it too!

https://littlefarmgrandma.com/rockin-grandma-cd-of-all-14-songs-in-sams-books/tickle-me-song

Share
Posted in Blog, Family, Raising Children | Tagged , , , , | Leave a comment

Working out – so important – how to make it fun?

Share

Working out is something that we just have to do especially as the years march on. And as we fight the battle of the bulge it becomes even  more critical to move your body as much as possible. I am no different from everyone else – and had to force myself to incorporate exercise into my daily life – as our sedentary ways – especially with computer addiction – are no contributor to good health.  Here I am stretching – no matter how much we stretch, it seems that we always need more stretching – sigh…. Larraine's back doing stretches April 10 2013

So what works? Well, first – walking whenever you can.

But that is not enough.

Weight training is essential. Yoga and Pilates are excellent for lengthening and stretching – and weight training adds that extra cherry on top – helps your metabolism work harder to burn calories.

What about Pilates then? I have been doing it for 10 years now – and love the way it makes me feel – stretched out and relaxed most of the time as long as I don’t overdo it. I know that folks who push the envelope of Pilates do the aerobic kind and I take my hat off to them – it is too much for me and inevitably I tear/overstretch/hurt myself. So I now do Pilates in the swimming pool and not only is it fun, but it is painless, and swimming for 30 minutes prior to the Pilates stretching is a fabulous aerobic workout.

But what I love the most is – boxing. Yes, boxing! It is an amazing sport – and burns more calories than anything else I have ever done. Now make no mistake – I am not hitting anyone. Nor is anyone hitting me! I am boxing with a trainer who wears padded gloves and all he does is respond to me – while telling me which boxing moves to take. It is all about foot work, body balance, and movement rather than brute force and I LOVE IT!

I do an occasional Zumba class – without too much bouncing or high impact – and its fun  but mainly Pool Pilates, Boxing, Aerobic swimming, Weight Training, Elliptical and Rowing Machine and Stretching – as well as Paddle tennis doubles once a week – well, you could say that in my dotage I am exercising more than ever before. Of course I now have the time – sort of – in between board work, babies and cooking!

Perhaps it’s just that now I LOVE what I do – and do it at my own pace. Nevertheless, exercising as a family is a great way to spend time together. My husband and I play golf – occasionally when we are not delivering goat babies, or dealing with the never ending projects on the Little Farm.

My son and his two older sons and wife all run together and I am sure now that the twins are walking – they will become a ‘running’ family. That is the way to do it…. start early!I used to swim, play field hockey, tennis, bike ride and ride horses in my youth – so running around is not new.  I LOATHED gymnastics – yet now it is part of my life. Go figure.

Maybe that is why I am so happy! Lucky me! What do YOU do to work out?

Share
Posted in Blog, Family, Raising Children | Tagged , , , , , , , , | Leave a comment

Some really cute animal pictures which will make you smile – and delight your children – raising children to love animals is so important

Share

A friend just sent me these photos. They are so delightful that even if you are not an animal lover, you will smile. Enjoy!Dog pic Beagle

Raising children with a love of animals is so important. It teaches responsibility ( feeding, entertaining, cleaning) and also what it feels like to receive unconditional love especially from a dog.Dog pic dog licking newborn

I grew up with a cocker spaniel and my mother also raised Rhodesian Ridgeback dogs. They are athletic, gorgeous to look at and strong willed but terrific with children. We have Rottweillers – and have had 5 over the past 20 years. Despite all the bad press that they get, they are the most amazingly loving, intelligent and family oriented dogs. They are less interested in other dogs than they are in people and love being with families. Our present dog is Sunny – and I have blogged about him a lot.

Of course we have lots of animals at our Little Farm – goats, chickens, quails, tilapia fish, and Sunny the dog. We have had multiple cats, but sadly the coyotes in our area tend to run off with them so we have stopped that. The coyotes are a little more reticent when they come across Sunny – who barks but leaves them alone. Here is Sunny exercising with my husband in the gym at the Little Farm.Sunny exercising with Clive 2010 JulyOur former Rottweiler Belinda used to play with the coyote cubs – that was not a lot of help to us but it was rather cute of her.
Even if you cant afford a pet, or live in a place where they are not permitted or practical, take your kids to play with pets that belong to other families – it’s so important to have children feel comfortable around animals – it grows the love in them.Dog pic dog hugging man


Share
Posted in Art, Blog, Family, Raising Children | Tagged , , , , , | Leave a comment

Meatballs and Rice – Cooking with Kids – a weekly staple

Share

Meatballs and Rice – Cooking with Kids

Here is my grandson Jonah helping me make meatballs for dinner. He is meticulous – four years old – and already has decided he is going to be an artist and a chef. OKAY! Sounds good to me!

Jonah making meatballs Jan 2013Meatballs and Rice

  • 1 lb of organic ground beef
  • 1 chopped onion
  • Garlic salt to taste
  • 1/2 cup of flour
  • 2 Tbsp Olive Oil
  • 1/4 cup of Ketchup
  • 1 can of tomatoes in puree
  • Chicken or Beef stock ( Better than Bouillon)
  • Grated parmesan for finish
  • Twig of parsley or cilantro for garnish

Directions:

  1. Roll the mixture into small balls and then coat with flour and set aside
  2. Heat the olive oil in a pan (one tbsp)
  3. Add the chopped onion and saute until translucent
  4. Add the meatballs and saute until browned.
  5. Set the browned balls aside and add a can of tomatoes in puree along with 2 cups of beef or chicken stock ( I use Better than Bouillon) until it comes to a boil, using a little flour mixed with some of the liquid to thicken.
  6. Add the balls back to the mixture and simmer for about 20 minutes until the liquid has reduced and the gravy is thicker.
  7. In the meantime, cook the rice as directed on the package – OR – fry some onion in the second tablespoon of olive oil,  in a pot, add the rinsed uncooked rice and saute for a few moments, then add stock bring to a boil, then allow to simmer until all the liquid has been absorbed and the rice is tender to your liking. I only do this for adults since my grandchildren like their rice unsullied by any vegetables. Sigh.
  8. Serve the meatballs, sauce and rice – and sprinkle some parmesan grated on the top with a twig of parsley or cilantro for decoration. Yum!
Share
Posted in Blog, Family, Rice | Tagged , , , , , | 1 Comment