Turning parking lots into urban farms – reverse tithing -90% of produce donated to the community, and only 10% kept for supporting the cause – VOTE TODAY!

Share

This is such a good cause – please cast your vote for it – it is an interfaith activity that churches and  synagogues participate in, where they take underutilized parking lots, and turn them into farms, then they reverse tithe by giving 90% of what they grow and raise to the community keeping only 10% for the use of the diocese or congregation. Please VOTE – and you will help this amazing cause be chosen for a $100,000 grant to continue their good work. It is called NETIYA and here is the link – please vote today!!!

http://myla2050.maker.good.is/projects/Project10

Here is a note posted by a participant in the program – with a video – amazingly good work – if you vote today – they may win a grant of $100,000 to continue their interfaith collaboration helping the needy – please click on the above link and vote ! I did!

We converted a crab grass and sun-bleached lawn into an edible landscape (1200 sq. ft organic garden, and 800 sq. ft. orchard). We grow food together. Through a reverse tithing, we give 90% of all the food to address food insecurity. Want to do this at your institution?
Project Partners: Netiya, Unitarian Universalist Church, Congregation Beth Ohr, Congregation Tikkun Olam [January – May 2012]

Share
Posted in Blog, Family | Tagged , , , , , , | 1 Comment

Making Brownies like a Bakery does! When cooking with kids – easy and fun!

Share

How to Make Your Brownies Look Like They Came from a Bakery


STEP 1:Line your pan with parchment paper.  Spread shortening in the pan to hold the paper in place.  Don’t worry; the fat will be outside the paper, not on your brownies.
STEP 2: After removing the pan from the oven, grab the edges of the paper and lift the cake from the pan. You can buy parchment paper at the grocery, or through my affilate partner The Prepared Pantry below.Must-Have Parchment Paper >
STEP 3: Using two cooling racks, invert the cake and peel off the paper.  Sandwich the cake between two racks and turn the cake over.  Re-invert the cake and let cool.
STEP 4: With a serrated knife, trim the edges from the cake.
STEP 5: Use a ruler to mark the cuts.
STEP 6: Cut the brownies with a wet blade.  Keep a clean damp cloth handy and wipe the blade between cuts.

5 Fantastic Desserts to Make with a Brownie Mix


Brownies with Strawberries and Whipped Cream

Pile thinly sliced strawberries on your brownie.  Cover it with whipped cream:

What you’ll need: Dessert Brownie Mix  from Prepared Pantry! Or your favorite packaged mix.

Share
Posted in Blog, Desserts, Recipes, Recipes to Make with Children | Tagged , , , , , , , , | Leave a comment

Making a really good ( and easy Graham Cracker Crust) – and Chocolate Ribbon Cheesecake – scrumptious!

Share

Making a really good ( and easy Graham Cracker Crust)

There are recipe authors that advocate baking the crust before you fill it.  It doesn’t need to be if you are making a dessert, such as a cheesecake, that is going to be baked.  The crust will bake along with the dessert.  If you are making a refrigerator dessert or a freezer dessert that is not baked, prebake the crust so that the sugar melts.

By the way, buy graham cracker crumbs.  Don’t invest valuable kitchen time crushing or grinding graham crackers.

The following recipe for a graham cracker crumb crust represents a nice balance of sugar, butter, and crumbs and is the right size for a nine-inch springform pan.

1 1/2 cups graham cracker crumbs (you may also use crush chocolate cookies or gingersnaps)

1/3 cup butter

1/3 cup granulated sugar

Melt the butter in the microwave.   Stir the crumbs and sugar together in the pan.  Stir in the butter.  Press the crumbs into the bottom of the pan and up the sides.  If you have trouble getting the crumbs to hold together, you can add more melted butter.

Chocolate Ribbon Cheesecake Recipe

A chocolate cheesecake is an impressive alternative to a vanilla cheesecake. This recipe calls for a walnut and graham cracker crust but you could use chocolate cookies if you prefer and leave out the nuts.  Fresh berries are delightful with chocolate cheesecake but we chose to drizzle this cheesecake with chocolate syrup as we did  with our Turtle Cheesecake.

For the crust

2 cups crushed graham crackers

1/2 cup finely chopped walnuts

2 tablespoons sugar

5 tablespoons butter, melted

For the filling

3 8-ounce packages of cream cheese, softened

3 large eggs

3/4 cup granulated sugar

1 tablespoon flour

1/4 teaspoon salt

1 teaspoon vanilla

1/4 cup whipping cream

4 ounces semi-sweet baking chocolate, melted
For the topping

Chocolate ice cream syrup

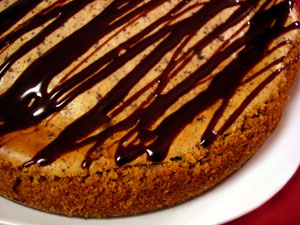
Chocolate Ribbon Cheesecake
Directions
1. Make the crust: Crush the graham crackers ( or use ready crushed ones). Mix the crumbs and chopped walnuts with the sugar and melted butter in a nine or ten-inch springform pan. Press the mixture into a crust across the bottom of the pan and up the sides. Put the crust in the refrigerator to set up while you prepare the filling.

2. Preheat the oven to 325 degrees.

3. Make the filling: Mix the cream cheese with the paddle attachment of your standtype    mixer set at medium speed until smooth and creamy, about five minutes. Add the eggs, granulated sugar, flour, salt, vanilla, and whipping cream and gently cream together until smooth. Do not over beat. Too much air in the filling will cause the cake to sink and crack.

4. With your mixer on the low setting, drizzle in the melted chocolate and mix until    combined. (If your filling is too cold, some of the chocolate may set up leaving  chocolate flecks in the filling. That’s okay; the cheesecake will not be compromised  and the flecks are actually quite attractive.)

5. Pour the cream cheese filling into the crust. Bake for 40 to 50 minutes or until the    top starts to turn golden and the center of the cake is just barely jiggly. Because it is not as thick, a ten-inch cheesecake will bake more quickly than a nine.

6. Let the cake cool in the pan on a wire rack for ten minutes. Run a knife around the    edge of the pan to loosen. Remove the ring and let the cheesecake cool completely. Refrigerate for several hours.

7. Prior to serving, drizzle the cheesecake with chocolate syrup.


Share
Posted in Blog, Desserts, Tips | Tagged , , , , , | Leave a comment

Cake desserts with Fruit and Sauces – yummy when Cooking with Kids!

Share

How to Make Luscious Cake Desserts with Fruit and Sauces
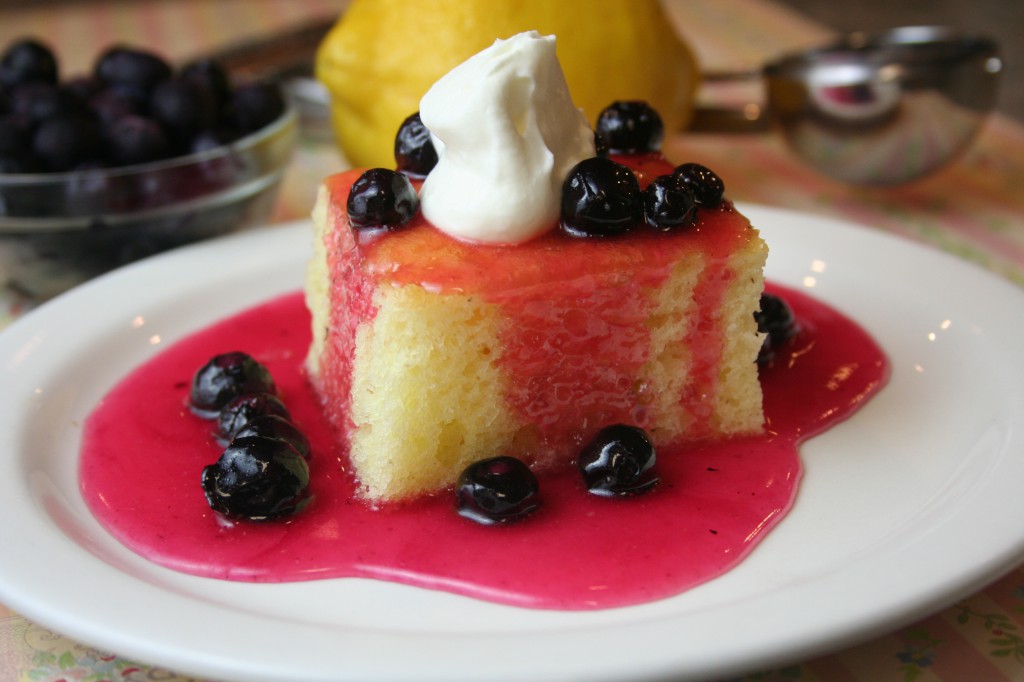
Cake desserts with fruit

I get a lot of my cake and bread mixes from The Prepared Pantry – it requires some thought and ordering in advance but they keep for months, and you will always have the fixin’s for a great cake and dessert on hand! So order away!

Get your vanilla bean cake mixes here

Vanilla Bean Cake with Raspberries or Blackberries and Lemon Sauce

Lemon and raspberry is a great combination.  We made the lemon sauce from a mix and then added raspberries.  We concluded it was better not to mix them, rather, pour the lemon sauce over the cake and add the berries.

We tried several flavors of whipped cream.  We liked the lemon cloud whipped cream the best.

Step 1:  Make the cake according to package instructions.

Step 2: Make the lemon sauce according to package instructions.

Step 3: Make the lemon whipped cream according to the recipe below.

Assemble the dessert.
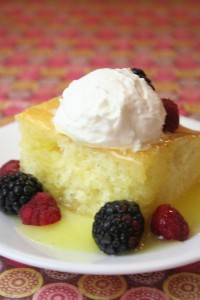
Vanilla Bean Cake with Berries


Vanilla Bean Cake with a Blueberry Lemon Sauce

Lemon and blueberry is a classic combination.  We liked the berries mixed right in the lemon sauce.  It made a beautiful pink and magenta sauce.

The lemon cloud whipped cream was really the only choice for this dessert.

Step 1:  Make the cake according to package instructions.

Step 2: Make the lemon sauce according to package instructions.

Step 3: Make the lemon whipped cream according to the recipe below.

Assemble the dessert.Vanilla bean cake with lemon sauce
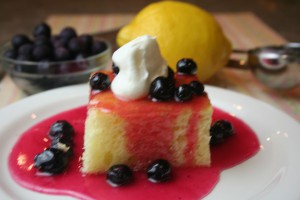
Vanilla Bean Cake with Fresh Strawberries and Lemon Sauce

If you like strawberry shortcake, you’ll like this.  The strawberries are just coming on; they’ll be a little better later in the season.  Still, this was very good.

The dessert in the image was made with lemon sauce. If you prefer buttermilk syrup any of the following would work well:

Buttermilk Syrup

Lawford Coconut Cream Syrup

Coconut Buttermilk Syrup

We didn’t try it but I bet a good chocolate sauce would have been very good.

Since we used lemon sauce, we stuck with lemon whipped cream.

Step 1:  Make the cake according to package instructions.

Step 2: Make the lemon sauce according to package instructions.

Step 3: Make the lemon whipped cream according to the recipe below.

Assemble the dessert.Vanilla bean cake with strawberries
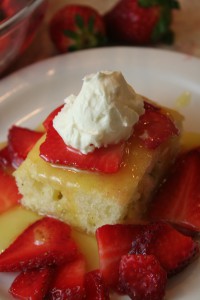
Vanilla Bean Cake with Peaches in Caramel Sauce and Caramel Whipped Cream

Buttermilk syrup tastes like a cross between caramel syrup and butterscotch syrup.  We added frozen peach slices right to the syrup.  That was a mistake.  It thinned the syrup too much.  It tasted great but it was too thin.  It’s best to use fresh peaches or let the frozen slices thaw a bit and then pat them dry.  Pour the sauce over the slices and the cake.

Caramel whipped cream was dynamite with this.

Step 1:  Make the cake according to package instructions.

Step 2: Make the lemon sauce according to package instructions.

Step 3: Make the lemon whipped cream according to the recipe below.

Assemble the dessert.Vanilla Bean cake with Caramel sauce
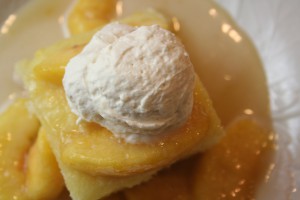
 

Share
Posted in Blog, Desserts | Tagged , , , , , , , , | Leave a comment

Marvelous Muffins! Great when cooking with kids – you can even use muffin mix and add zing to them

Share

Beyond the Basics:  Adding Goodies to Your Muffins

Includes: “How to Get Your Muffins Out of the Pan without Breaking”

What’s not to like about a warm honey bran muffin with great jam?

Cinnamon Chip Bran Muffins.  To a mix for 12 large high-domed muffins, we added one cup cinnamon chips.  They tasted great, no—fantastic.  But as the chips melted, we got a little spread and overhang around the rims.  We solved that problem; we cut the water back a quarter cup and made 15 muffins instead of twelve so the cups weren’t quite so full.  Perfect.

Apple Cranberry Bran Muffins.  To a mix for 12 large high-domed muffins, we added 3/4 cup diced apples and 3/4 cup dried cranberries plus a teaspoon of Vietnamese cinnamon,  The cranberries overpowered the apples so we added a teaspoon of apple flavor to the next batch.  Perfect.  The Vietnamese cinnamon really adds a nice touch.

Ginger Pear Bran Muffins.  Pears have such a mild flavor; it’s hard to get them to stand out.  Instead we left them in the background, a nice sweet orchard taste, and let the candied ginger do the heavy lifting.  We added 3/4 cup dried pears and 3/4 cup small diced candied ginger.

Carrot Cake Bran Muffins.  Great muffins.  We used 3/4 cup grated carrots, one teaspoon of cassia cinnamon, and 3/4 cup chopped walnuts.  They’re not sweet like a carrot cake.  Don’t be tempted to add more sugar—you’ll upset the balance and they’ll spread.  Use a jam or jelly to make them sweeter.

Cranberry Nut Bran Muffins.  These are my favorites—but then I like cranberries and I like nuts.  Add 3/4 cup dried cranberries and 1/2 cup chopped walnuts or pecans.

Pineapple Coconut Bran Muffins.  These are the muffins that made Kelli the Baker’s husband a bran muffin convert.  We drained crushed coconut and added 3/4 cup plus 1/2 cup sweetened shredded coconut.

Candied Ginger Bran Muffins.  These are the ginger pear muffins without the pears.  We added 3/4 cup candied ginger.

Other muffins:  We meant to experiment with ginger apple plus some pumpkin muffins—ginger pumpkin, pumpkin raisin, and pumpkin nut—but didn’t get that far.  If you try these variations, let us know what you think.


Suggestion: Get a soft bladed silicone spatula
This is my secret weapon.  I use it all the time.  The soft blade bends around the corner of bread pans and muffin pans to break free those sticky goodies.  And it’ll never scratch your expensive bakeware. Williams Sonoma has them.


Share
Posted in Blog, Desserts, Recipes to Make with Children | Tagged , , , , , , | Leave a comment

Mentoring MBA Candidates – one of my passion’s is paying it forward to young women and men encouraging them that a business career is GOOD!

Share

For the past 21 years I have mentored young women and men at UCLA Anderson School of Management. It is a continuing pleasure and honor to meet these amazing young people who come from all over the world to participate in the leading Entrepreneurial MBA program that the Anderson School of Management offers at UCLA.

Last week’s group was no different and hailed from Brazil, Mexico, Hong Kong, Israel, Iran and of course from all over the USA. They inspire me as much as they tell me chatting about the challenges and opportunities that I have been blessed with in my career, inspires them. My husband Clive has much that he offers too in these discussions – and they are always amazed that we have  been married for 44 years and are still together! So many blessings fill our lives I am happy to share the ‘secrets’ and hard work that has made it all happen. Larraine and Clive with UCLA MBA candidates Dinner for 8 at Hillcrest 2013

Share
Posted in Blog, Live Events | Tagged , , , , | Leave a comment

Here is the ultimate strawberry chocolate cake – just like the last two blogs but with chunks of fruit – great when cooking with kids

Share

Strawberry White Chocolate Lava Cake with Strawberry Sauce

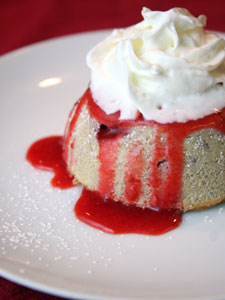
Anyone who likes strawberry shortcake is going to love this.  The chunks of fruit in the filling reduce the ooze but this so good, it’s hard to pass up. Full-StrawLavaCake


Ingredients

1/2 cup butter 1/2 cup granulated sugar 1/4 teaspoon salt
6 large eggs 2 teaspoons strawberry flavor 3/4 cup all-purpose flour
10 ounces white chocolate wafers, melted 12 ounces individually frozen strawberries 1/4 cup granulated sugar 2 heaping tablespoons red currant jelly

Directions

Preheat the oven to 400 degrees. Generously butter a standard muffin tin. Dust with granulated sugar, and tap out excess. Set aside.

  1. Remove 2/3’s of the strawberries from the 12 ounce bag.  While still frozen, chop them into 1/4 inch chunks with a bench scraper or large knife.  Set the rest of the strawberries aside.
  2. In the bowl of your stand-type mixer and with the paddle attachment, cream the half cup butter, half cup sugar, and salt together. Add the eggs one at a time, beating after each.  Add the strawberry flavor.
  3. Add the flour and beat until just combined. Drizzle in the melted white chocolate and mix until combined.  Gently fold in the strawberry pieces.  Divide the batter evenly among prepared muffin cups.   The cups will be full.
  4. Bake just until the tops of the cakes no longer jiggle when the pan is slightly shaken, 9 to 11 minutes. Remove from oven and let the pan stand for three to five minutes
  5. To remove the cakes, place a cutting board over the top of the pan with the cakes.  Grasping the edges of the pan and cutting board together, invert the pan, hold the inverted pan atop the cutting board, and drop the pan and cutting board from a height of six to eight inches.  The cakes will pop loose onto the cutting board.
  6. To make the sauce, puree the remaining strawberries in a blender then empty the contents into a small saucepan.  Add the 1/4 cup sugar and jelly.  Heat and stir until the sugar is dissolved and the jelly is melted. And it just starts to bubble.  Set aside to cool.

Serve with whipped cream and the strawberry sauce.

Share
Posted in Blog, Desserts, Recipes to Make with Children | Tagged , , , | Leave a comment

If you got the hang of Chocolate Lava Cakes, try this one – white chocolate orange lava cakes – when cooking with kids

Share

Chocoholics beware! This cake could be in your future!

Orange White Chocolate Lava Cake

Ingredients

  • 1/2 cup butter
  • 1/2 cup granulated sugar
  • 1/4 teaspoon salt
  • 6 large eggs
  • 2 teaspoons orange flavor
  • 1 tablespoon orange zest
  • 2/3 cup all-purpose flour
  • 12 ounces white chocolate wafers (one bag), meltedCloseup of Tangelo tree

Directions

Preheat the oven to 400 degrees. Generously butter a standard muffin tin. Dust with granulated sugar, and tap out excess. Set aside.

  1. In the bowl of your stand-type mixer and with the paddle attachment, cream the half cup butter, half cup sugar, and salt together. Add the eggs one at a time, beating after each.  Add the orange flavor and zest
  2. Add the flour and beat until just combined. Drizzle in the melted white chocolate.  Divide the batter evenly among prepared muffin cups.
  3. Bake just until the tops of the cakes no longer jiggle when the pan is slightly shaken, 8 to 9 minutes. Remove from oven and let the pan stand for three minutes.
  4. To remove the cakes, place a cutting board over the top of the pan with the cakes.  Grasping the edges of the pan and cutting board together, invert the pan, hold the inverted pan atop the cutting board, and drop the pan and cutting board from a height of six to eight inches.  The cakes will pop loose onto the cutting board.

Dust with confectioners’ sugar, and serve with ice cream or whipped cream.

Orange Marmalade Sauce

  • 1/4 cup granulated sugar
  • 1 tablespoon cornstarch
  • zest from one large orange
  • juice from two large oranges
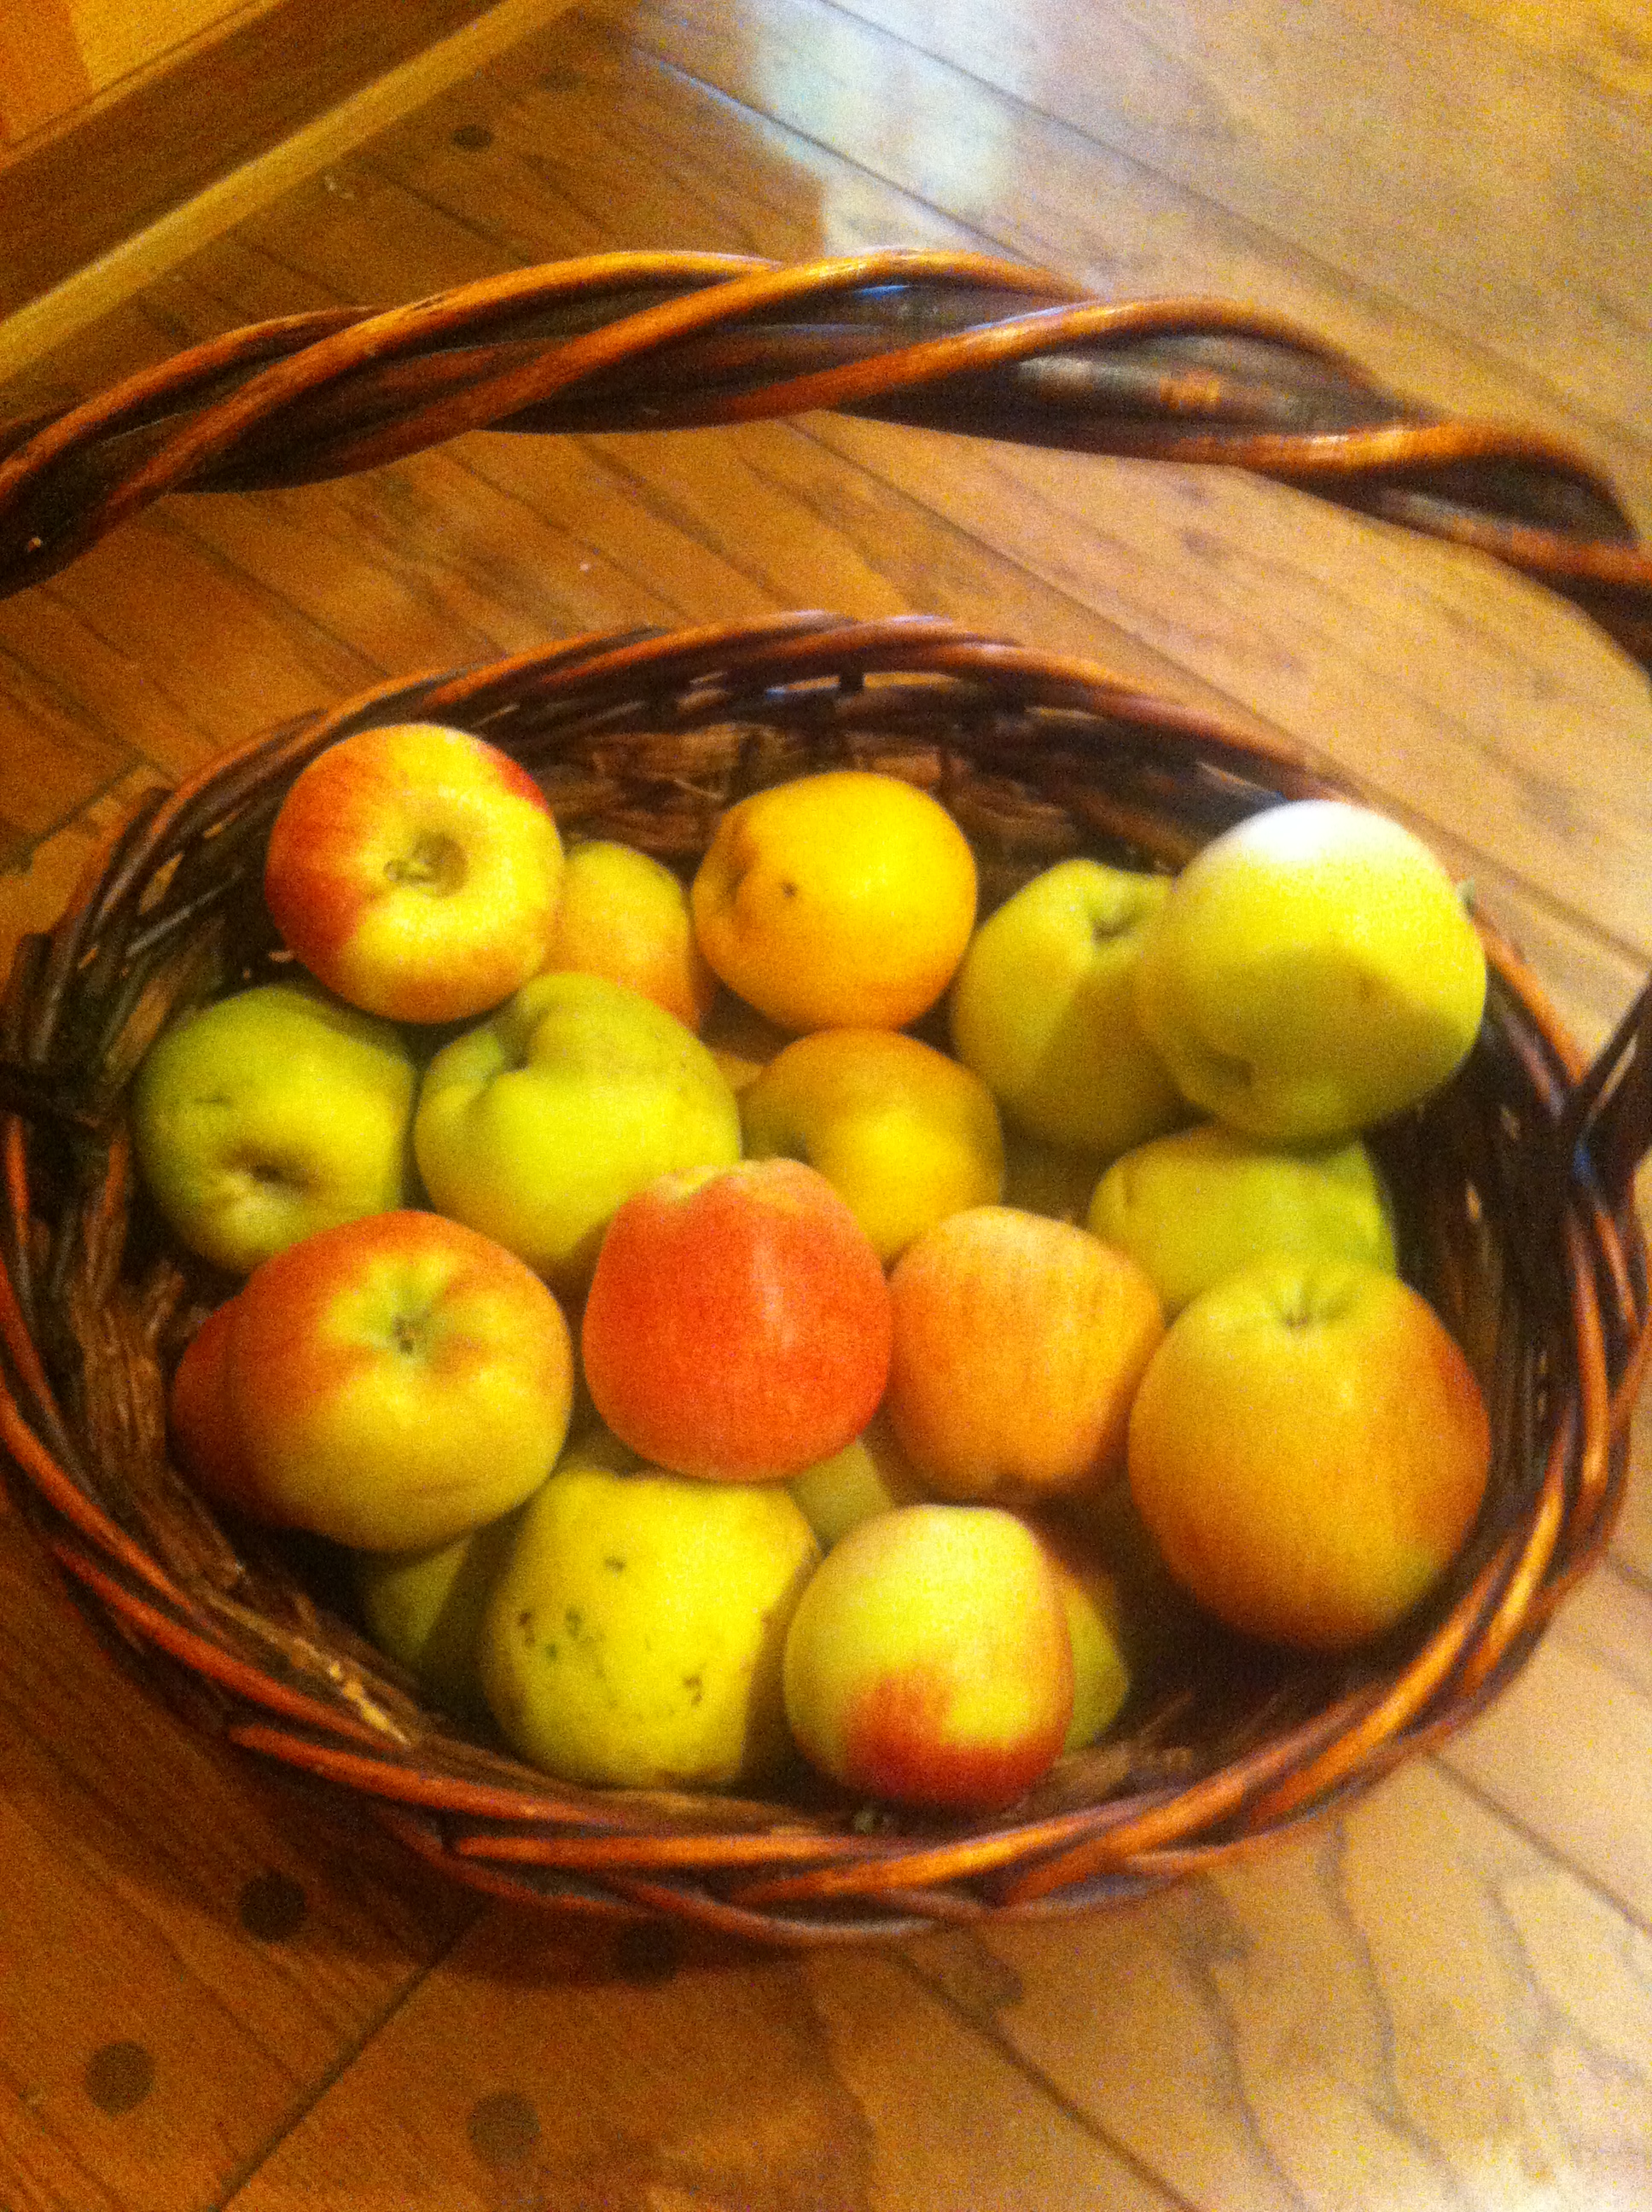
  • 2 to 4 heaping tablespoons of orange marmalade ( we make our own from the gorgeous fruit you see in the above picture taken from our citrus grove

Combine the granulated sugar and cornstarch in a saucepan. Add the zest and orange juice.  Heat and stir until the sauce is thick and bubbly.  Remove the sauce from the heat and add the orange marmalade, enough to taste.  Let cool.

Share
Posted in Blog, Desserts, Little farm products, Recipes to Make with Children | Tagged , , , , , | Leave a comment

Making yummy molten chocolate lava cakes – cooking with kids

Share

If you are a chocoholic you will LOVE these cakes. Their name says it all –

Molten Chocolate Lava Cake

Ingredients

  • 1 cup butter
  • 1 1/4 cups granulated sugar
  • 1/4 teaspoon salt
  • 6 large eggs
  • 2/3 cup all-purpose flour
  • 3/4 cup rich dark cocoa

Directions

Preheat the oven to 400 degrees. Generously butter a standard muffin tin. Dust with granulated sugar, and tap out excess. Set aside.

  1. In the bowl of your stand-type mixer and with the paddle attachment, cream the one cup butter, one cup sugar, and salt together. Add the eggs one at a time, beating after each.
  2. Add the flour and cocoa and beat until just combined. Divide the batter evenly among prepared muffin cups.
  3. Bake just until the tops of the cakes no longer jiggle when the pan is slightly shaken, 8 to 9 minutes. Remove from oven and let the pan stand for three minutes.
  4. To remove the cakes, place a cutting board over the top of the pan with the cakes.  Grasping the edges of the pan and cutting board together, invert the pan, hold the inverted pan atop the cutting board, and drop the pan and cutting board from a height of six to eight inches.  The cakes will pop loose onto the cutting board.

Dust with confectioners’ sugar, and serve with ice cream or whipped cream.

Share
Posted in Blog, Desserts, Recipes to Make with Children | Tagged , , , | Leave a comment

Making Pannekoeken ( Dutch Baby Cups) from prepared mix and filling them with yummy stuff – great for cooking with kids

Share

Coming from South Africa, there is a significant amount of Dutch heritage in the background of those who live there and so I remember growing up with many recipes that heralded from Holland. One of those memories is all about Pannekoeken.

My affiliate The Prepared Pantry provides me with all my bread machine mixes and much more. The Pannekoeken mix is so useful since one can fill these adorable little cups with so many different kinds of fillings. Here are a few for your entertainment ( and for cooking with kids) below.

How to Make the Pannekoeken Cups

Preheat the oven to 425 degrees.

  1. Mix 2 eggs, 1/2 cup milk, and 1/2 cup pannekoeken mix together.
  2. Put a dab of butter in each cup of a six cup jumbo muffin pan.  Put the pan in the oven to heat and melt the butter.
  3. Divide the batter between the six cups.
  4. Bake for nine to ten minutes or until the tops are golden brown.  Remove the Dutch babies to a wire rack.  Serve immediately.

If there is a secret to making Dutch babies, pannekoeken, it’s a hot oven.  There is no leavening in the batter; it’s all driven with steam like a popover.  So you have to have a lot of heat in a hurry for expansion.

Ovens are notoriously inaccurate, even brand-new ovens.  If your first batch doesn’t rise the way it should, turn your oven up 25 degrees.

You can buy an oven thermometer and check your oven.  (We had the ovens checked at major appliance store before doing a demo.  They were off 35 degrees on average.)  An experienced service technician can adjust the oven for you.

What to Fill Them With

You’re limited only by your imagination.  Pastry fillings are perfect—and you can buy them from Prepared Pantry with whom I affiliate—but you can use pudding, pie filling, ice cream, and more.  Use any fruit that you want.  They also have over 30 kinds of pancake syrups and desserts sauces to choose from.  Or make your own.

It’s easy to top them with a spray can of whipped cream.  It’s more fun to make flavored whipped cream—from caramel nut to chocolate to strawberry cheesecake whipped cream.  How about a peanut butter hot fudge sundae made like this:

Hot Fudge Sundae Pannekoeken Desserts

  1. Make either chocolate or vanilla dessert cups.
  2. While they are still warm, load them with vanilla ice cream.
  3. Drizzle them generously with hot fudge sauce.
  4. Sprinkle them with salted chopped peanuts.
  5. Top them with a scoop of chunky peanut butter whipped cream.

Yes, you can make whipped cream with chunky peanut butter—with more peanuts thrown in for good measure.  (The picture on the right has whipped cream from a spray can—we were being lazy.  Peanut butter whipped cream is much better
Share
Posted in Blog, Desserts, Family, Recipes to Make with Children | Tagged , , | Leave a comment

What are the easiest ways to make a meal? Especially when cooking with kids? 5 TIPS for you

Share

You come home from work, the kids are hungry, the dog wants to be fed, you are so tired all you want to do is collapse into a chair – but dinner needs to be made, homework done and everyone readied for bed. Sigh. I remember those days well. So how can you ensure that you ALWAYS have something in the pantry for dinner? Here are the 5 easy steps which should take you about 20 minutes to prepare:

1. Have chopped salad in the fridge

2. Have frozen chicken breasts or thighs in the freezer

3. Have canned chopped tomatoes in puree in the pantry along with Lawry’s seasoning salt

4. Have basmati rice and a rice cooker handy

5. Have fresh fruit – bananas, apples and oranges – and store bought ( or home baked at another time) cookies174

1. Salad

Always have a bag of chopped greens, a couple of cucumbers and cherry tomatoes  and bottled dressing – cut, toss and add prepared dressing

2 and 3. Protein and Canned Tomatoes in Puree

Keep frozen skinless boneless chicken breasts and thighs in the freezer – and pop them into the microwave under defrost while you are tossing the salad. Choose any one of my simple recipes for Chicken – e.g. Use Lawry’s seasoning salt on both sides of the chicken, heat a couple of tablespoons of olive oil in a frying pan, brown the chicken on both sides, throw in a can of chopped tomatoes in tomato sauce and let that simmer while you prepare the rice.

4. Starch

Put the right amount of rice ( according to the package) into the rice cooker, add water and salt and leave it to do its thing while you prepare the fruit.

5. Dessert

Slice the bananas, apples and oranges into pieces – arrange on a large plate along with chocolate chip cookies ( store bought)

Share
Posted in Blog, Family, Fruit, Recipes, Recipes to Make with Children, Rice, Tips | Tagged , , , | Leave a comment

Sugar Cookies – always good when cooking with kids! And a Spiderman Birthday Cake!

Share

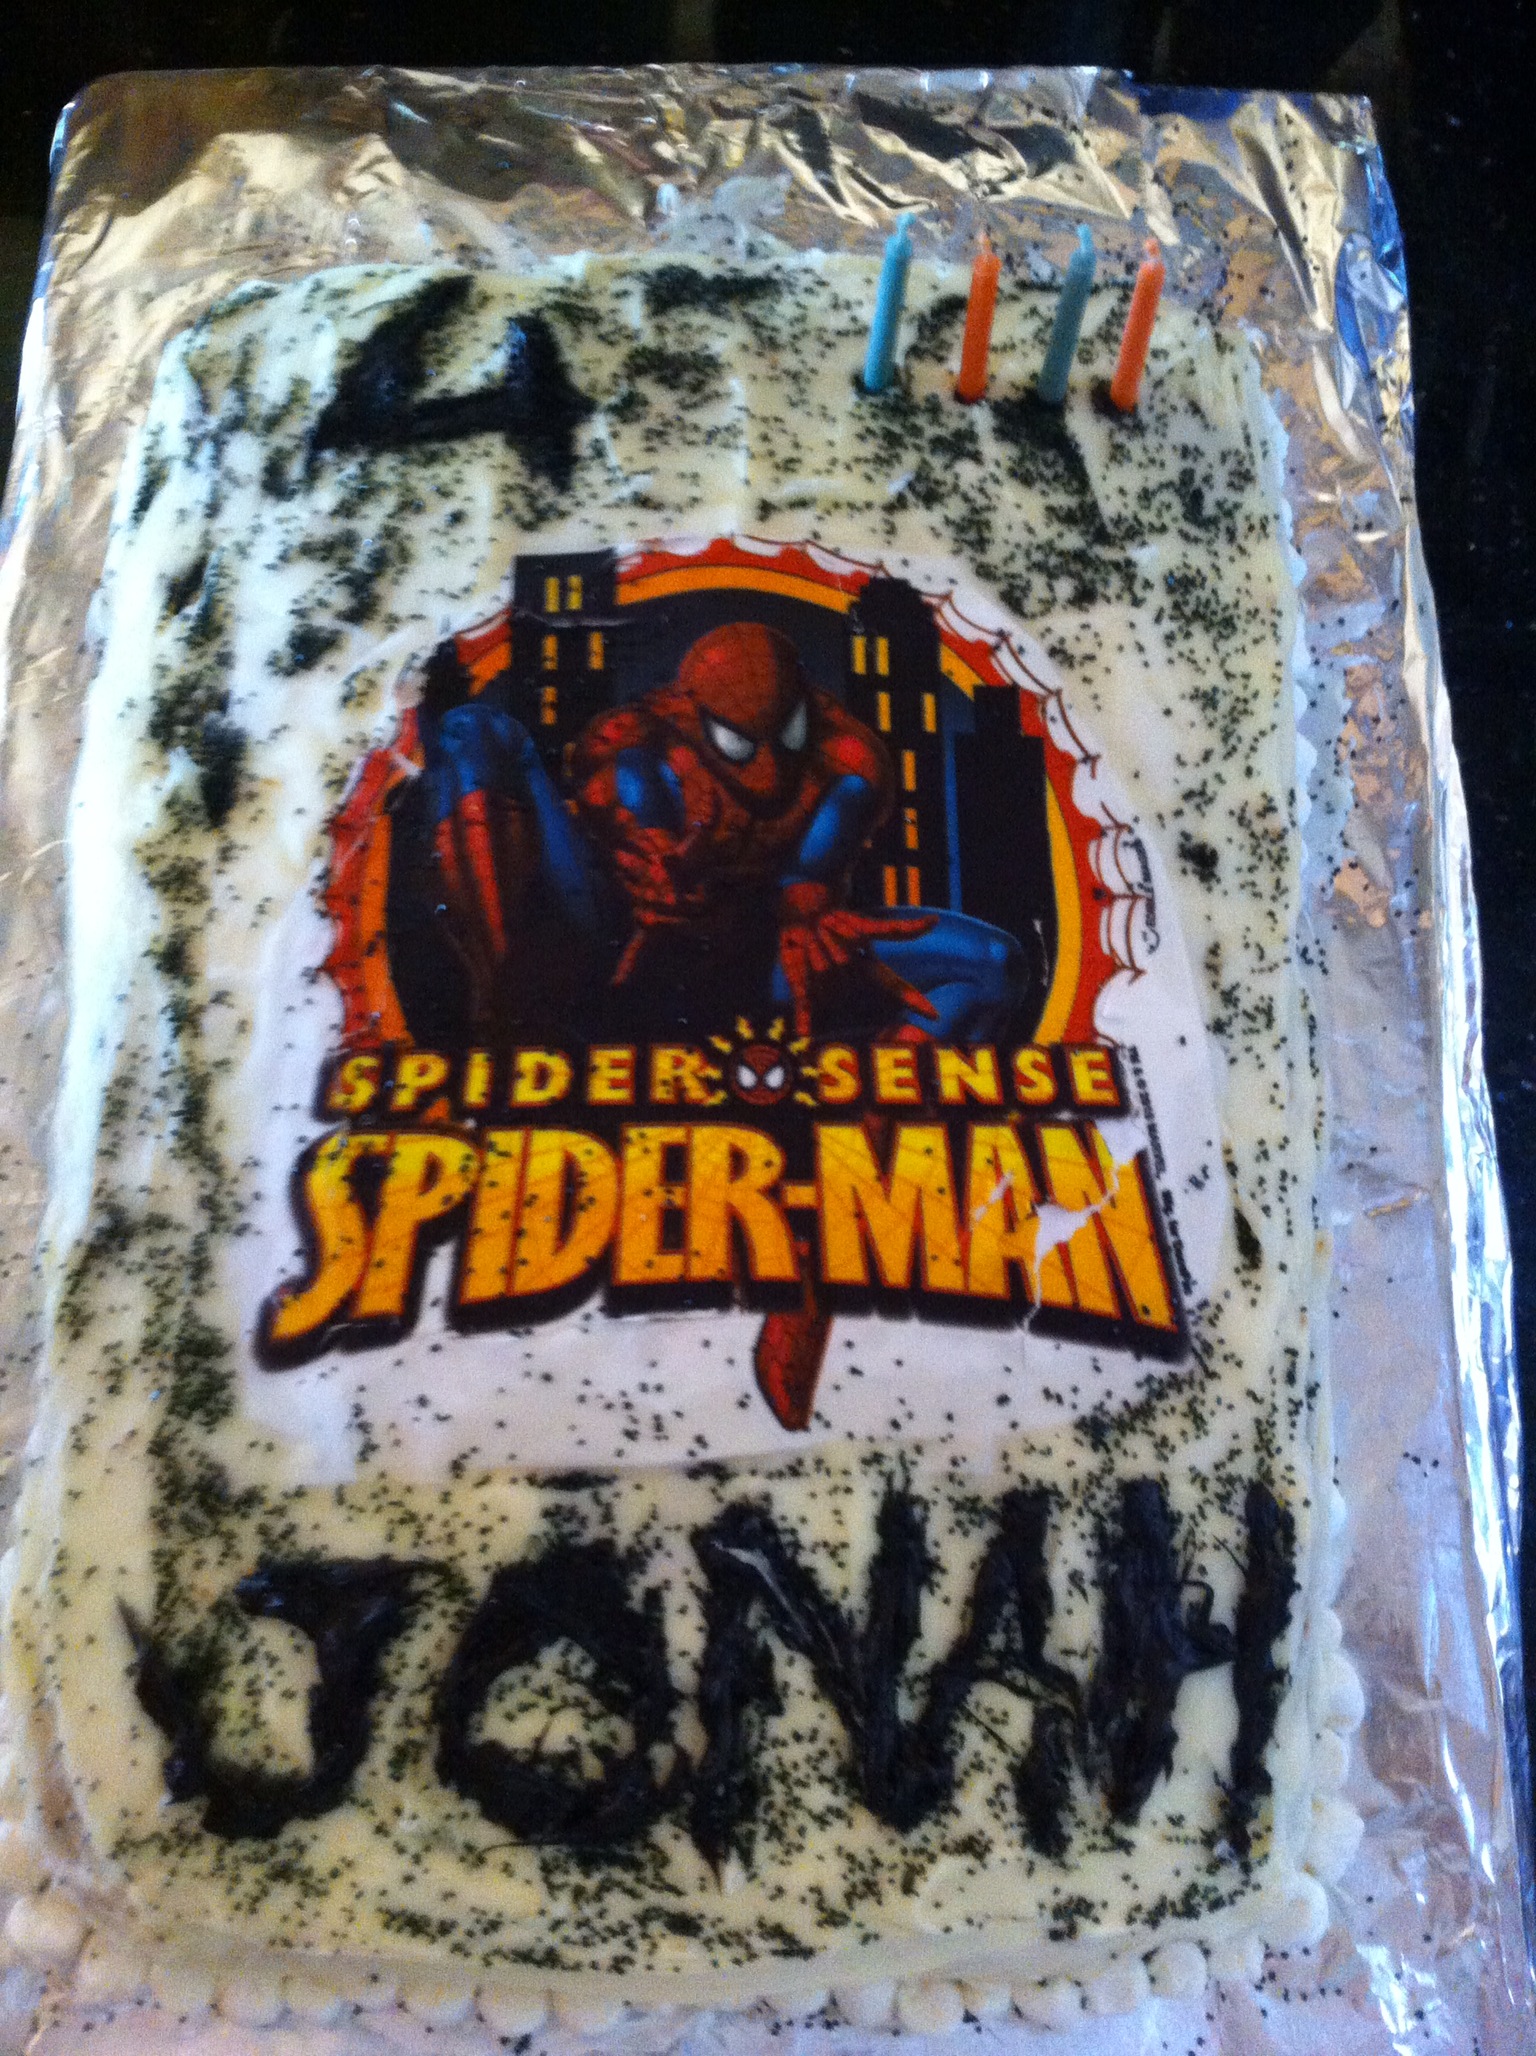
Sugar cookies are fast and easy. However below are some ways to dress them up. My grandson Jonah just loves to bake cookies of any kind with me! Below is the SPIDERMAN cake that I made for his fourth birthday – I bought a decal on line of Spiderman ( edible) and baked a simple lemon cake, covered it with bought cream cheese frosting and black sprinkles – and he loved it!Jonah 4th Spiderman decal cake

Back to the Decorated Cookies:
First here is a very simple sugar cookie recipe:

Ingredients

  • 2 3/4 cups all-purpose flour
  • 1 teaspoon baking soda
  • 1/2 teaspoon baking powder
  • 1 cup softened butter
  • 1 1/2 cups white sugar
  • 1 egg
  • 1 teaspoon vanilla extract
  • 3 to 4 tablespoons buttermilk
  • Sprinkles or colored sugar, for decorating

Directions

  1. Preheat oven to 375 degrees F.
  2. In a small bowl, stir together flour, baking soda, and baking powder. Set aside.
  3. In a large bowl, cream together butter and sugar until smooth. Beat in the egg and vanilla. Gradually blend in dry ingredients. Add enough of the buttermilk to moisten the dough and make it soft, not wet.
  4. Roll rounded teaspoons of dough into balls and place on a ungreased cookie sheet. Or you could use cookie cutters to make specific shapes if you are going to decorate with fondant below.
  5. With a brush or fingers, moisten the top of each cookie with the remaining buttermilk and slightly flatten the top of each cookie. If you decide NOT to decorate in a fancier way, then sprinkle with raw sugar or colored sprinkles.
  6. Bake for 8 to 10 minutes or until slightly golden. Let stand for 2 minutes before removing to cool on a rack.
  7. OR use your new skills below to decorate the cookies when cool.

1.  Decorate them with fondant.  

Thin sheets of fondant were cut to be the same shape with cookie cutters and then decorated with additional pieces of fondant. You can buy fondant at The Prepared Pantry my affiliate partner – just click on the links .

2.   Decorate the edges.  For intriguing cookies, consider decorating the edges.  This is usually done with refrigerator cookies—the “log” is rolled through the decorations—but most sugar cookies can be baked as refrigerator cookies.  Roll the log through decorations and then slice the log into cookies.

3.  “Spread and sprinkle.”  Usually you’ll “spread and sprinkle.”  That is, you’ll use a spreadable icing, either premade or from a recipe, and sprinkle the tops with decorations.  The magic is usually in the decorations.  Most decorations are pretty but don’t add much flavor—colored sugar crystals and jimmies are typical.  (Prepared Pantry have excellent selections with unusual colors and combinations.)  The icing can be colored in 27 different colors using food color gels.  You can buy white colored sugar crystals and tint them with food color gels in any of these colors.

Candy bark adds flavor as well as color.   It’s a combination of crushed candy—usually intensely flavored candy—and white chocolate.   It costs more but tastes much better.

Don’t forget the meringue powder.  Meringue powder is basically sugared, flavored dry egg whites.  A little will make your frosting firm so it will not mar and smear so easily.  We typically add two tablespoons when we make cookie icing.  The royal icing used to make cake decorations—like the flowers and leaves on a wedding cake—is hardened with meringue powder.

Share
Posted in Blog, Desserts, Recipes to Make with Children | Tagged , , , , , , , , | Leave a comment

Banana Nut Cupcakes with yummy caramel frosting – Cooking with kids – and make Banana Nut Bread too!

Share

The Prepared Pantry Vanilla Bean Baby Cakes Mix makes great banana bread. It’s baked at a lower temperature and in a loaf pan with mashed bananas and comes out denser and moister than a cake—just like a quick bread. (See the recipe below.) And you can make banana cupcakes, with a YUMMY Caramel frosting too. Here is that super recipe for cooking with  kids.

Banana Nut Cupcakes

Ingredients:

  • 1 Vanilla Bean Cake Mix
  • 1/2 cup oil
  • 3 eggs
  • 1 cup mashed banana
  • 1 teaspoon banana flavor
  • 1/2 cup chopped nuts
  • 3/4 cup cinnamon chips

Directions:

Preheat the oven to 325 degrees.

1.Mix cake mix, oil, eggs, banana, and flavor in stand-type mixer, per package instructions. 2.Add the nuts and cinnamon chips to the cake batter. Mix just until combined.

3.Spoon the batter into 16 to 18 regular muffin pan cavities.

4.Bake for 16 to 18 minutes or until a toothpick inserted in the center of the cake comes out clean. Allow the cupcakes to cool on a wire rack.

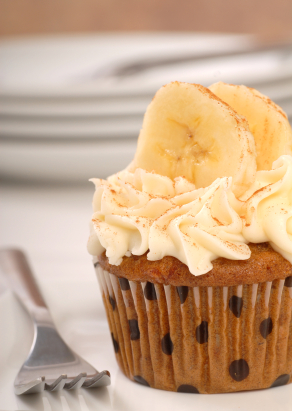
5.You could use canned cream cheese frosting and sprinkle some nuts on the top – or use the Caramel Frosting below.Vanilla cupcake with cream cheese frosting and sliced bananas

 Caramel Frosting

You can make homemade caramel or unwrap a pound of caramel candies such as Kraft for this recipe.

Ingredients:

  • 1 pound caramel heated until soft and warm
  • 1 cup butter
  • 3 cups powdered sugar
  • 1/2 teaspoon caramel flavor
  • 3 cups powdered sugar
  • 3 tablespoons whipping cream

Directions:

1.Scrape the soft caramel into the bowl of your stand-type mixer. Making sure that the caramel is not too warm to melt the butter, add one cup (two sticks) of cold butter to the caramel. Beat the butter into the caramel.

2.Add the powdered sugar and flavor and beat in. Add enough milk or whipping cream to reach the right consistency. The frosting can be spread with a knife or piped with a pastry bag.

Banana Nut Bread

Ingredients:

  • 1 Vanilla Bean Cake Mix
  • 1/2 cup oil
  • 3 eggs
  • 1 cup mashed banana
  • 1 teaspoon banana flavor
  • 1/2 cup chopped nuts
  • 3/4 cup cinnamon chips


Directions:

Preheat the oven to 300 degrees.

1.Mix cake mix, oil, eggs, banana, and flavor in stand-type mixer, per package instructions.

2.Add the nuts and cinnamon chips to the cake batter. Mix just until combined.

3.Spread batter in a greased or parchment lined 9”X5” loaf pan and bake for 1 hour 5 minutes to 1 hour 15 minutes or until a toothpick inserted in the center of the cake comes out clean.

4.Allow the bread to cool in the pan on a wire rack. If you are using parchment paper, grab the edges of the paper and lift to transfer it to a wire cooling rack to finish cooling.

Share
Posted in Blog, Desserts, Recipes, Recipes to Make with Children | Tagged , , , , , , | Leave a comment

Creme Brulee – not just for fancy chefs – you can do it too – and while cooking with kids!

Share

Creme Brulee is a delicious dessert – and not that hard to make. Here are a couple of variations and all of them are good for cooking with kids too!

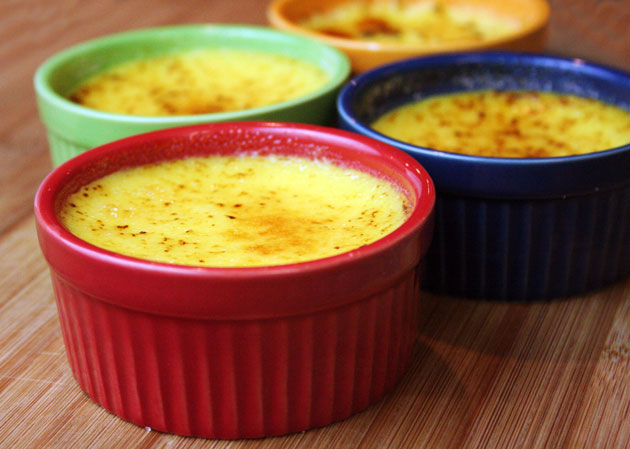
ColoredCremeBrulee

General Tips on Custard Making ( Creme Brulee is basically custard!)

  • Custards are typically made with eggs, granulated sugar, cream, and vanilla.  Mix the ingredients gently but thoroughly.  Try to avoid a foam.  For a smoother top, you may wish to spoon off any bubbles.
  • We prefer making our custards with egg yolks instead of whole eggs.  The yolks are richer than the whites and since whites and yolks coagulate at different temperatures, we found that an all yolk custard is a smoother custard.
  • Baking times for custards vary substantially and depend on the pans used, how hot the water is, and how deep it is.  You should bake until the custard is gently set.
  • Custards need to bake evenly so that the proteins set up at the same time.  The individual custards are baked in a pan of water to evenly disperse the heat: the center of the custards bake at the same rate as the edges.
  • Place the custards on a folded towel placed in the bottom of the baking pan.  The towel insulates the ramekins from the heat on the bottom of the pan.
  • Sprinkle sugar evenly over the completed custards.  The sugar is melted by placing the desserts under the broiler and close to the elements or it is melted with a blow torch.  A blow torch provides more control and you can see what you are doing but it is very convenient to do it in the oven and after a couple times, you will have the art mastered.
  • You want to heat the sugar quickly so that it does not heat the custard.  Of course, you can use a blow torch.  Serve the same day or the caramel topping will become soft.  We sometimes place the ramekins in the freezer to chill more quickly.  Do not let the custards freeze.

Classic Crème Brulee

This is the classic crème brulee served in restaurants.  You’ll be surprised how easy it is.

Ingredients:

9 large egg yolks

1/4 teaspoon of salt

1/2 cup granulated sugar

3 cups heavy cream

1 teaspoon vanilla extract

1/2 cup granulated sugar

Directions:

  1. To make the custard, mix the egg yolks, salt, and the granulated sugar together until they are combined.
  2. Heat the cream in a saucepan on medium heat until it just starts to bubble, not boil.  Gradually stir in the hot cream into the sugar and egg mixture.  Add the vanilla.
  3. Preheat the oven to 350 degrees.
  4. Place a folded towel in the bottom of a baking dish.  The towel will insulate the custard from heat on the bottom of the pan.  Set 4 eight-ounce or 8 four-ounce ramekins on the towel.  Divide the custard mixture between the ramekins.  Set the baking dish with the ramekins on the shelf of the oven.  Carefully pour hot water in the pan—without splashing water into the ramekins—until the water is halfway up the sides of the ramekins.  Cover the pan with foil.  Bake for 30 to 40 minutes or until the custard is just set.
  5. Let cool in the pan with the water, then remove the ramekins from the baking dish, cover with plastic wrap and refrigerate for 3 hours or until chilled.
  6. Use a paper towel to dab up condensation on the tops of the desserts.  Sprinkle the tops with an even coating of sugar.  Place the rack high in the oven and set the oven to the broiler setting.  The tops of the ramekins should be close to the broiler.
  7. Heat for a few minutes under the broiler, just long enough for the sugar to caramelize.  Serve immediately or return to the refrigerator to chill.

Cinnamon Crème Brulee

Not only does the cinnamon add a wonderful flavor to the custard, the cinnamon flecks are very attractive.  Be sure that you use a top quality cinnamon.

Ingredients:

9 large egg yolks

1 teaspoon cinnamon

1/4 teaspoon of salt

1/2 cup granulated sugar

3 cups heavy cream

1 teaspoon vanilla extract

1/2 cup sugar

Directions:

  1. To make the custard, mix the egg yolks, cinnamon, salt, and the granulated sugar together until they are combined.
  2. Heat the cream in a saucepan on medium heat until it just starts to bubble, not boil.  Gradually stir in the hot cream into the sugar and egg mixture.  Add the vanilla.
  3. Preheat the oven to 350 degrees.
  4. Place a folded towel in the bottom of a baking dish.  The towel will insulate the custard from heat on the bottom of the pan.  Set 4 eight-ounce or 8 four-ounce ramekins on the towel.  Divide the custard mixture between the ramekins.  Set the baking dish with the ramekins on the shelf of the oven.  Carefully pour hot water in the pan—without splashing water into the ramekins—until the water is halfway up the sides of the ramekins.  Cover the pan with foil.  Bake for 30 to 40 minutes or until the custard is just set.
  5. Let cool in the pan with the water, then remove the ramekins from the baking dish, cover with plastic wrap and refrigerate for 3 hours or until chilled.
  6. Use a paper towel to dab up condensation on the tops of the desserts.  Sprinkle the tops with an even coating of sugar.  Place the rack high in the oven and set the oven to the broiler setting.  The tops of the ramekins should be close to the broiler.
  7. Heat for a few minutes under the broiler, just long enough for the sugar to caramelize.  Serve immediately or return to the refrigerator to chill.

Chocolate Crème Brulee

Chocolate makes a very good crème brulee.  Be sure to use good quality chocolate in this recipe.

Ingredients:

9 large egg yolks

1/4 teaspoon of salt

1/2 cup granulated sugar

1 1/2 cups heavy cream

1 1/2 cup milk

1 teaspoon vanilla extract

2/3 cup (4 ounces) dark chocolate wafers

1/2 cup sugar

Directions:

  1. To make the custard, mix the egg yolks, salt, and the granulated sugar together until they are combined.
  2. Heat the cream and the chocolate in a saucepan on medium heat until it just starts to bubble, not boil, and the chocolate is melted.  Gradually stir in the hot cream and chocolate mixture into the sugar and egg mixture.  Add the vanilla.
  3. Preheat the oven to 350 degrees.
  4. Place a folded towel in the bottom of a baking dish.  The towel will insulate the custard from heat on the bottom of the pan.  Set 4 eight-ounce or 8 four-ounce ramekins on the towel.  Divide the custard mixture between the ramekins.  Set the baking dish with the ramekins on the shelf of the oven.  Carefully pour hot water in the pan—without splashing water into the ramekins—until the water is halfway up the sides of the ramekins.  Cover the pan with foil.  Bake for 30 to 40 minutes or until the custard is just set.
  5. Let cool in the pan with the water, then remove the ramekins from the baking dish, cover with plastic wrap and refrigerate for 3 hours or until chilled.
  6. Use a paper towel to dab up condensation on the tops of the desserts.  Sprinkle the tops with an even coating of sugar.  Place the rack high in the oven and set the oven to the broiler setting.  The tops of the ramekins should be close to the broiler.
  7. Heat for a few minutes under the broiler, just long enough for the sugar to caramelize.  Serve immediately or return to the refrigerator to chill.

Berry Crème Brulee

Adding berries makes a good crème brulee better.  Use this recipe as a template for raspberries, blueberries, or blackberries.

If breaking out a torch to melt the sugar on top seems like too much, don’t worry.  You can finish these in the oven under the broiler.

Ingredients:

9 large egg yolks

1/4 teaspoon of salt

1/2 cup granulated sugar

3 cups heavy cream

1 teaspoon vanilla extract

1 cup fresh berries or individually frozen berries partially thawed

1/2 cup sugar

Directions:

  1. To make the custard, mix the egg yolks, salt, and the granulated sugar together until they are combined.
  2. Heat the cream in a saucepan on medium heat until it just starts to bubble, not boil.  Gradually stir the hot cream into the sugar and egg mixture.  Add the vanilla.  Gently stir in the berries.
  3. Preheat the oven to 350 degrees.
  4. Place a folded towel in the bottom of a baking dish.  The towel will insulate the custard from heat on the bottom of the pan.  Set 4 eight-ounce or 8 four-ounce ramekins on the towel.  Divide the custard mixture between the ramekins.  Set the baking dish with the ramekins on the shelf of the oven.  Carefully pour hot water in the pan—without splashing water into the ramekins—until the water is halfway up the sides of the ramekins.  Cover the pan with foil.  Bake for 30 to 40 minutes or until the custard is just set.
  5. Let cool in the pan with the water, then remove the ramekins from the baking dish, cover with plastic wrap and refrigerate for 3 hours or until chilled.
  6. Use a paper towel to dab up condensation on the tops of the desserts.  Sprinkle the tops with an even coating of sugar.  Place the rack high in the oven and set the oven to the broiler setting.  The tops of the ramekins should be close to the broiler.

Heat for a few minutes under the broiler, just long enough for the sugar to caramelize.  Serve immediately or return to the refrigerator to chill.

Are you having fun yet?

Share
Posted in Blog, Desserts, Recipes, Recipes to Make with Children | Tagged , , | Leave a comment

Cooking with kids again – this time chocolate coconut baby cupcakes – yum!

Share

Chocolate Coconut Baby Cakes

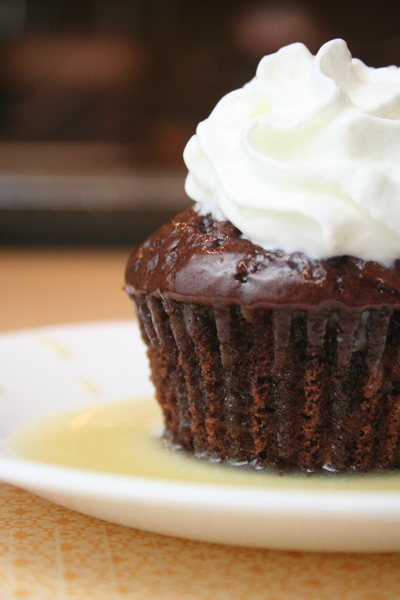
Baby Cakes are cupcakes designed for dessert.  Emphasis is on taste, not design and fancy decorations are not necessary though they should be attractive enough to serve at a dinner party.Chocolate coconut baby cupcakes

We first made these from scratch, little chocolate cupcakes with coconut added and served in a caramel sauce.  The recipe follows.  But a mix is quicker and easier.  We used a Fudgy Baby Cakes Mix.  Instead of making the caramel sauce from scratch, we used a buttermilk syrup mix.  My interpretation of buttermilk syrup is “butterscotch and caramel combined.”

Chocolate Coconut Baby Cakes (Mixes)

  1. Mix a Fudgy Baby Cakes mix and make cupcakes per the package instructions but add 3/4 cup shredded coconut.  There are chocolate pieces in the mix and the combination will be a deep chocolate and coconut combination.
  2. Make a batch of buttermilk syrup.  We added coconut flavor to make a coconut buttermilk syrup but the dessert is great without doing so. A teaspoon and a half of coconut flavor is about right.
  3. After the cupcakes are baked, remove the paper liners and place one cupcake on each dessert plate. Pour warm buttermilk syrup over the cupcakes and top with dollops of      whipped cream.  Serve while the syrup is still warm and before the whipped cream melts.

Chocolate Coconut Baby Cakes (Scratch)

This is straightforward to prepare and fancy enough to serve to guests.

For the cakes:

1 cup butter
4 ounces unsweetened baking chocolate
1 1/2 cup sugar
3 large eggs
2/3 cup milk
1/2 tablespoon baking powder
1 1/2 cup all-purpose flour
1 1/2 cup flaked sweetened coconut

Prepare baking cups by greasing well and flouring the bottoms or use paper liners.  A jumbo muffin pan works well.  Prepared Pantry who is my supplier for many bread machine mixes as well as cake mixes, also offers paper liners for jumbo muffins pans.

Preheat the oven to 350 degrees.

1. In a large mixing bowl, melt the butter and chocolate together in a microwave stirring once or twice.
2. Stir in the sugar until it is dissolved.  Then stir in the eggs one at a time.  Add the milk.
3. Stir in the baking powder and flour.  Finally, fold in the coconut.
4. Spoon the batter in the prepared cups.
5. Bake for 23 to 28 minutes depending on the size of the baking cups.  A toothpick inserted in the center of the cake should come out clean when done.  Cool on wire racks.

Serve with Caramel Sauce.

Caramel Sauce ( this is completely irresistable – and frankly, I just love to eat it with a spoon!)

1 12-ounce can of evaporated milk
1 1/4 cup brown sugar
6 tablespoons butter
1 teaspoon vanilla extract

Mix all the ingredients except the extract in a heavy saucepan.  Heat over medium heat, stirring often, until the mixture boils.  Gently boil for eight to ten minutes or until the mixture thickens.  Remove from the heat and stir in the extract.  Cool until the sauce thickens to serving consistency.

Share
Posted in Blog, Desserts, Recipes to Make with Children | Tagged , , , , , | Leave a comment

Spudnuts – ridiculously divine – certainly not low cal – but a treat for once in a long while…

Share

SpudnutSundae Prepared PantrySpudnuts always seem a little indulgent but they sure are good—much better than donuts.  We used a Spudnut mix which we bought from Prepared Pantry, and cooked both the donuts and the donut holes—with  extra donut holes for our sundaes.

We read of a restaurant that soaked donuts holes in maple syrup.  Why not glaze donuts in syrup?  Would it work?

We’re awash with buttermilk syrup these days and we’ve been tinkering with variations, adding flavors to the syrup.  So far, maple and coconut are our favorites—and they are very, very good.  So we decided to try all three—regular buttermilk, coconut, and maple–as a glaze.

We dipped donuts and holes in buttermilk syrup warmed in the microwave.  That was a mistake; the syrup was too thin and we didn’t get enough coating.  After that, we used only room temperature syrup. Even then, we double dipped to get more coating.

It worked.  The donuts were very good.

We were afraid that the donuts would be too sticky to eat with our hands.  They were sticky, but not much more so than those glazed with a powdered sugar icing.  The donuts seemed to absorb some of the moisture and of course, they dried a bit.

We could see why the restaurant soaked theirs in the syrup—it made the syrup dominant.  But a lighter coating of syrup was just right for us—not too sweet while the soaked ones were too sweet.  With a thin coating, it was difficult to pick up the tones of butterscotch and caramel that makes buttermilk syrup so delightful.  But the donuts were very good.  We glazed some of the donuts in the other syrups and liked the buttermilk maple syrup better and the buttermilk coconut syrup the best.

But on to our sundaes . . . .  Here’s how to make them:

  1. Load glazed Spudnut holes in bowls.
  2. Scoop ice cream on top of the Spudnut holes.
  3. Drizzle warm buttermilk syrup over the ice cream and onto the Spudnut holes.
  4. Sprinkle salt crystals over the syrup.  The crunch of salt and the bursts of flavor are a nice contrasting touch.  Use Himalayan Pink Salt Crystals or something similar.
  5. Place a dollop of whipped cream on top.  If you like, use Caramel Whipped Cream.

These make great sundaes.  Of course you can try different ice creams and syrups or make banana splits.  The glazed donut holes absolutely make these desserts.

The kids will LOVE them!

Share
Posted in Blog, Desserts, Other wonderful treats | Tagged , , | Leave a comment

Why not have eggnog at other times of year? Its so delicious – try eggnog cupcakes!

Share

To Make the Eggnog Cupcakes: From our affiliate partner THE PREPARED PANTRY from whom I buy all my bread mixes and some of these specialty ones too! Try them – they are amazing! By clicking on any of the links in this article – you will arrive at the Prepared Pantry’s webpage.

We’re using the Vanilla Bean Baby Cakes and adding eggnog to both the mix and the frosting.  Pretty simple.  Could you use a white cake mix from the store?  I think so but I don’t think the cheap mixes would work quite as well.  Most of those are really light and airy, not much substance.  The frosting and the cream filling tends to overwhelm the light cake—not enough balance.  The baby cakes mix is a cream cake mix, denser and moister.  You get more cake in each bite.  But I don’t think the store mixes would be bad.  If you go that way, reduce the amount of frosting and filling that you use.

This mix makes 18 cupcakes.  You’ll have frosting and Bavarian cream left over for your next project. You will need:

Vanilla Bean Baby Cakes Cake Mix Bavarian Cream (comes in a two-pound dispenser pack) Sweet Sensations Vanilla Buttercream Frosting Mix or your favorite buttercream frosting recipe Butter rum flavor Ground nutmeg

Eggnog

For the cupcakes:

  1. Make the cake mix per directions except substitute eggnog for water.
  2. Add four teaspoons of butter rum flavor and two teaspoons of ground nutmeg.
  3. Bake as directed.

For the filling:

  1. Cut a 1/4-inch corner off the dispenser pack of Bavarian cream.  Insert the cut corner into the center of the cupcake to a depth of about 1/2-inch.
  2. Squeeze the dispenser bag so that the Bavarian cream flows from the bag into the cupcake.  You will feel the cupcake swell and get heavier. (There is no need to cut a slit or core the cupcake.)  Repeat with the other cupcakes.  When you frost the cupcakes, you will cover the holes.  See how to fill cupcakes this way.  Store your leftover filling in the refrigerator.

For the frosting:

  1. Make the frosting per the directions on the package but substitute eggnog for the water.
  2. Add two teaspoons of butter rum flavor and one teaspoon of nutmeg.

Frost the cupcakes with a pastry bag or spread a thick layer of frosting on the cupcakes with knife.

To Make the Peanut Butter Fudge Cupcakes:

We’re using Fudgy Baby Cakes but substituting crunchy peanut butter for the oil called for in the directions.  We’re making the cake according to package instructions but it needs to bake a minute or so longer.

For the frosting, we’re mixing 1/2 cup crunchy peanut butter to 1 1/2 cups Sweet Sensations Fudgy Chocolate Frosting.

Could you use a chocolate cake mix from the store?  I don’t think so, at least not the cheap mixes.  I don’t think your cheap mixes will hold up to that much peanut butter.  The fudgy Baby Cakes mix has a ton of little chocolate pieces in the batter.  With the peanut butter and the chocolate pieces in the batter, these come out almost like brownies.  (They’re darned scrumptious without any frosting.)

Can you use another frosting?  Yes, I think you can take any thick, fudgy frosting and add peanut butter.  We’ve mixed peanut butter into ganache before with fantastic results.  To make ganache, melt really good chocolate wafers and stir in a little cream to reach the right consistency.  But this frosting is darned good.

Where’s the Breakthrough?

We thought it was great that you could substitute eggnog for the water in both the cake mix and the frosting.  It made us wonder what else we might substitute for water.

It’s pretty neat that you can substitute peanut butter for the oil in the cake mix—at least in this cake mix.

So try something different this weekend when cooking with kids. They will love it!

Share
Posted in Blog, Desserts, Recipes, Recipes to Make with Children | Tagged , , , , | Leave a comment

Quick Weekday Salmon – easy to cook with kids

Share

Salmon is nutritious on many levels – that wonderful omega fish oil, low in calories and tasty too! Wild salmon is best, but farmed salmon is still more nutritious than eating fast food or deep fried options. This recipe is so simple that you can pull the whole meal together in 45 minutes – just the trick during the week when everyone is in a hurry and tired from work or school with lots of homework to get done.Salmon raw

Ingredients:

  • 2 lbs of raw salmon filet ( for 6 people )
  • 1/2 cup of Panko Bread Crumbs
  • 1/3 Cup of Mixed fresh or dried herbs ( I used basil, thyme, Italian parsley and sage – and below is a picture of our grandson helping me pick the herbs from our Little Farm)Jack in LF Tomato Patch
  • 4 tbsp of olive oil
  • Salt and pepper to taste

Directions:

  1. Heat the oven to 395 degrees
  2. Drizzle some olive oil in a baking pan which has sides
  3. Place the salmon lightly seasoned into the pan
  4. Chop the mixed herbs and sprinkle them over the top of the salmon filet
  5. Then sprinkle the bread crumbs over the salmon covering all of one side
  6. Drizzle the olive oil over the breadcrumbed herbed salmon
  7. Cook for 10 minutes at 395 degrees then increase the heat to broil and broil the salmon carefully  until the breadcrumbs brown – depending on your oven it could be another 10 minutes or less. The fish should be cooked through but not dry – some prefer the fish rare inside – we don’t – but if you do – cook it for less time at 395 degrees and less time under the broiler too.
  8. Serve with a green salad and steamed rice.
Share
Posted in Blog, Fish, Recipes, Recipes to Make with Children, Rice, Salad | Tagged , , , , , | Leave a comment

Cooking with kids – CATHEAD BISCUITS! A recipe from the old south but quick and easy!

Share

Cathead Biscuits: Easy Biscuits in the Oven or on the Stovetop

Because you don’t have to roll the dough and cut  the biscuits, drop biscuits are faster than cut biscuits.

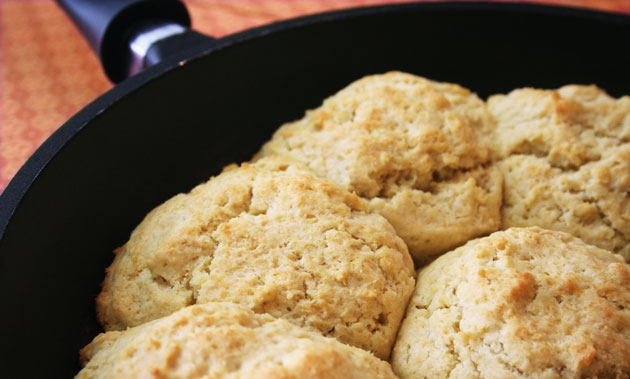
This recipe filled an 11-inch skillet perfectly and made nine biscuits three to four inches across—the size of a cat’s head.CatheadBiscuits

Hence the name! The kids LOVED this whole idea.

Add all the dry ingredients  in a bowl, add melted butter and shortening to the cold milk, and then stir  the milk mixture into the dry ingredients. To bake, melt butter in a nonstick skillet  (a cast iron skillet that is well seasoned will work). Use a lever-type ice cream scoop to  quickly drop big mounds of batter about a half-inch apart into the pan with the  melted butter.

 We even used M&M’s to make some eyes on the biscuits ( pressed them on when they were fully cooked – if you do it before they will melt!)

Ingredients:

  •  2 cups plus 2 tablespoons all-purpose flour
  • 2 teaspoons baking powder
  • 1/2 teaspoon baking soda
  • 3/4 teaspoon salt
  • 1 teaspoon sugar
  • 2 tablespoons dry  buttermilk
  • 1 cup cold milk
  • 4 tablespoons butter and four tablespoons shortening, melted together but  cooled to warm (still liquid)

Directions:      

Preheat the oven to 425 degrees.

  1. In a large bowl, whisk the flour, baking powder, baking soda, salt, sugar, and       buttermilk powder together.
  2. Pour the melted fats into the cold milk, whisking until the fat solidifies and the       milk looks curdled.
  3. Make a well in the dry ingredients and pour in the liquid mixture. Stir with a fork just until the batter clumps and form a wet mound in the bottom of the bowl.
  4. Using a  1/4 cup (2-inch diameter) ice cream scoop (4 ounce), scoop the batter from       the bowl onto the hot frying pan, leaving just enough distance between the  biscuits for expansion. The mounds should be about 1 1/2-inchs high.
  5. Bake just until the tops of the biscuits are golden brown, ten to twelve minutes. (Baking times will vary with different pans.) Remove the pan from the oven and place it on a rack.
  6. After a few minutes, remove the biscuits to racks to cool and serve while still hot.

We serve this with our home made grapefruit marmalade, or jujube jam, or even blackberry jam. So many options – so little time!

Share
Posted in Blog, Desserts, Jams, Recipes, Recipes to Make with Children, Snacks | Tagged , , , , , , , | Leave a comment

Pocket Sandwiches – cooking with kids – easy for them or you to make for lunches!

Share

Call them hot pocket sandwiches, pastries, piroshki, or calzones (though calzones are pizzas in a pocket, made with Italian spices and red sauce).   They are very good and easier than you may think.

There are three ways to make hot pocket sandwiches: with pastry dough, with bread dough, or with biscuit dough.  You can use a dough press to quickly form your sandwiches if you are using bread pastry dough.  If you are using biscuit dough, you’ll need to free form your sandwiches; a dough press doesn’t work well.

You can use a mix—a pie crust mix, pizza dough mix, or a biscuit mix— and your pocket sandwiches will be ready for the oven in minutes.  Of course, you can make your dough from scratch but it takes longer.  And bread dough is a little more difficult to work with because of the stretch and springback inherent in most bread doughs.  Pizza dough mixes usually have a dough relaxer so that the dough is softer and easier to work with.  You can buy your own dough relaxer and add it to your bread dough to make pocket sandwiches and pizza crusts.

It’s easy to make great pocket sandwiches with pie crust dough. Roll out the dough then use the dough press to cut the circles, fill the pockets, and seal them.  The back of the dough press is the cutter, the press is bowl shaped for easy filling, and the two halves press together to seal.  It just takes a few moments.

Preheat the oven to 375 degrees.

  1. Divide the dough in half and return one half to the refrigerator to keep it cold. Roll the dough out on a floured counter to a thickness of 1/4-inch. Cut the dough into twelve 6-inch rounds. Place a round in the floured dough press. Place three tablespoons of the filling on the round. Brush water along the edges of the round so that it seals better.  Close the dough press firmly to seal the edges of the pastry. Continue with the rest of the rounds and filling.
  2. Place the completed pocket sandwiches on a greased baking sheet. Poke a few holes in the pocket sandwiches with the tines of a fork to vent the pocket sandwiches. Brush with a beaten egg.
  3. Bake for 20 minutes or until they are golden brown.

It’s also easy with pizza dough or bread dough.  Use exactly the same directions as above.  The baking time and temperature will be the same.  In some cases, we have found that sandwiches made with bread dough are a little drier and so we’ve added an extra half-cup of water to our filling.

It’s easy but a little different with a biscuit mix.  Instead of using a dough press, shape the sandwiches with your hands.  Here’s how to do it:

Preheat the oven to 425 degrees. Grease a baking sheet.

  1. Mix the biscuit dough. If you use our just-add-water biscuit mix, that’s simple.
  2. Form the biscuits. Roll the dough to a thickness of 3/8-inch. Use a small bowl to cut circles four inches in diameter.
  3. Fill the biscuit pockets. Spread mustard, mayonnaise or a sandwich spread on half of the circles. Place cheese and meat on the rest of the circles. Brush a little water on the edges of these circles—it helps with sealing.
  4. Complete the pockets. Lay a circle of dough over the top of a circle with meat and cheese. Pinch the edges tightly together to seal the filling in.
  5. Bake the pockets. Place each pocket on the prepared sheet and press the pocket into a flat disc (about 3/4-inch thick) with your hand. (If your pockets are thicker than this, they bake too slowly.) Bake for 12 to 14 minutes or until the pockets begin to brown. Remove the pockets from the baking sheet and place them on a wire rack. Serve hot.

Filling Recipes

Turkey & Cheese

This is our recipe for Turkey and cheese pocket sandwiches.  It will make about 12 sandwiches so you may want to cut the recipe in half.  Extras can be frozen.

1 1/2 cups cubed turkey ( thick sliced smoked or roasted is best) , 1 inch pieces 1 1/2 cups cubed cheddar cheese 6 teaspoons mustard

We much prefer using whipped mustard.  Any sandwich spreads are good.

Ground Turkey and Cheese

Again, this makes about 12 sandwiches.

1 lb ground turkey 1/2 cup diced onion 2 tablespoon butter 3/4 cup water 1/2 teaspoon garlic powder 1/2 teaspoon salt 1/4 teaspoon pepper 2 tablespoons flour 3 tablespoons fresh parsley or 1 tablespoon dried 1 cup grated cheese

  1. Melt butter in skillet. Brown ground turkey in butter, then add diced onion and cook until onion is tender.
  2. Sprinkle on flour, garlic powder, salt and pepper.
  3. Stir in water and parsley, cook for a minute until thickened. Set aside.

Beef and Onion

1 pound ground beef 1 large onion, finely chopped 1 tablespoon flour 1/2 cup water or broth 3 tablespoons sour cream 2 hard-boiled eggs, chopped 3 tablespoons fresh dill, chopped salt black pepper 1 egg, lightly beaten, for glazing

  1. Brown the meat in a skillet.  Add the onion and sauté for ten minutes or until the meat and onions are cooked.
  2. Sprinkle flour over the meat mixture and continue cooking for one more minute to gelatinize the flour.  Add the water to create an in-the-pan sauce.
  3. Add the sour cream, stir to blend, and then remove from the heat.  Add the chopped eggs, dill, and salt and pepper to taste.  Set aside.

What you’ll need

  • Meats and cheese for the filling.
  • Biscuit mix (if you are not baking from scratch)
  • Pastry knife (if you are baking from scratch)
  • Sandwich spreads.  (Our new whipped mustard spreads are exceptional)

I have an affiliate relationship with The Prepared Pantry who provide all the mixes referred to in this article – enjoy!

Share
Posted in Blog, Cheese, Family, Meat, Poultry, Recipes, Recipes to Make with Children | Tagged , , , , , , , , | Leave a comment