Chicken Thighs with a lovely lemony garlic sauce – great for cooking with kids!

Share

Chicken Thighs with a Lovely Lemony Garlic Sauce – easy for Cooking with Kids – fairly low in calories and quick and easy.

Chicken thighs are becoming more popular – before most folks went for the breasts – supposedly lower in fat etc but I find that the thighs are so much more tasty – so I combine the two. This recipe is for thighs only – but you could combine them if you wish.

Ingredients

  • 4  chicken thighs, skinned
  • 1 tablespoon all-purpose flour
  • Your choice of dried or chopped fresh  herbs – oregano works well but so does thyme or just some seasoned salt/pepper blend – my advice is to LEAVE out salt – since the broth/breadcrumbs/capers have salt and no more is needed
  • 1  large egg, lightly beaten
  • 1/2 cup Panko breadcrumbs ( they are the very best)
  • 2 teaspoons olive oil
  • 1/2 cup chicken broth
  • 1/2 cup white wine
  • 2 tablespoons fresh lemon juice
  • 2  garlic cloves, minced
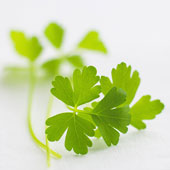
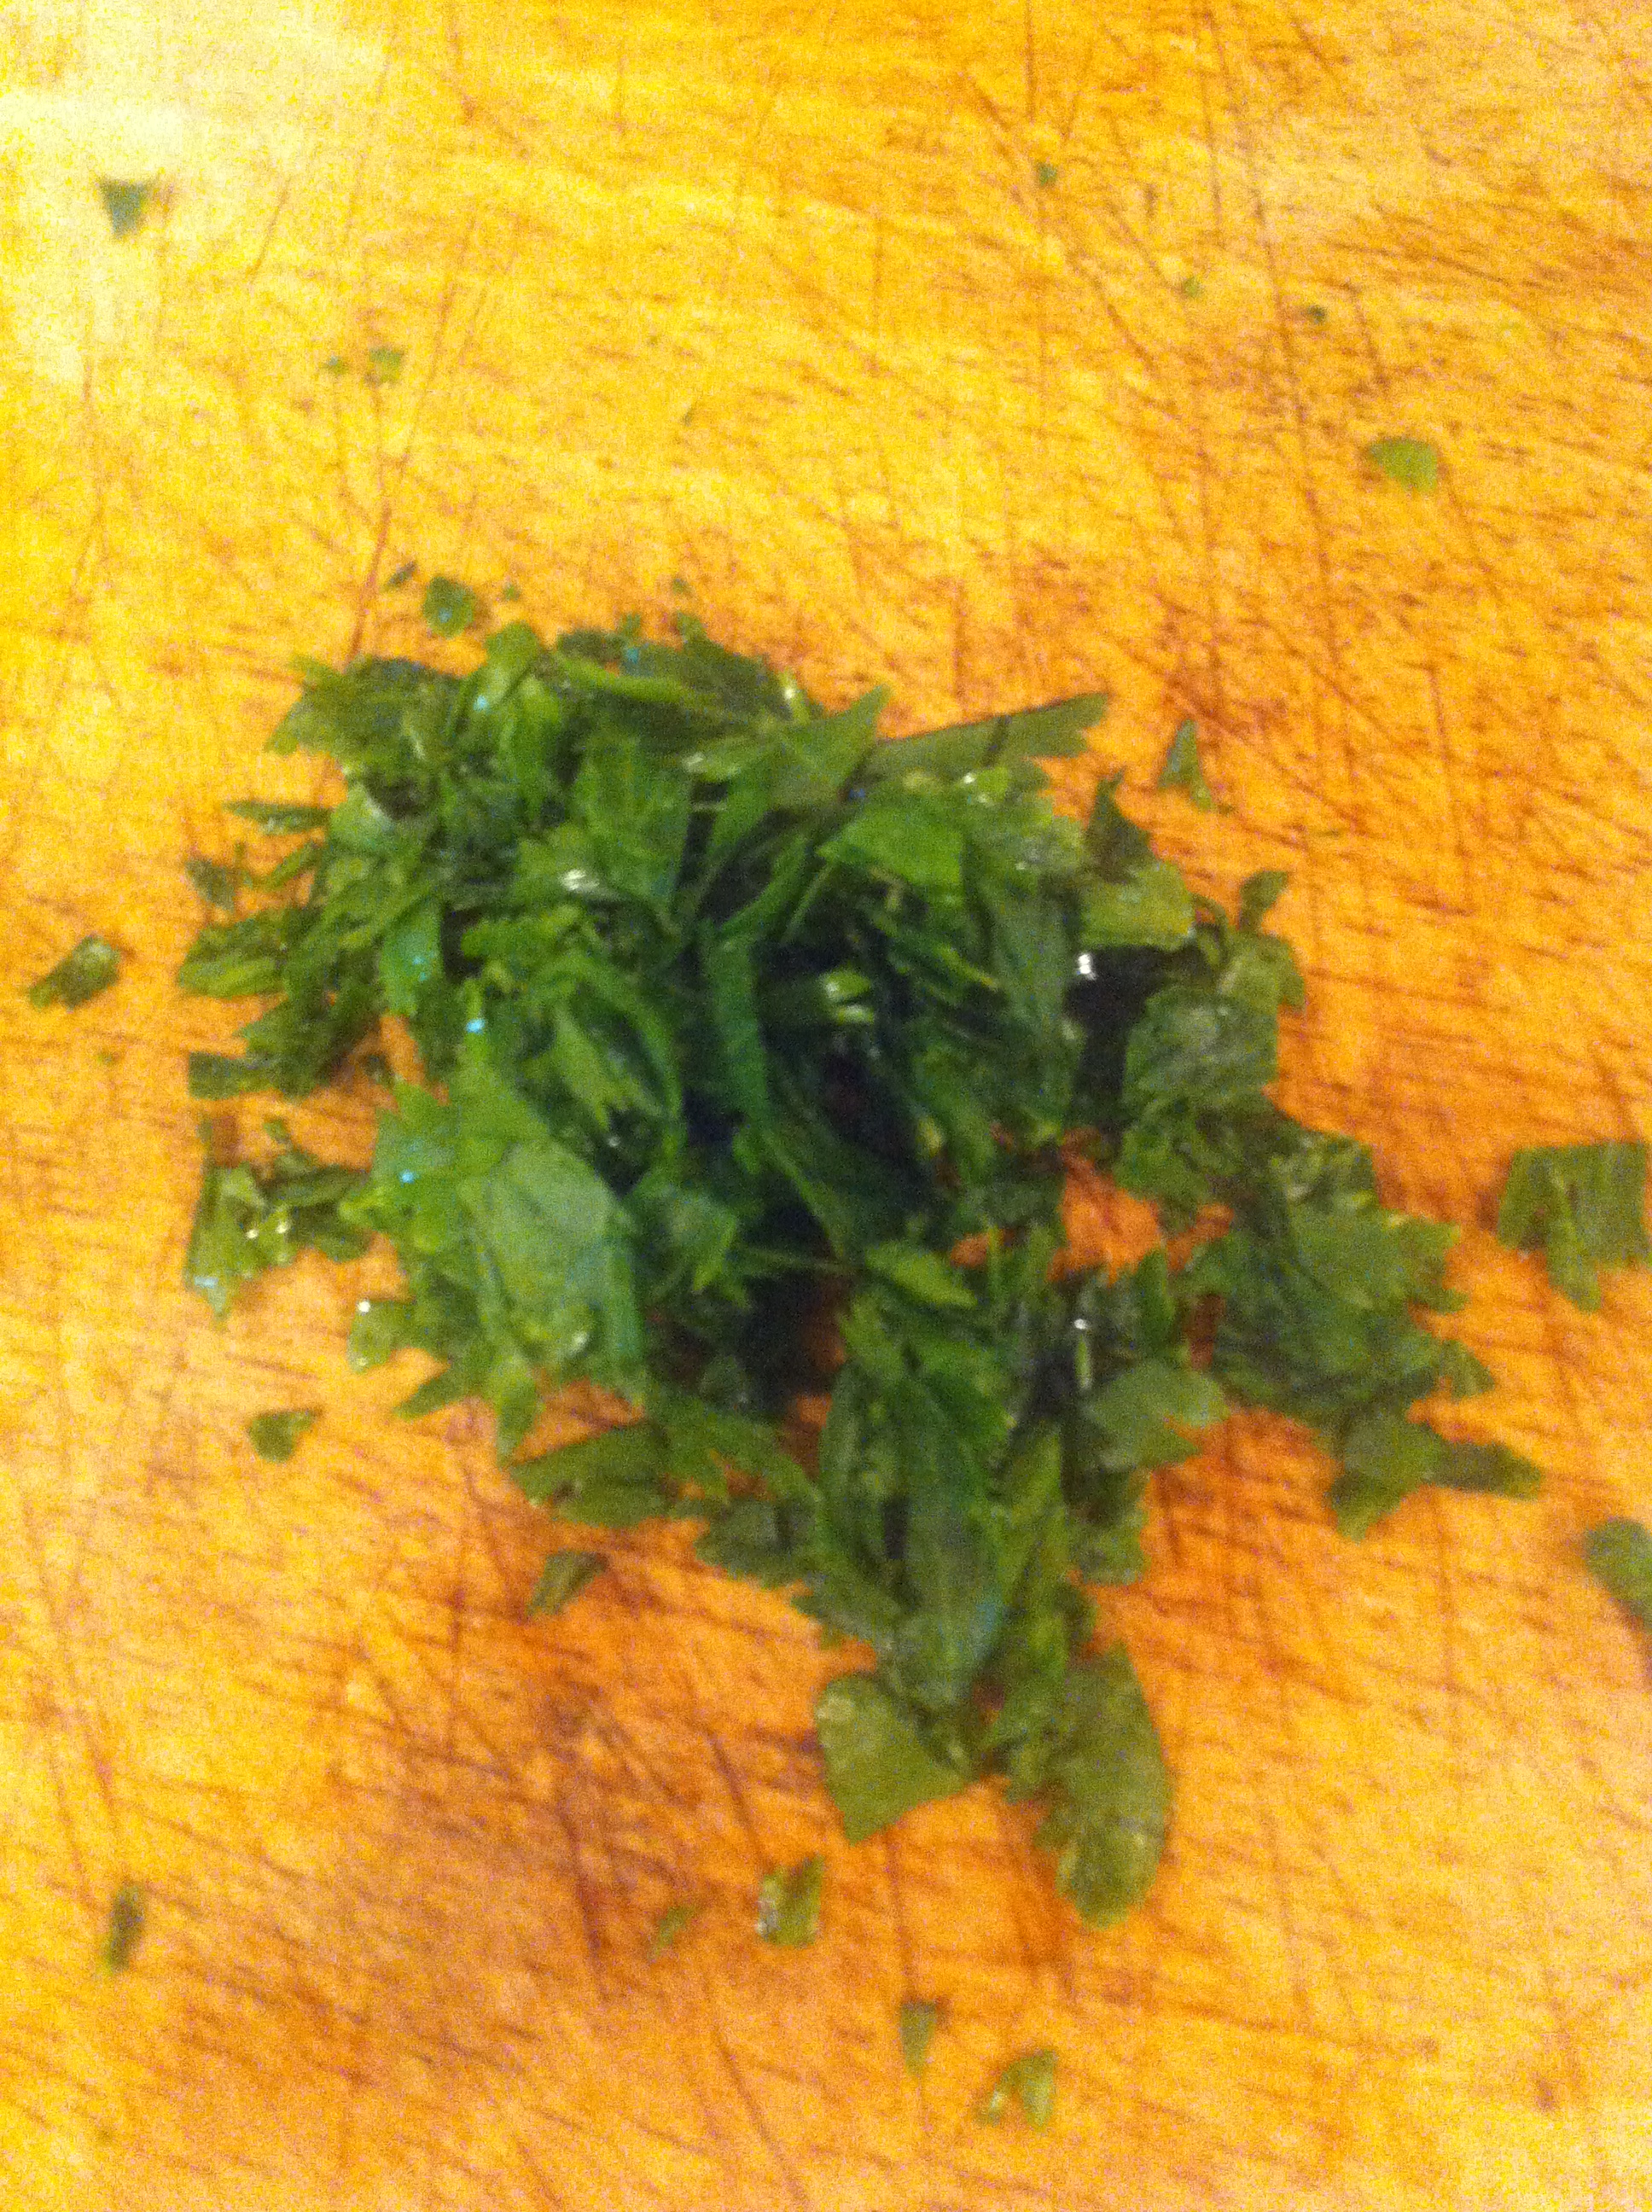
  • 2 tablespoons chopped fresh Italian parsley
  • 1 tablespoon capers or black kalamata pitted olives chopped, drained
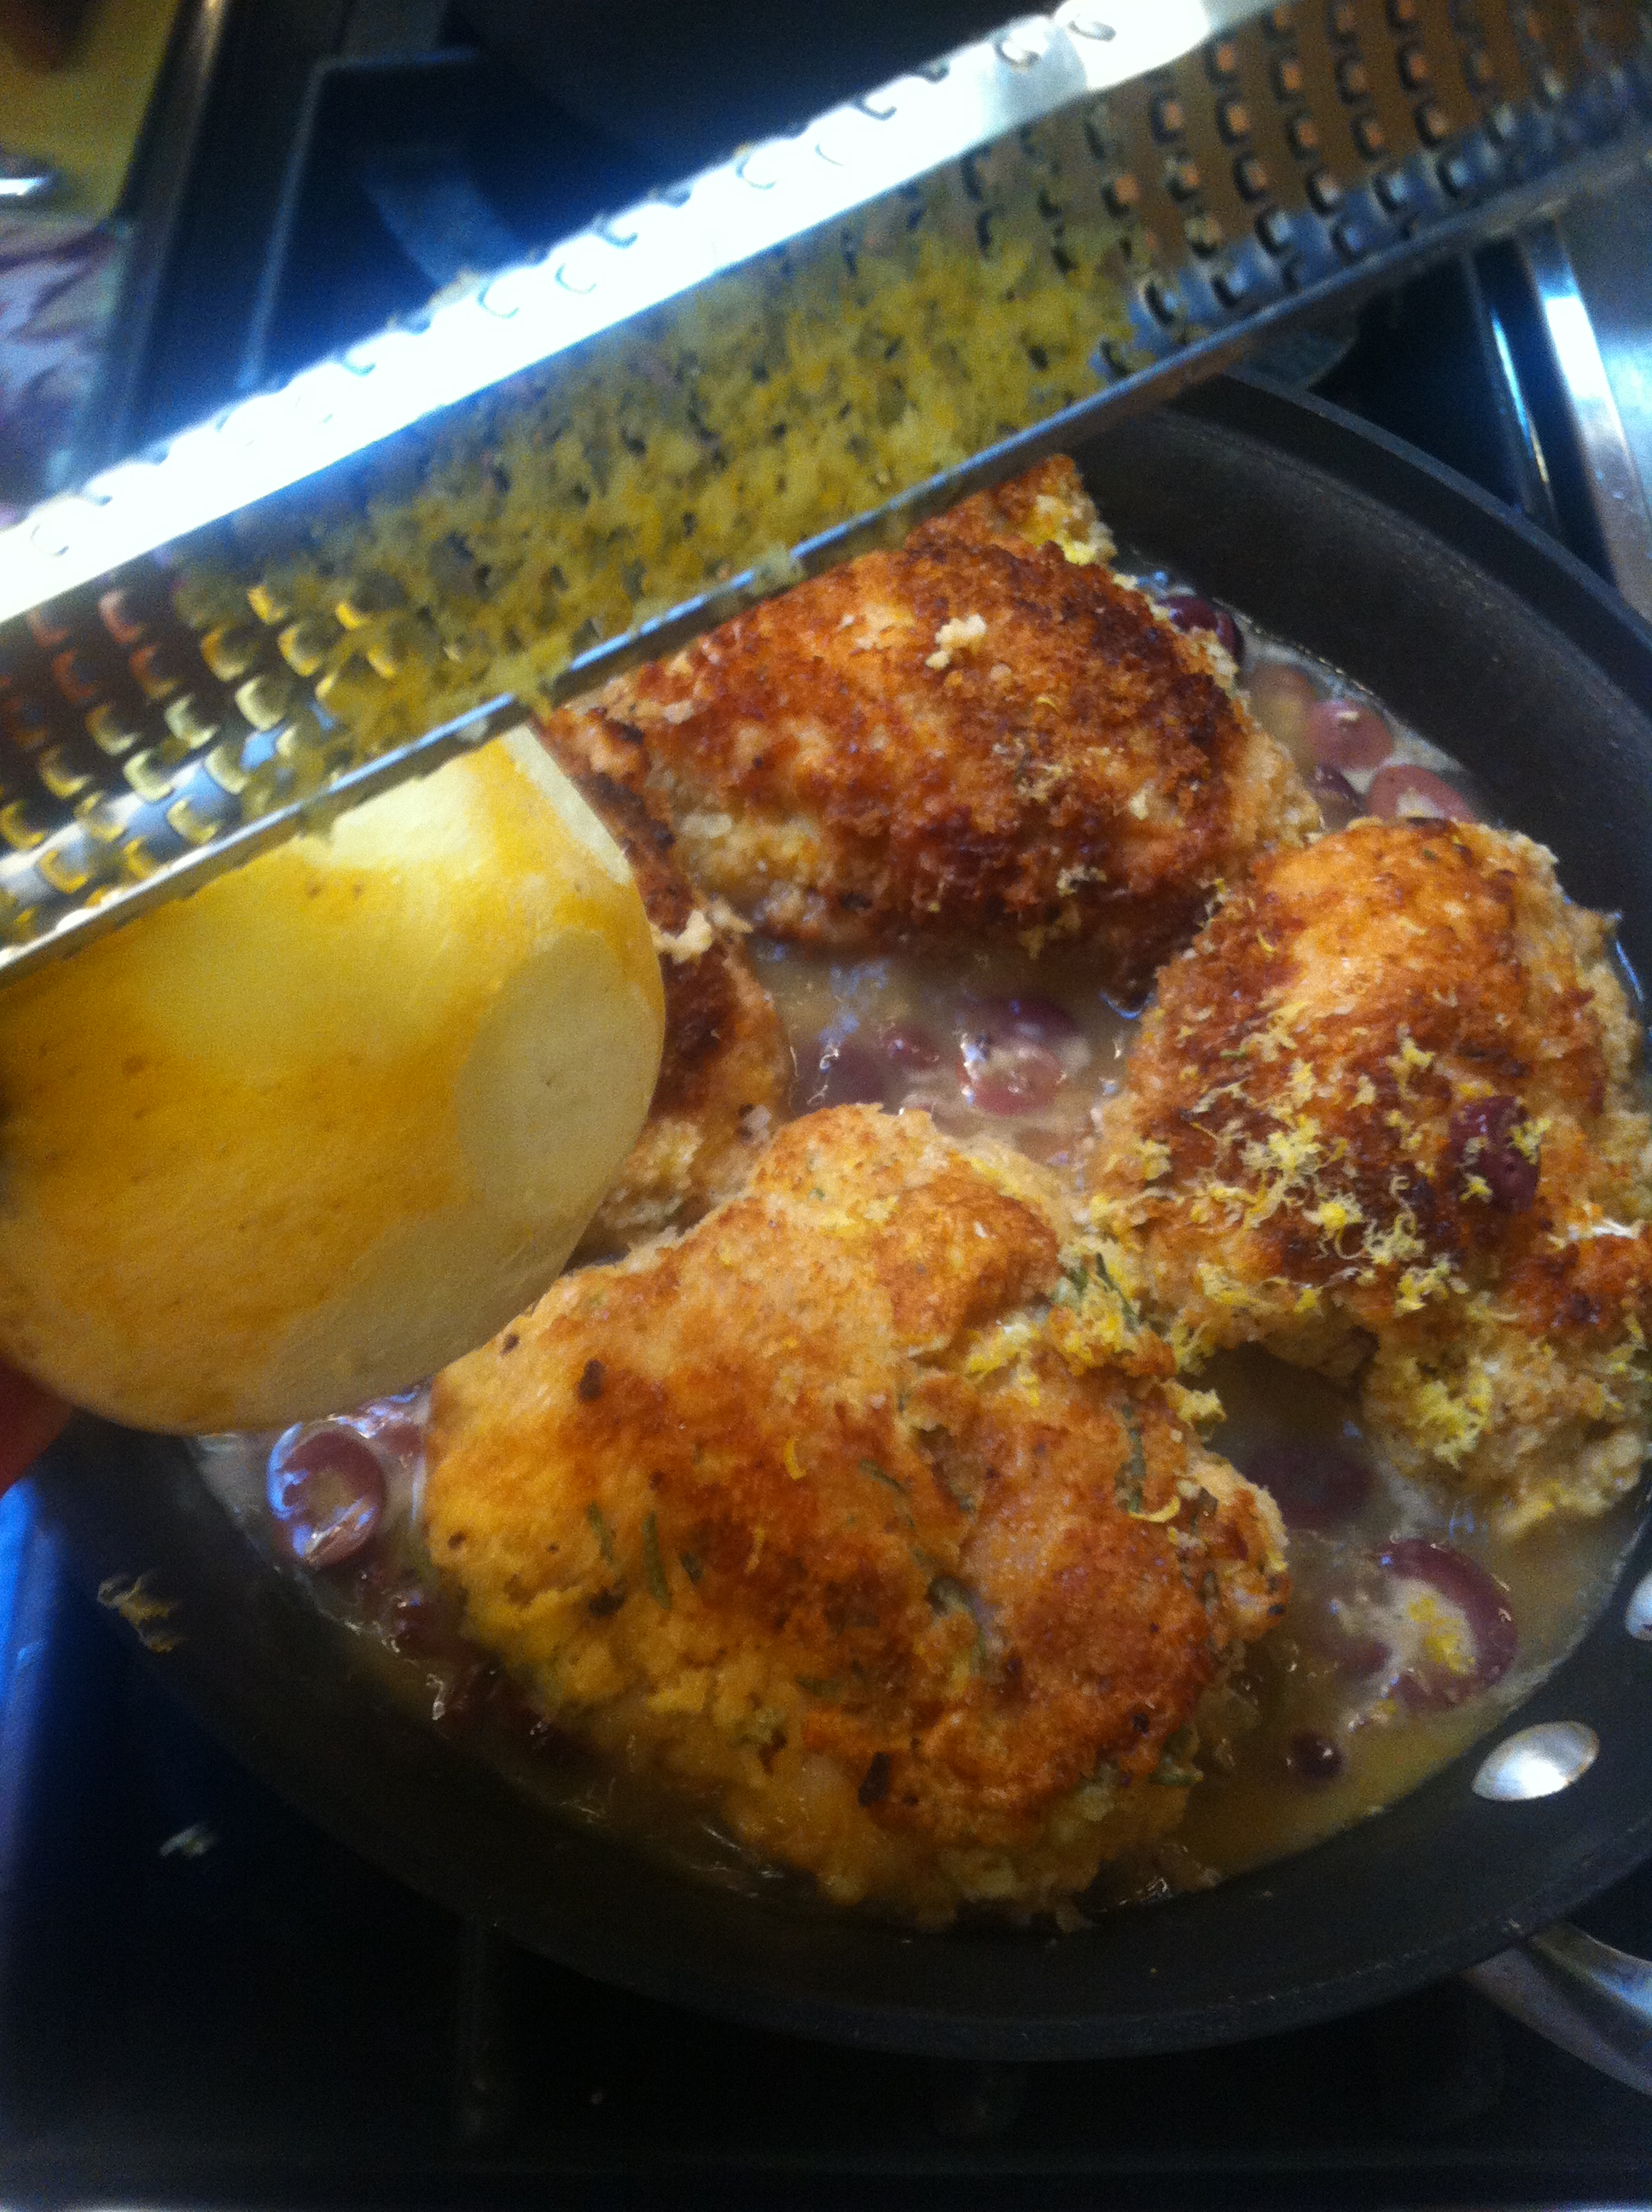
  •  Grated lemon rind – or if you following my tips – you will have a couple of frozen lemons and you can grate some of the WHOLE lemon for serving and return the rest of it to the freezer!

Directions

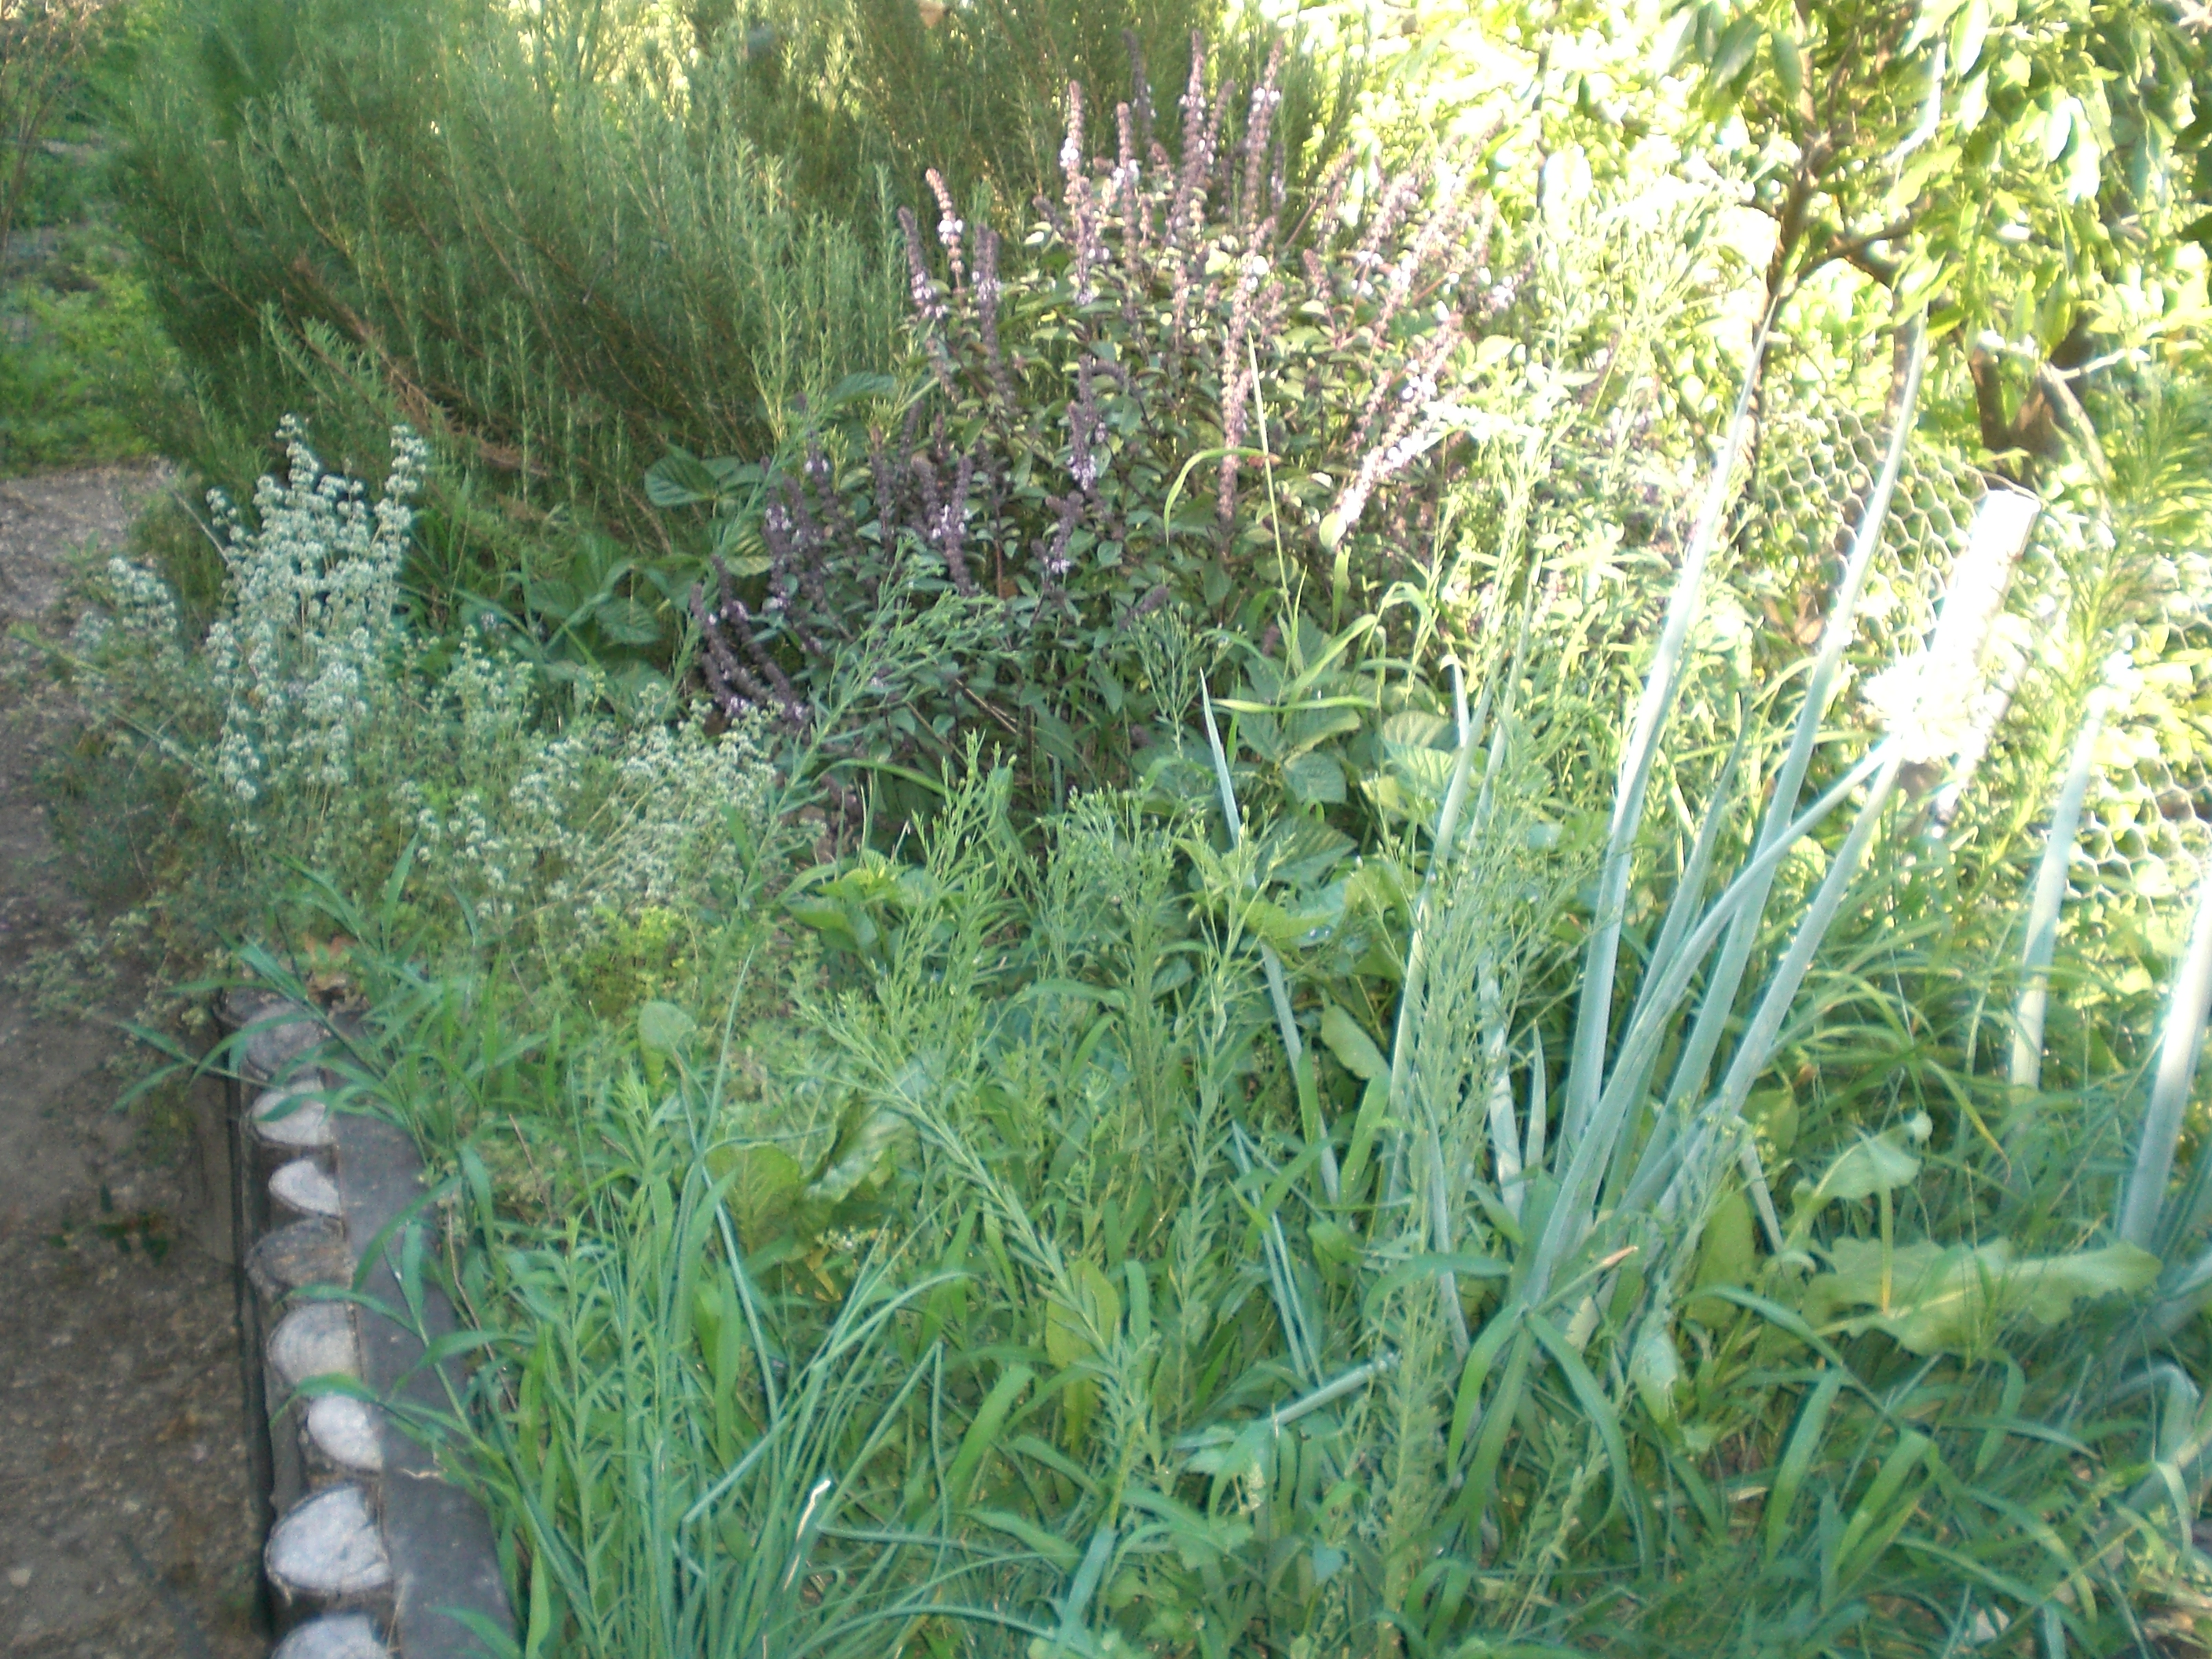
  1. Place chicken in a plastic bag; add flour, and whatever seasonings you like – salt or pepper or dried herbs like marjoram or oregano. Below is organic black basil, marjoram and rosemary growing in our Little Farm.
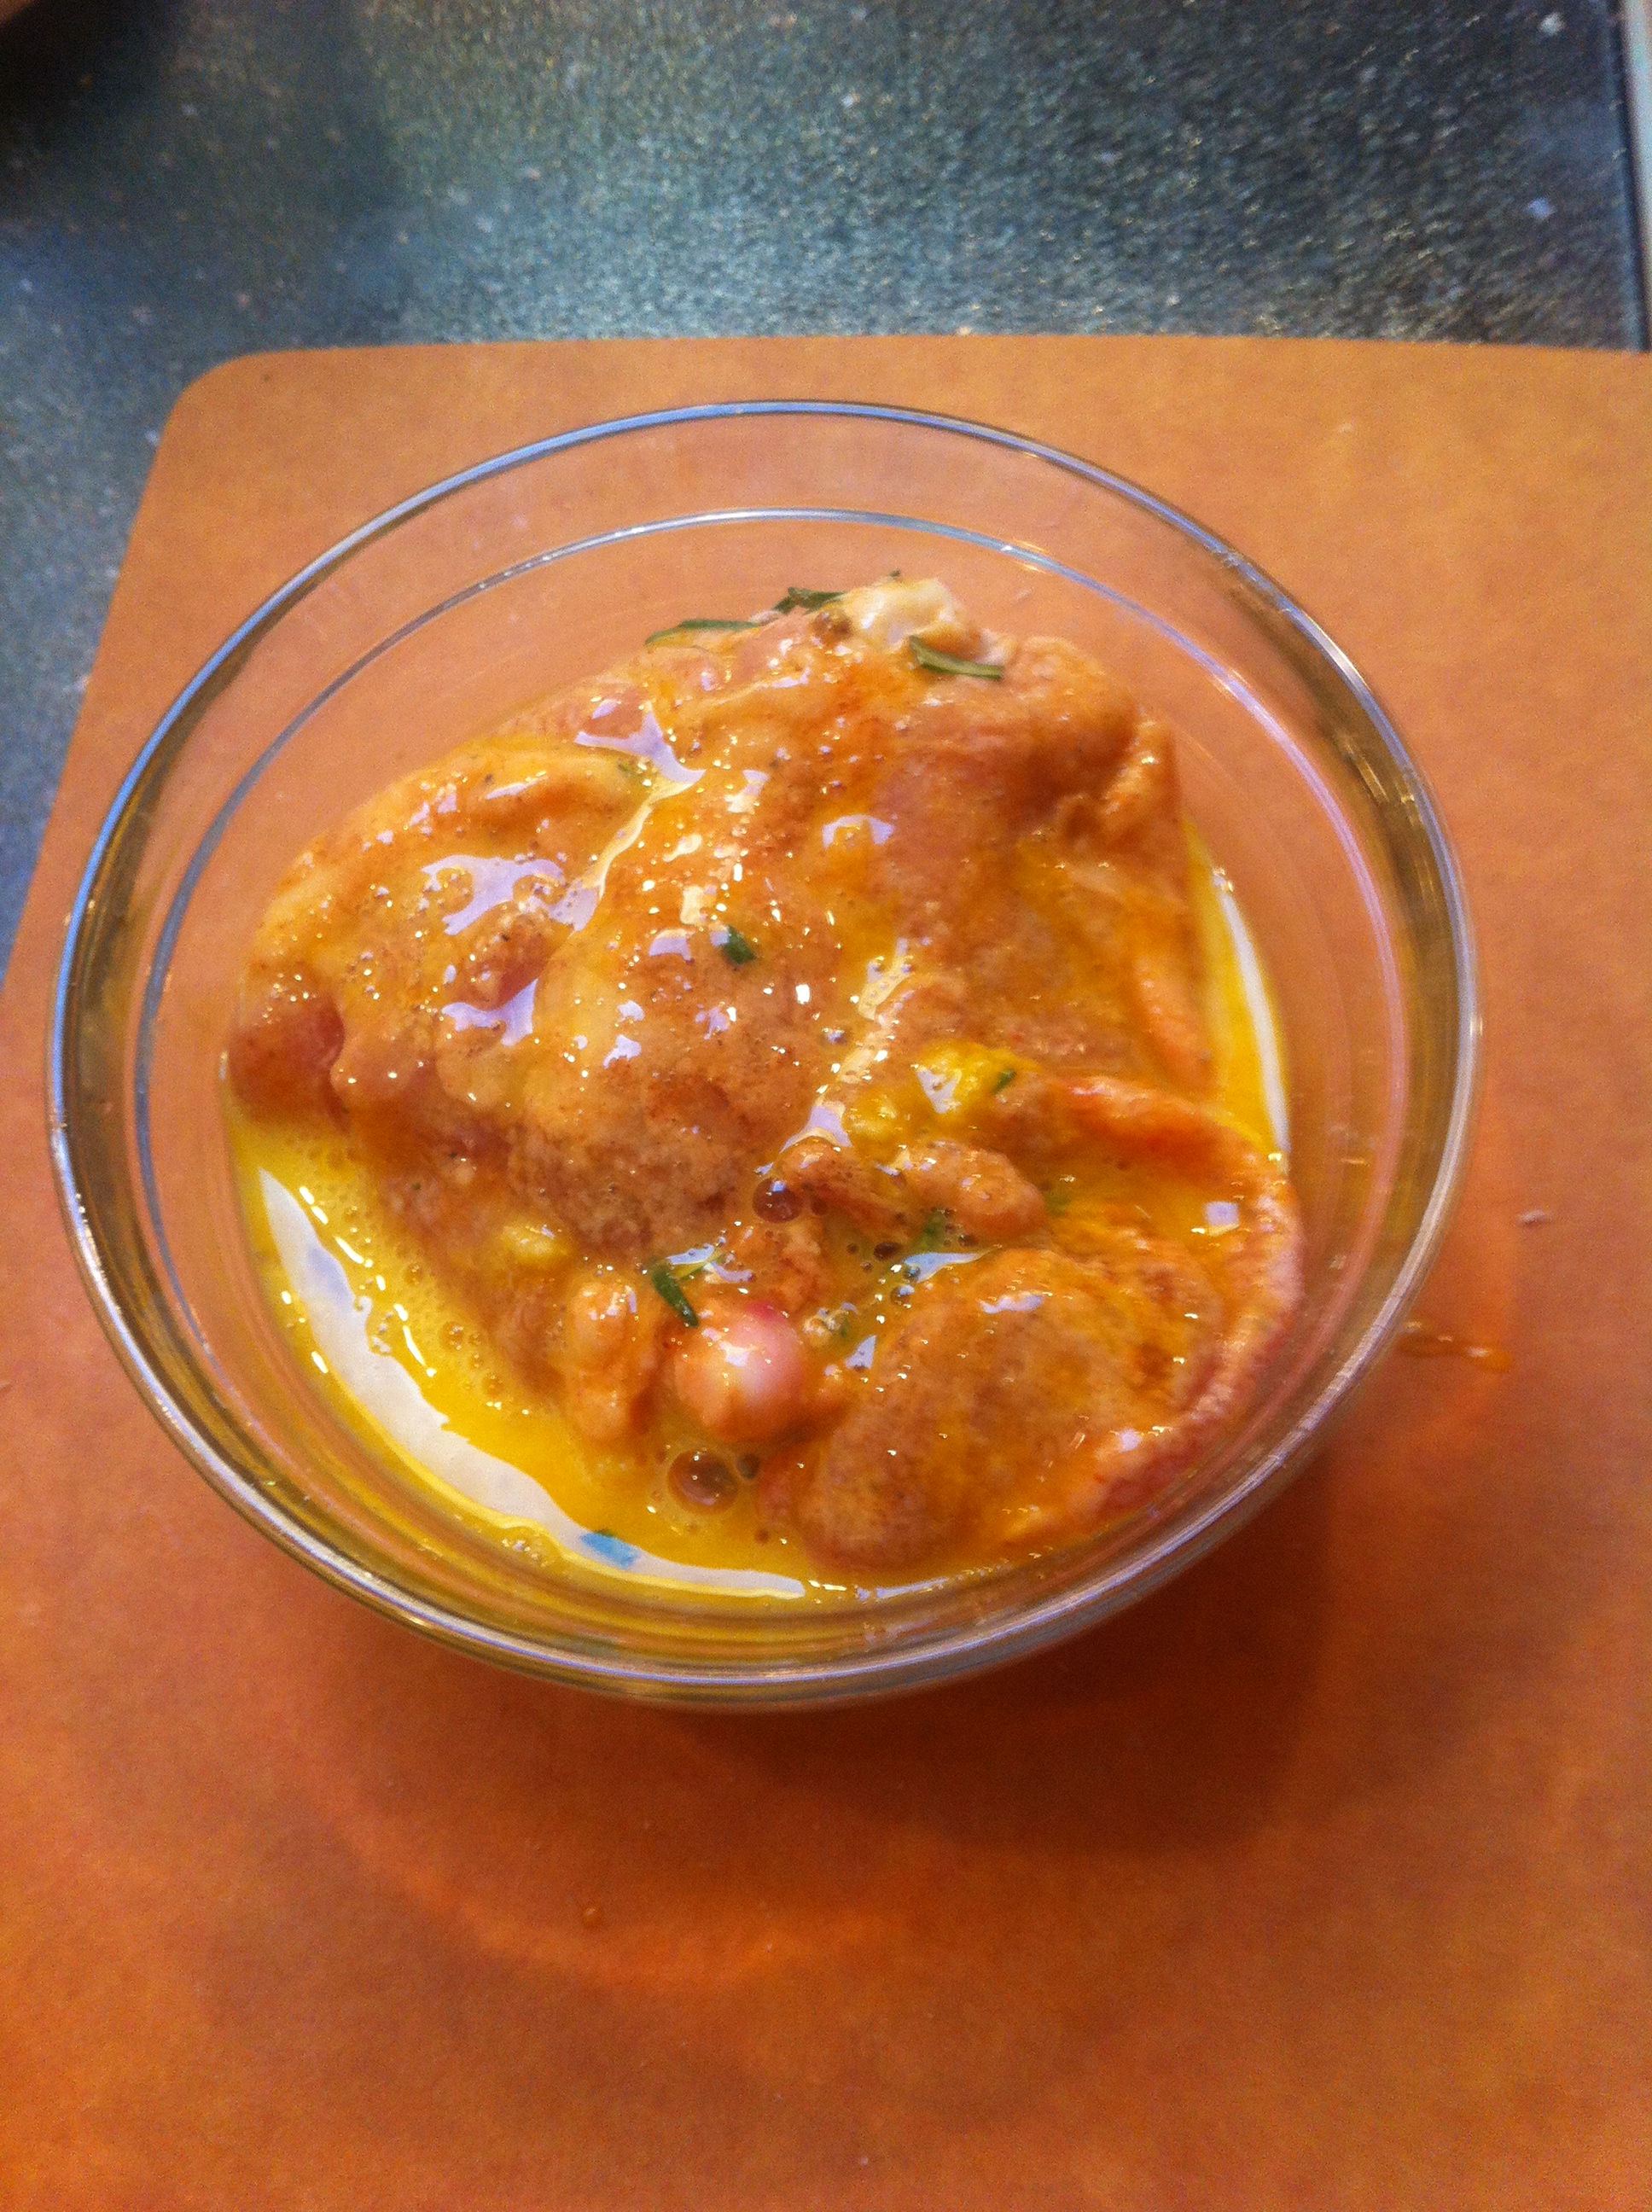
  2. Seal bag, and shake to coat chicken. Here is what mine looked like. I added chopped rosemary.
  3. Whisk the egg gently in a shallow dish.
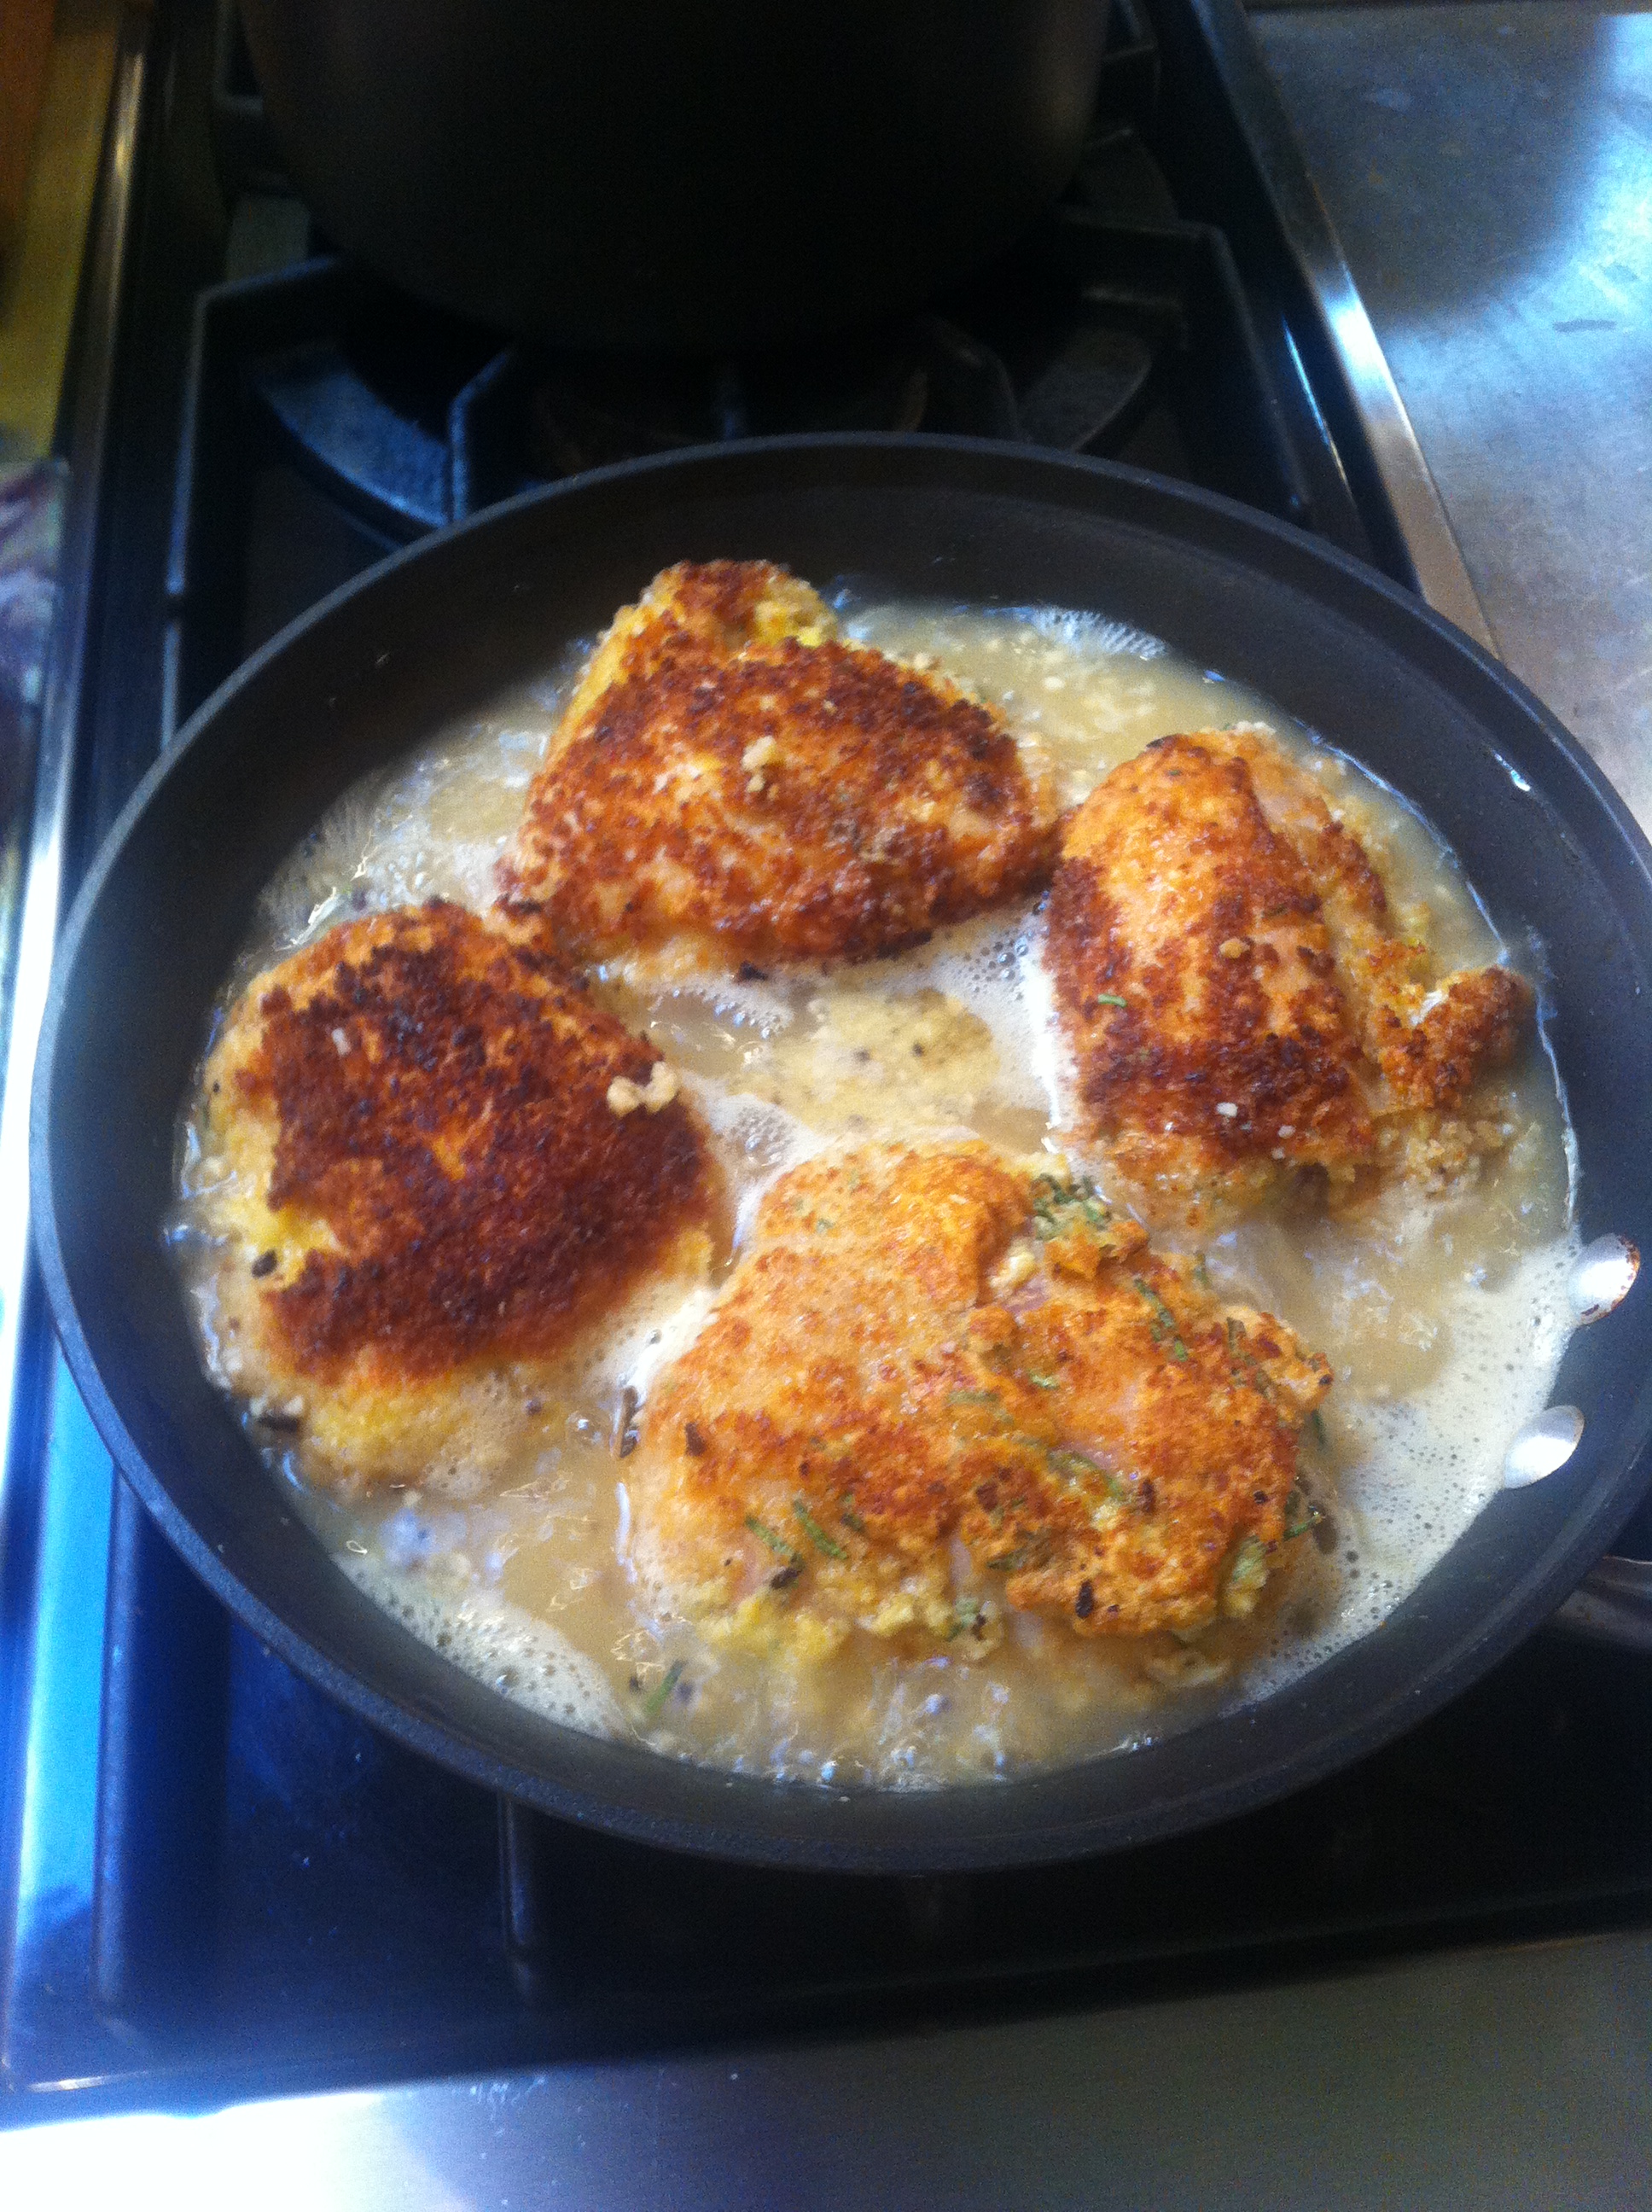
  4. Dip each piece in egg white mixture, and dredge in breadcrumbs. Here is what mine looked like!
  5. Heat oil in a large nonstick skillet over medium-high heat.
  6. Cook the chicken for about 5 minutes on each side or until browned.
  7. Add broth, wine, lemon juice, and garlic to pan; bring to a boil.
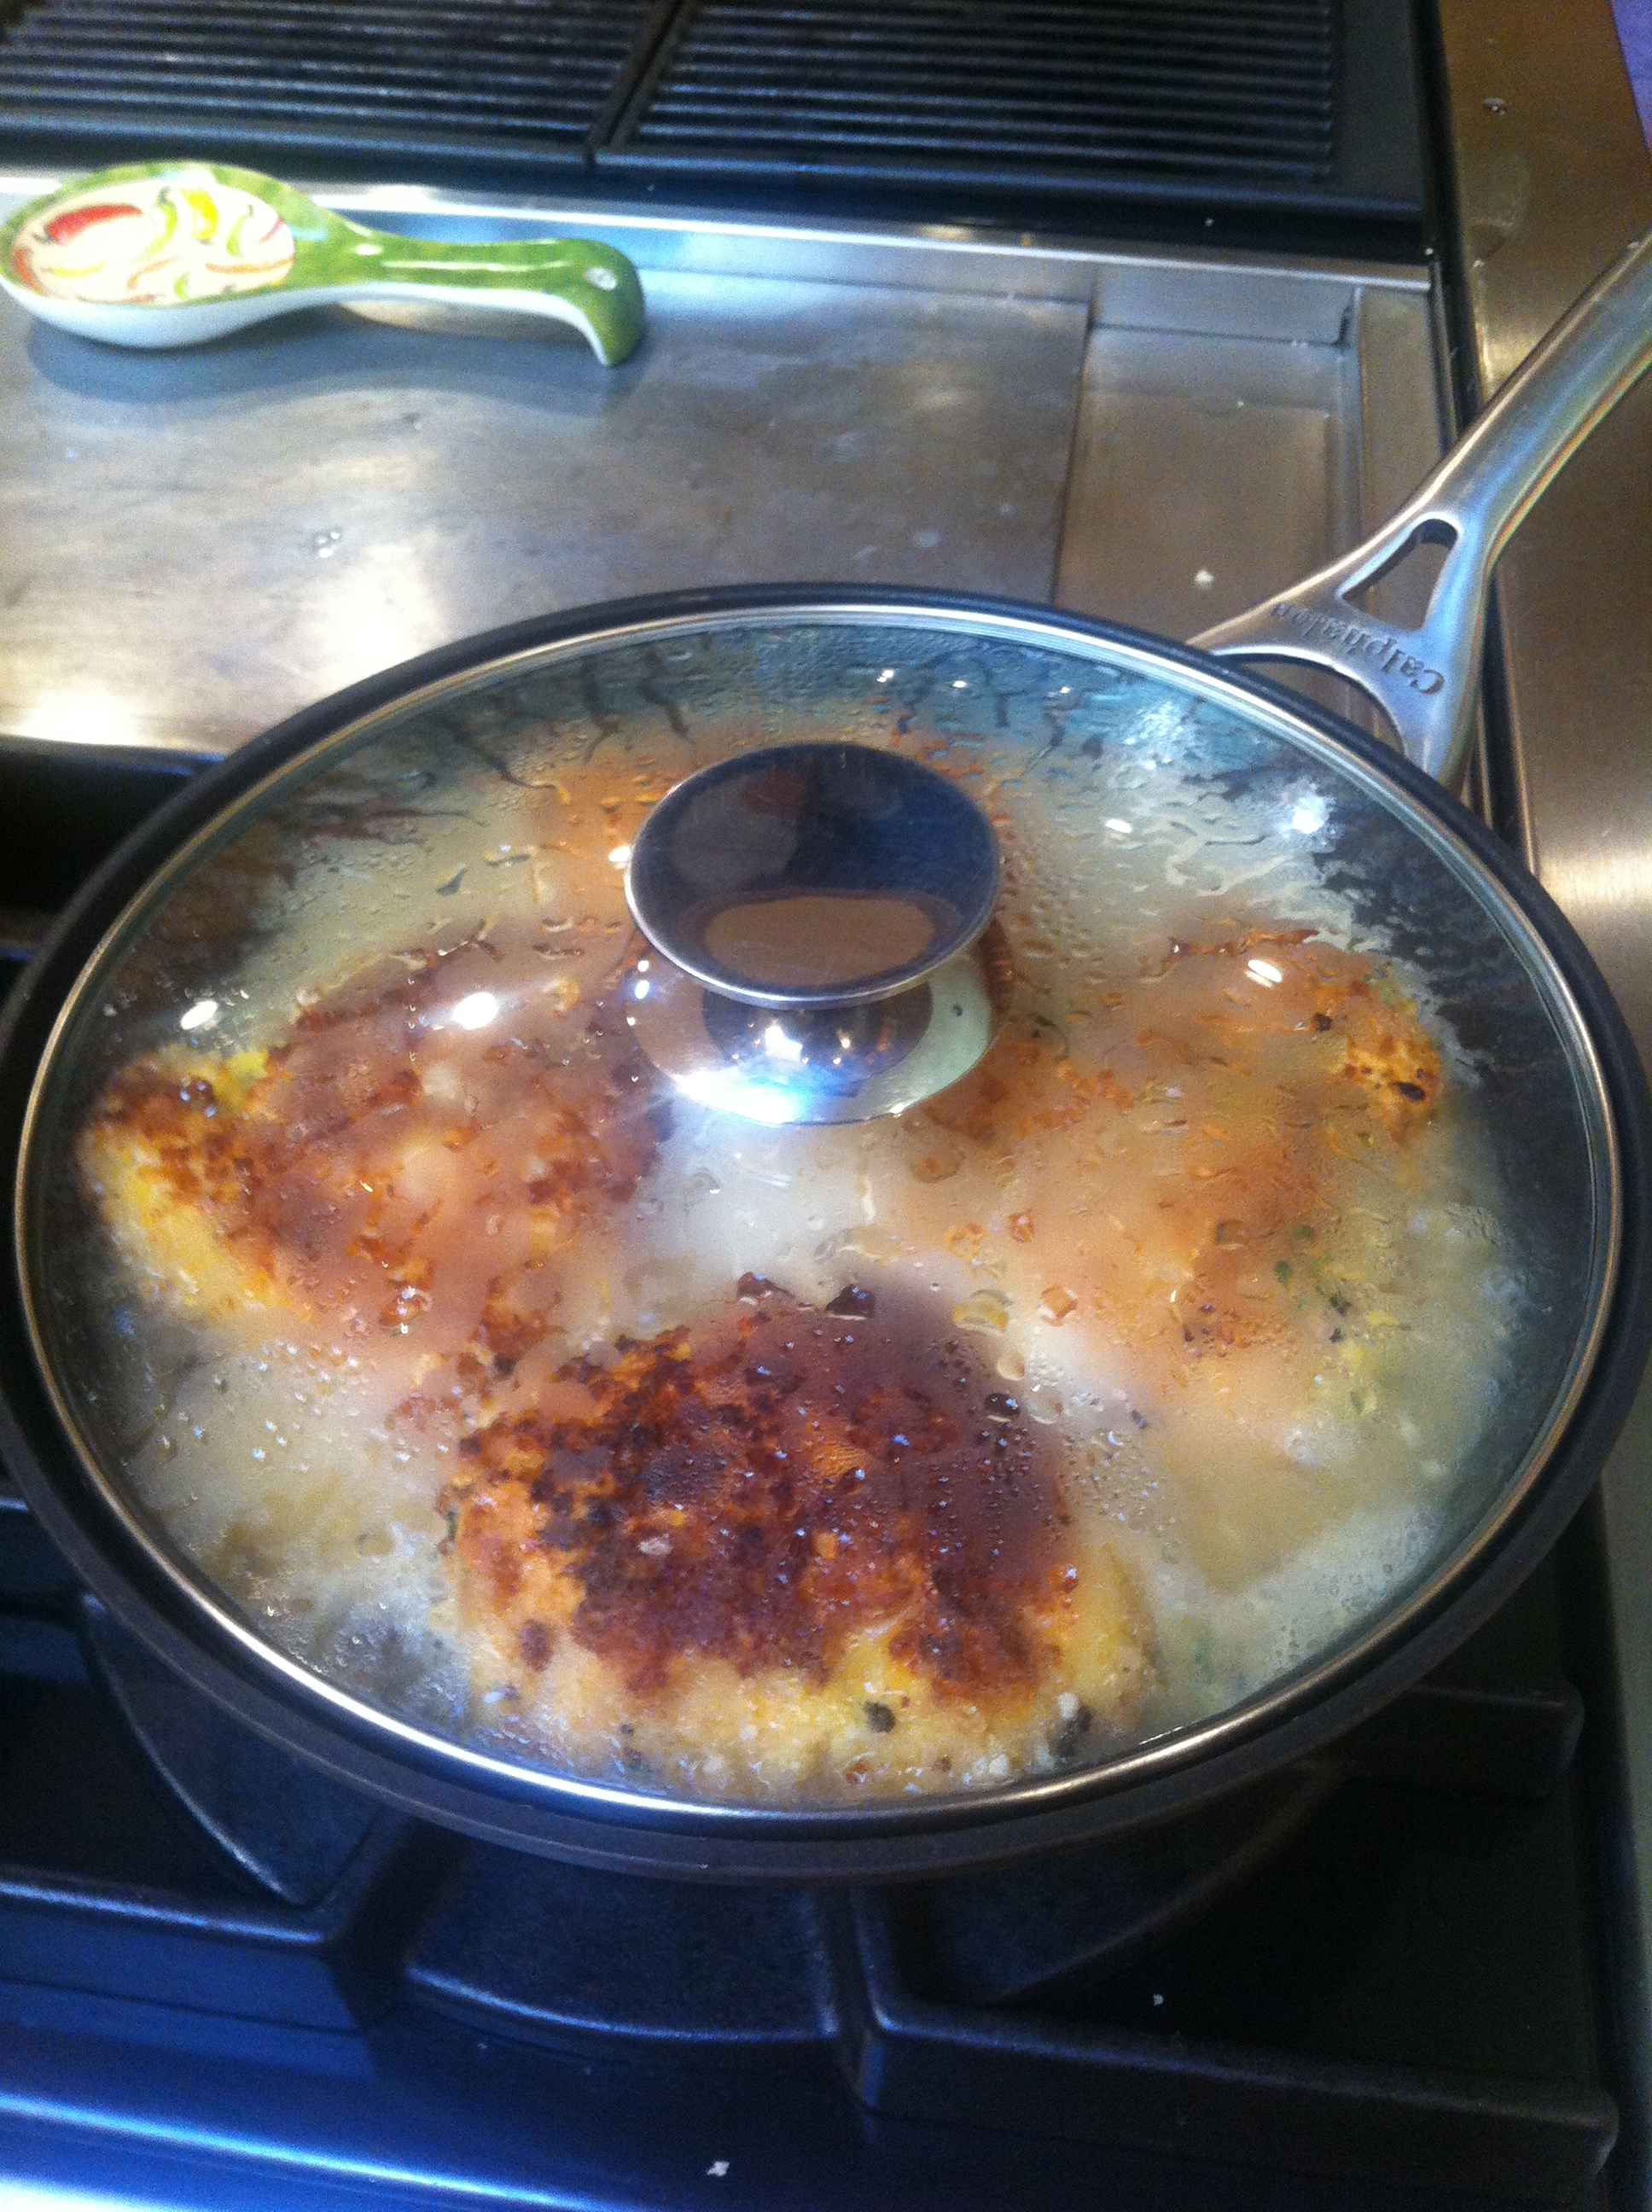
  8. Cover, reduce heat, and simmer 10 minutes.
  9. Add parsley and capers or olives ( I didnt have any capers so used olives), and simmer, uncovered at first and then covered, until the chicken is no longer pink in center.
  10. Sprinkle with grated lemon.

And then add the chopped Italian parsley just before serving.

I like to serve this with fluffy basmati rice – cooked in a rice cooker so that I dont have to worry about it drying out. You can keep the chicken warm in your warming oven for a while if dinner is delayed 30mins or so – which often happens with us as things come up at the last moment like phone calls….

Share
Posted in Family, Poultry, Raising Children, Recipes, Recipes to Make with Children, Rice | Tagged , , , , , , , , | Leave a comment

Tasty Thursdays – A Mexican Crumb Coffee Cake – Yum!

Share

A Mexican crumb cake or coffeecake is swirled with cinnamon and  chocolate.  With the right cinnamon and  chocolate combination and a good, fairly dense cake, it can be luscious. Remember to put on your favorite music when you  bake – it makes it taste better – seriously – food with love and music – what could be better! Try cooking with kids – especially cakes – they love to stir and taste everything. Then you can play grandma music – how about – Dancing in my room!

You can use your favorite coffeecake or crumb cake recipe as  long as it is not too light and airy.  If  the batter is too light, the sugar in the filling, as it heats, will turn to  liquid and drop through the batter.  Most  coffeecake recipes will be dense enough.

We’ve been serving ours with Bavarian  cream, a cinnamon syrup, and  flavored whipped cream—usually cinnamon brown sugar whipped cream or caramel  whipped cream.  It’s so good, we turned ours into a mix.

Today, we’ll give you the recipes for a coffeecake, the  filling, a cinnamon dessert sauce, and the whipped cream.

Dutch Sour Cream Coffee Cake

2  large eggs

1 1/2 cups sugar

2 tablespoons melted butter

1 teaspoon vanilla

2 cups sour cream

3  cups all-purpose flour

1 1/2 tablespoons baking powder

1/2 teaspoon baking soda

1 teaspoon salt

2  cups filling (recipe follows)

Directions

Prepare  an 9 by 13-inch baking pan by greasing well.  Preheat the oven to 375 degrees.

  1. Beat the eggs with an electric mixer until frothy.
  2. Add the sugar, melted butter, and vanilla and continue beating  until smooth and light.  Beat in the sour cream.
  3. In another bowl, mix the flour, leavenings, and salt.
  4. Add the dry ingredients to the creamed ingredients and mix with a  spatula until combined.
  5. Spread half the batter into the prepared pan.  Sprinkle half the filling over the  batter.  Spoon the remaining batter over  the layer of filling.  Sprinkle the  remaining half of the filling over the top of the battier.  You will have a layer of batter, a layer of  filing, a layer of batter, and a final layer of filling on the top.
  6. Bake in the preheated oven for 25-30 minutes or until the cake tests  done.

The Chocolate Cinammon Filling ( Irresistable!)

Mix together:

1 1/2 cups brown sugar

1 1/2 teaspoons cinnamon

2 tablespoons cocoa

1/3 cup dark chocolate chips

The Cinnamon Dessert Sauce:

We love both Lyons Cinnamon Dessert Sauce and Lawford’s Private Reserve Cinnamon Cream Syrup. They are very different.  Lawford’s is made with cream and is very much  like a caramel sauce with cinnamon added.  Lyon’s is more of a clear base  with Vietnamese cinnamon added.   Vietnamese cinnamon is very different than the Cassia cinnamon we are  accustomed too; I love it.

Here is a cinnamon  dessert sauce like Lyon’s.

1 cup brown sugar

1 1/2 tablespoons cornstarch

2 teaspoons Vietnamese cinnamon

1 1/2 cups water

1 teaspoon vanilla

4 tablespoons butter

  1. Combine the sugar, cornstarch and cinnamon in a medium saucepan. Stir in the water until smooth.
  2. Cook over medium heat, stirring constantly, until mixture comes to a boil and slightly thickens.
  3. Remove from heat, add the butter, and stir in the vanilla extract.

Cinnamon Brown Sugar Whipped Cream

2 cups whipping cream

1 teaspoon brown sugar flavor

1/3 cup brown sugar

1 teaspoon cinnamon

Whip the cream until soft peaks form. Add sugar, cinnamon, and flavor and continuing whipping until it reaches the desired consistency.

In this recipe: Cocoa, Cinnamon, Lyons sauce unless you make your own version, and Marsden and Bathe extract. All are available from our partner – The Prepared Pantry.


Cocoa Cinnamon Cinnamon Sauce Vanilla


Share
Posted in Blog, Desserts, Family, Raising Children, Recipes, Recipes to Make with Children, Snacks | Tagged , , , , , , , , , | Leave a comment

An amazing way to use Lemons – also a recipe for Lemon Marmalade

Share

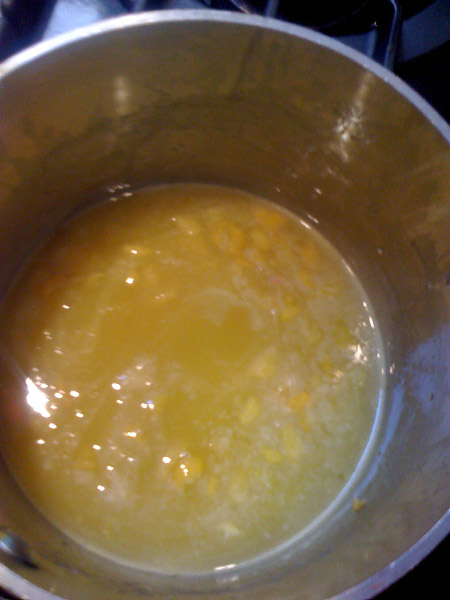
I have found an amazing way to use lemons. We have such an abundance of them – literally trees that are breaking from the weight of their lemons – all kinds including Meyer lemons which I think are the best. I have been making lemon marmalade – but there is a limit to that after making up about 30 pints.  Here is lemon marmalade cooking. You can see that all I have added is the lemon fruit, and the zest of the lemon. That is the recipe – zest the lemon, cut out the fruit ( discard the white pith) and add sugar to taste. Cook until thickish, then add pectin (use the amounts on the pectin box) and cook on low heat until thicker – then put into jam jars that you have sanitized in your dishwasher (using tongs so as not to touch the inside of the jar or lids with your hands). Simple. And delicious. However a pain to zest and peel all those lemons. So see below for another use of lemons!

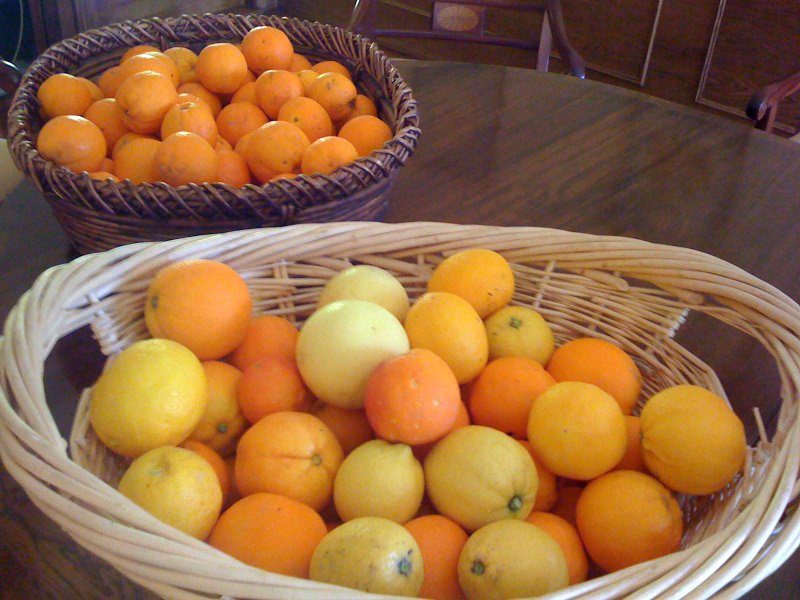
So now I am FREEZING the whole lemon and then grating it onto whatever food we are serving – OH MY OH MY!! How yummy it is! DO try it – it truly does transform food and also you dont need to peel it – this way you can use the entire lemon – zest, skin, fruit – all of it – and it will add amazing taste to everything – whether it be whiskey, vegetables, curry, stew, steak, chicken, fish – whatever. Below is a picture of just a little of the crop of oranges and lemons, grapefruit and tangelos that come daily from our Little Farm – so we are busy daily making jams and marmalades during the citrus season. How blessed are we!

Enjoy!

Share
Posted in Blog, Family, Fruit, Gluten Free, Jams, Recipes, Recipes to Make with Children, Tips | Tagged , , , , , , , , , | Leave a comment

Useful tips for home and family – last group of really good tips…

Share

And the last of the tips postings….

Wrap celery in aluminum foil when putting in the refrigerator and it will keep for weeks.
============ ========= ========= =====
 
When boiling corn on the cob,
add a pinch of sugar to help bring out the corn’s natural sweetness. ( We grow our own – and they are soo sweet already -I know those of you who do the same know what I mean!)
============ ========= ========= =====
 
Cure for headaches: 
Take a lime, cut it in half, and rub it on your forehead.  The throbbing will go away. I have a better solution – play some music – try this one – Start the world all over again – that will make you feel better immediately!
============ ========= ========= =====
 
Don’t throw out all that leftover wine:
Freeze into ice cubes for future use in casseroles and sauces…
============ ========= ========= =====
 
To get rid of itch from mosquito bites,
try applying soap on the area and you will experience instant relief.
============ ========= ========= =====

Ants, ants, ants everywhere. 
Well, they are said to never cross a chalk line.  So, get your chalk out and draw a line on the floor or wherever ants tend to march.  See for yourself. [Slices of lemon scattered along their path track also work].
============ ========= ========= =====

Use air-freshener to clean mirrors.
  It does a good job and better still, leaves a lovely smell to the shine.
============ ========= ========= =====

When you get a splinter,
reach for the scotch tape before resorting to tweezers or a needle.  Simply put the scotch tape over the splinter, and then pull it off.  Scotch tape removes most splinters painlessly and easily. 
============ ========= ========= ===== 
Now look what you can do with Alka Seltzer…
Clean a toilet.  Drop in two Alka Seltzer tablets, wait twenty minutes, brush and flush. 
============ ========= ========= =====
 
Clean a vase.
  To remove a stain from the bottom of a glass vase or cruet, fill with water, and drop in two Alka Seltzer tablets.
============ ========= ========= =====
 
Polish jewelry.
  Drop two Alka Seltzer tablets into a glass of water and
immerse the jewelry for two minutes.
============ ========= ========= =====

Clean a thermos bottle..
  Fill the bottle with water, drop in four Alka
Seltzer tablets, and let soak for an hour (Or longer, if necessary).
============ ========= ========= =====
 
Unclog a drain.
  Clear the sink drain by dropping three Alka Seltzer
tablets down the drain followed by a cup of Heinz White Vinegar.
Wait a few minutes, and then run the hot water.
============ ========= ========= =====

Do your friends a favor.
  Pass this timely (and some not-so-timely)
information on to a friend! I know I just did.


Share
Posted in Blog, Family, Raising Children, Tips | Tagged , , , , , , , , , , , | Leave a comment

Our Philanthropy Friday today celebrates the life of my dear friend who passed last week, Carol Abrams – one of a kind – she will be in my heart forever

Share

In the picture above, my dear friend Carol Abrams, is second from the right dressed in black, with her husband Gerry, and I am next to her in red, with my husband Clive with me, and next to him our other dear friends, Anita and Mayer. We were celebrating 25 years of friendship – some 13 years ago.

On Sunday, June 3, 2012  Carol,  beloved wife, mother, grandmother, sister and friend, passed away at her home in Los Angeles. Carol was born in New York City on September 23, 1942.  The daughter of Lee and Harry Kelvin, Carol attended Penn State University and graduated with honors. She married Gerald W. Abrams and had two children, J.J. and Tracy. While her children were attending school, Carol got her real estate license and sold properties in Bel Air and West Los Angeles. At the age of 39, Carol enrolled at Whittier College School of Law where she graduated first in her class. She eventually became a professor at Whittier, teaching for five years. Always looking for a new challenge, Carol became interested in film.  She developed and was an executive producer of The Ernest Green Story for the Disney Channel, the story of forced integration at Central High in Little Rock, Arkansas in 1957.  The film had its premiere at Central High and was introduced that night by President Elect Bill Clinton. One year later the film won a National Peabody Award.While Carol went on to produce other films, her attention then turned to writing.  She co-authored two published books, Grandparents & Grandchildren and Teen Knitting Club. Carol was an accomplished knitter, pianist and painter and was a contributing artist for The Santa Barbara Art Museum.  She spoke threelanguages. Carol is survived by her husband and children, son-in-law Jono Rosen and daughter-in-law Katie McGrath, five grandchildren (Henry, Gracie and AugustAbrams and Ross and Maya Rosen) and her sister, Joan Davidson. Services for Carol are private.

In lieu of flowers, memorial contributions may be made to The Carol Abrams Fund, attn.: KC Miller at the Johnnie L. Cochran, Jr. Brain Tumor Center, 8700 Beverly Blvd. Suite 2416, Los Angeles, California, 90048. I am featuring this charity today as my Philanthropy Friday – in honor of my dear friend.

Carol you will be with me every day for the rest of my life – as you have been every day for the past 38 years since we came to America and met you – you were my very first friend and introduced me to my other very dear friend Anita. You were the shining example to me of what could be achieved in this country – you made it look easy, with bubbly humor, brilliant turn of phrase, fun and love and happy times – while doing good for so many with your philanthropy ( silent and anonymous) and making joy with your talent. Rest in peace my dear friend with my love with you forever.


Share
Posted in Blog, Philanthropy | Tagged , , | 1 Comment

More useful tips for home and family….

Share

Some of these tips are so obvious it makes you wonder why you didnt think of that? They work too! Of course I strongly suggest putting on Grandma Music if you are doing the boring work of cleaning – music makes everything more fun! Try this one for kicks – The Silly Kwela – that will get a bounce in your step!

Blood stains on clothes?  Not to worry!  Just pour a little hydrogen peroxide on a cloth and proceed to wipe off every drop of blood.  Works
every time!  (Now, where to put the body?)

============ ========= ========= ===== 
Use vertical strokes when washing windows outside and horizontal for  inside  windows.
  This way you can tell which side has the streaks.. Straight vinegar will get outside windows really clean.  Don’t wash windows on a sunny day.  They will dry too quickly and will probably streak.
============ ========= ========= =====
 
Spray a bit of perfume on the light bulb
in any room to create a lovely a light scent in each room when the light is turned on. A lot less expensive than using perfume sticks or freshener spray! Of course it depends how expensive your perfume is….
============ ========= ========= =====
 
Place fabric softener sheets in dresser drawers
and your clothes will smell freshly washed for weeks to come.  You can also do this with towels and linen. [Bars of toilet soap with wrapping removed also work beautifully.   Once they’re thoroughly dried out they last longer in the bathroom].


============ ========= ========= =====
 
Candles will last a lot longer if placed in the freezer
for at least 3 hours prior to burning.
============ ========= ========= =====
To clean artificial flowers,
pour some salt into a paper bag and add the flowers.  Shake vigorously as the salt will absorb all the dust and dirt
and leave your artificial flowers looking like new!  Works like a charm! However I personally have a thing about artificial flowers – and only use the fresh kind.
============ ========= ========= =====
 
To easily remove burnt on food from your skillet
, simply add a drop or two of dish soap and enough water to cover bottom of pan, and bring to a boil on stove top.
============ ========= ========= =====
 
Spray your TUPPERWARE with nonstick cooking spray
before pouring in tomato based sauces and there won’t be any stains. I do this all the time and it works great!!

Share
Posted in Blog, Family, Raising Children, Tips | Tagged , , , , , , | Leave a comment

Useful tips for the home and family

Share

I received these tips anonymously on the internet and love them! Thank you to whomever created them!

For icy door steps in freezing temperatures:  Get warm water and put Dawn dish washing liquid in it. Pour it all over the steps. They won’t
refreeze.  (Wish I had known this when we lived in Canada). [Presumably any dish washing liquid is OK]
============ ========= ========= =====
 
To remove old wax from a glass candle holder
, put it in the freezer for a few hours. Then take the candle holder out and turn it upside down. The wax will fall out.
============ ========= ========= =====
 
Crayon marks on walls?
  This worked wonderfully!  A damp rag, dipped in baking soda. Comes off with little effort (elbow grease that is!). Of course Crayola now creates washable crayons but this is for those times when your kids or grandkids find the other kind and Crayola is one of our partners so click here to get their amazing products!http://www.dpbolvw.net/click-5465357-10292417

Permanent marker on appliances/counter tops (like store receipt BLUE!) – usrubbing alcohol on paper towel.

Whenever I purchase a box of S.O.S Pads, I immediately take a pair of scissors and cut each pad into halves.  After years of having to throw  away rusted and unused and smelly pads, I finally decided that this would be much more economical.  Now a box of S.O.S pads last me indefinitely! In fact, I have noticed that the scissors get ‘sharpened” this way!  [S.O.S = steel wool]

More to come soon!

Share
Posted in Blog, Family, Raising Children, Tips | Tagged , , , , , | Leave a comment

The Differences Between Cows Milk and Goats Milk – Great for those who are lactose intolerant!

Share


This article is Reproduced from United Caprine News (US) March 1989. The reason I am publishing it here is that it is one of the best descriptions I have found for the topic – and because we use a lot of goats milk at our Little Farm – since we raise Alpine Goats for that purpose. I hope you enjoy it! I have added some comments as well as pictures of our goats for your added enjoyment – and remember to play music to your plants and animals – we love to do that!
 
Differences Between Cow and Goat Milk

By G F W Haenlein PhD and R Caccese
University of Delaware, Newark
Here are pictures of our goats (Alpine and Nubian)- their babies, (it’s spring time!) and Julia, a particularly curious goat trying to get to my camera! Of course we play music for our goats – RockinGrandmaMusic – it keeps them happy when we are milking. We love particularly Start the World All Over Again. We play RockinGrandmaMusic for our grapes too and they grow happily too!


To most people today, especially in the more developed countries, the term milk is synonymous with cow milk, as if cows alone possess a singular ability to produce mammary secretions. Perhaps nowhere has the feeling been more prevalent than in the US, where over 10 million cows are maintained to provide an abundant, clean source of nourishment and refreshment to our country, producing more than 125 billion pounds of milk annually. Yet on a world-wide basis, there are more people who drink the milk of goats than from any other single animal. Over 440 million goats (world wide) produce an estimated 4.8 million tons of milk that is predominantly consumed locally, or processed into various types of cheeses.Here in the US, which historically has been one of the staunchest denigrators of the ‘stinking’ goat, there are approximately a million dairy goats actively producing milk. Most of the upsurge in goat popularity has been the result of a growing trend towards attaining some measure of self-sufficiency on the part of many people, for both economic and aesthetic purposes. A goat will eat little, occupy a small area and produce enough milk for the average family (a good milker will produce about a gallon a day), whereas the prospect of maintaining a cow in the suburban backyard is usually more than the homeowner is willing or able to cope with. Hence the growing popularity of the ‘poor man’s cow’.As the interest in dairy goats and their products continues to rise, it is apparent that many misconceptions, discrepancies and exaggerated claims are being perpetuated. A comparison of cow and goat milk seems to be in order, so that some prejudices against goat milk may be erased. Also, while goat milk is somewhat unique, it is certainly not a magical elixir.One of the primary misconceptions concerning goat milk is that it has a peculiar ‘goaty’ odor or taste to it. This effect is produced by the presence of the buck, whose scent glands are rather odiferous and may indeed cause the ‘goaty’ type of milk people object to if he is present among the herd, especially at milking time. Does, however, do not have the powerful odor of the buck and milk produced in the absence of a buck should bear no objectionable odor.Diet also plays a large role in the palatability of goat milk, as well as cow milk. While cows are usually rather closely regulated as to what they may eat and when, goats are often allowed to consume a great variety of materials at any time, including browsing. This kind of feeding may allow a certain ‘off’ taste or smell to be transferred to the milk, just as cows may produce eg a ‘garlicky’ milk from some spring pastures. What holds true for the cow also holds for the goat, ie what comes out is based on what goes in! If goats and cows are similarly managed, the smell and taste of both milks are quite comparable.
Basic Composition
Goat milk is similar to cow milk in its basic composition. On average, cow milk contains about 12.2% dry matter (3.2% protein, 3.6% fat, 4.7% lactose and 0.7% mineral matter). Goat milk contains about 12.6% dry matter (3.4% protein, 3.8% fat, 4.1% lactose and 0.8% mineral matter). These figures are only averages of course, as there are considerable differences between breeds, and among individuals of a breed. There are 6 breeds of dairy cows in the US and 6 breeds of dairy goats producing milk.The Saanen is best known as the Holstein of the goat world, producing a high quantity of milk with somewhat low fat levels. At the other extreme is the Jersey of the goat world, the Nubian. This breed produces a lesser amount of milk with a high fat content. The Toggenburg, La Mancha, Alpine, and Oberhasli fall somewhere in between. Below are our Alpine goats Cami ( for Camembert) and Ricci ( for Ricotta).
Summary of Differences
However, there are also differences that give goat milk a place for special purposes. In summary: Goat milk has a more easily digestible fat and protein content than cow milk. The increased digestibility of protein is of importance to infant diets (both human and animal) as well as to invalid and convalescent diets. Goat milk tends to have a better buffering quality, which is good for the treatment of ulcers. Goat milk can successfully replace cow milk in diets of those who are allergic to cow milk. In under-developed countries, where meat consumption is low, goat milk is an important daily food source of protein, phosphate and calcium not available otherwise because of a lack of cow milk.
Allergies
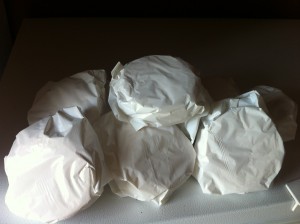
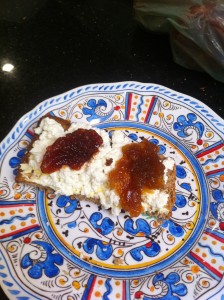
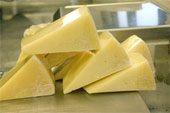
Allergies appear to be more common than formerly thought, especially in very young children. In an allergic type reaction, symptoms are produced by histamines, which are stored in body cells. Histamines are released when triggered by a local stimulus. Antibody-antigen type reactions that manage to find an anchorage on cell walls trigger a release of histamine and produce the allergic symptoms. Such a release brings on a congestion of the capillaries and a flooding of the intracellular spaces by the lymphatic glands. The stimulation of local nerve endings also occurs.People who display an allergic reaction are usually more sensitive to the release of a given amount of histamine and also tend to produce a greater number of antibodies to certain proteins.Some of the so-called ‘sudden deaths’ of infants seem to be related to allergic type responses, resulting in anaphylactic shock. About 6% of the infants in the US suffer allergic responses to cow milk. Of this number, however, about only 14% react to bovine serum present in cow milk. Most infants are allergic to various constituents of cow milk which may also be present in goat milk. Individuals who are allergic to bovine serum in cow milk will undergo also an allergic reaction to a variety of dairy products that are made with cow milk. Here are some camemberts all ready wrapped up, and also a piece of home made bread, with homemade ricotta and two different kinds of marmalade – one made from loquats and the other is grapefruit marmalade – a wonderful brunch meal!
Digestive Upsets
Other types of digestive upsets can result from milk due to lack of the lactose digesting enzyme. While the presence of lactase is universal in infants up to three years, the presence of this enzyme in adults is somewhat irregular and genetically determined.Fat CompositionOne of the more significant differences from cow milk is found in the composition and structure of fat in goat milk. The average size of goat milk fat globules is about 2 micrometers, as compared to 2.5 to 3.5 micrometers for cow milk fat. These smaller sized fat globules provide a better dispersion, and a more homogeneous mixture of fat in the milk. Research indicates that there is more involved in the creaming ability of milk than merely physical size of the fat globules. It appears that their clustering is favoured by the presence of an agglutinin in milk which is lacking in goat milk, therefore creating a poor creaming ability, especially at lower temperatures.The natural homogenization of goat milk is, from a human health standpoint, much better than the mechanically homogenized cow milk product. It appears that when fat globules are forcibly broken up by mechanical means, it allows an enzyme associated with milk fat, known as xanthine oxidase, to become free and penetrate the intestinal wall. Once xanthine oxidase gets through the intestinal wall and into the bloodstream, it is capable of creating scar damage to the heart and arteries, which in turn may stimulate the body to release cholesterol into the blood in an attempt to lay a protective fatty material on the scarred areas. This can lead to arteriosclerosis. It should be noted that this effect is not a problem with natural (unhomogenized) cow milk. In unhomogenized milk this enzyme is normally excreted from the body without much absorption.Another significant difference from cow milk is the higher amount of shorter-chain fatty acids in the milk of goats. Furthermore, glycerol ethers are much higher in goat than in cow milk, which appears to be important for the nutrition of the nursing newborn. Goat milk also has lower contents of orotic acid which can be significant in the prevention of fatty liver syndromes. However, the membranes around fat globules in goat milk are more fragile, which may be related to their greater susceptibility to develop off-flavours than cow milk.

Protein Composition
The protein composition of cow and goat milk is fairly similar, although the typical major alpha-S-1 casein in cow milk is absent in goat milk and the formation of casein curd under rennin action is different. The quality of curd is judged by two criteria:Curd tension – a measure of the hardness or softness of the curd. The softer the material, the more easily digestible it is. This tension is largely a breed characteristic. Holsteins generally have the softest curd in the bovine family.

Cow range:515-200g (avg 570g).
Goat range: 510-570g (avg 536g).
Relative size of flakes – formed by the addition of strong acid to milk, causing curd flakes to precipitate. It can be seen that goat milk forms finer flakes more rapidly than cow milk, which tends to form large lumps and more slowly. This test tends to duplicate reactions that occur in the stomach, and demonstrates why goat milk is more easily and rapidly digested.

Vitamins and Minerals
Goat milk has greater amounts of vitamin A than cow milk. Also, goats convert all carotenes into vitamin A, creating a white type of milk. Vitamin B levels are a result of rumen synthesis in goats and cows, and are somewhat independent of diet. Goat milk is higher in B levels especially riboflavin, but vitamins B6 and B12 are higher in cow milk. Niacin levels are also higher in goat milk. The milk levels of vitamin C and D are low and roughly the same for cows and goats.Goat milk is higher in the minerals calcium, potassium, magnesium, phosphorus, chlorine and manganese; but it is lower in sodium, iron, sulphur, zinc and molybdenum.

Other Elements
Cow milk is higher in lactose levels, although the difference is minor. Goat milk has also less of certain enzymes, ribonuclease, alkaline phosphatase, lipase and xanthine oxidase.

Buffering
Cow and goat milk is slightly on the acid side, with a pH range of 6.4 – 6.7. The principal buffering components of milk are proteins and phosphates. The good buffering capability of goat milk appears to make it ideal for treatment of gastric ulcers.

Conclusion
Thus, some differences exist but their nutritional significances in human nutrition have yet to be researched and documented. the goat will probably never replace the cow for commercial production of milk, but there seems to be great potential for diligent efforts in practice and research to improve production and marketing of goat milk and its products.The value of goat milk as an alternative food for children and sick people, because it is easier digested, extends also to feeding animals, young dogs, foals, even calves. Experience in the field indicates that calves can consume large quantities of goat milk while similar amounts of cow milk may result in scouring calves. Goat milk can, therefore, have a value not only for growing veal but also for raising valuable dairy replacement heifers, which will benefit from the high milk intake and show superior growth.

Reprinted from United Caprine News (US) March 1989


Share
Posted in Blog, Family, Raising Children, Tips | Tagged , , , , , , , , , | Leave a comment

What is better than a swing on a day at the beach! Sundays are SUCH fun! Kid Stories, family togetherness – the best!

Share

The day was perfect and the swings swung high – here is our middle grandson Jonah having the best time at the beach today.

And our oldest grandson Jack listening to jazz at the beach – he is in heaven – eating a cheeseburger and listening to music – what could be better!

Share
Posted in Blog, Family, Raising Children | Tagged , , , , , , | Leave a comment

Banana Caramel Muffins for Cooking with Kids

Share

We like a lot of  banana flavor in our muffins.  That took  two things: really ripe bananas and added banana flavor. This is a wonderful treat for cooking with kids. Of course they will sample a LOT.

This recipe transforms banana muffins from a breakfast bread to a dessert or at  least, a sweet brunch treat.  We covered  the tops with salted caramel and served them with dollops of whipped cream in  flavors like caramel, butterscotch, and banana.

Is this over the top for calories? Yes. So this is a TREAT not an everyday event. And it’s worth it. I have learned from my guru on how to lose and maintain weight loss Dr Deena Solomon, that you can eat whatever you like whenever you like,  as long as you count the calories and know the amount of daily calories at which you maintain, lose or gain weight ( for me it’s about 1500 a day for maintenance) , bank the amount of calories you need in advance if you are planning an event like this one – baking and eating these scrumptious treats – and write down what you are planning to eat before you eat it! Sounds so simple doesn’t it? And it works.

So  first put on music – everything is better with music – for this event we chose the Happy Song. Then make your favorite banana muffins ( or use our recipe below).  Top  them with three-ingredient caramel.   Sprinkle them with salt crystals.   Add some flavored whipped cream.  You’re  a hero.

The Best Banana  Muffin Recipe

The perfect banana muffin is very banana-rich but still light and cake-like.

Ingredients:

  • 2  1/4 cups all-purpose flour
  •  1 tablespoon baking powder
  • 1/2 teaspoon baking soda
  • 1/2 teaspoon salt
  • 2 1/4 cups ripe mashed banana
  •  1/2 cup granulated sugar
  •  1/2 cup sour cream (not low fat)
  • 1/4 cup vegetable oil
  • 3 large egg yolks
  • 1 teaspoon banana  flavor 1 cup pecan or walnut  pieces

Preheat  the oven to 400 degrees.

  1. Mix the flour, baking powder, baking soda, and salt together in a large bowl.
  2. In another bowl, mix the mashed banana, sugar, sour cream, vegetable oil, egg yolks, and       flavor together.
  3. Add wet ingredients to the dry and stir just until the ingredients are mixed       well.  Fold in the nuts.
  4. Fill the well-greased tins nearly full.  Use all the batter for twelve standard muffins.  Sprinkle on some optional streusel topping.
  5. Bake for 8 minutes at 400 degrees.  Reduce the temperature to 350 degrees and bake for another 8 to 10 minutes or until done.  Let sit for five minutes and       remove the muffins from the pan to a rack to cool.

How to Make Salted Caramel with Only Three Ingredients plus Salt

Genuine  caramel can be made with only three ingredients: Cream, brown sugar, and corn  syrup.  Mix it together and boil it.  Simple.    We usually double the recipe to make a big batch–you can’t have too much  caramel.

  • 2  cups heavy cream
  • 1  cup brown sugar
  • 1  cup corn syrup
  1. Mix the three ingredients in large saucepan.  It’s going to       boil up so fill the pan no more than one-third full.
  2. Cook over medium high heat stirring nearly continually. The high heat shortens cooking time substantially but if not tended, you will burn your caramel.
  3. Cook to a soft ball stage, 230 degrees.  Remove from the heat and let cool.

candy thermometer is the way to go the first few times you make caramel unless  you are already familiar with candy making.   I don’t bother; I find the thermometer gets in the way of my  stirring.  It’s easy to put a little  caramel on a spoon and ease the spoon into a cup of cold water.  When cooked, the caramel will cool to a soft  ball.

If  you want to make a caramel sauce, don’t cook it quite so long, maybe 220  degrees.  You can thin your caramel with  a bit of cream.  If you want a firmer  caramel, cook it a bit longer.

I  guarantee that after two times, you’ll be comfortable making caramel and  you’ll find a lot of uses for it: a topping on desserts and on ice cream;  caramel candies and caramel apples.

How to Make Flavored Whipped Cream

Never settle for plain whipped cream.  It’s so easy to  make very special whipped cream.  Often it’s as simple as adding a flavor  to the whipped cream.  Sometimes you’ll want to sweeten your whipped cream  with brown sugar instead of granulated sugar.  I often add lemon zest to  lemon whipped cream and orange zest to orange whipped cream.  We grow our own citrus and so its easy to do that. The zest  adds a little flavor and the colored flecks are pretty.

For  your banana muffins, we recommend banana, caramel, butterscotch, or brown sugar  whipped cream.

Whip the cream to soft peaks.  Add the  sugar and flavor and continue whipping.

To Assemble Your Banana Muffins

Chances  are your caramel will be too thick to cover the top smoothly and drizzle down  the sides.  That’s fine.  Push a large spoonful of caramel off the spoon  onto the top of the muffin.  Zap it in  the microwave until the muffin is warm and the caramel starts to melt (about 12 seconds).  Sprinkle it with optional salt crystals.  Use the salt sparingly.

Thai cooking combines a lot of salt and sugar next to each other – each brings out the flavor of the other.

Add  a dollop of flavored whipped cream.  Don’t  bother trying to stack the whipped cream on the top of the warm muffin; it will  just slide off.  We use a large ice cream  scoop and place it next to the muffin.

Brace yourself.   People will go nuts over this.

Share
Posted in Blog, Desserts, Family, Other wonderful treats, Raising Children, Recipes, Recipes to Make with Children | Tagged , , , , , , , , , | Leave a comment

Veal and Tomatoes in the Crockpot! Cooking with kids – an easy dinner dish! Healthy too….

Share

Did I tell you how much I love my crockpot? I really do – it’s sooo easy to use.

So today I made Veal Tomato Stew -easy, healthy, and fast! We put on some upbeat weird music for this one – since my grandsons helped me – called Monsters in My Room! Way to go Grandma!

Ingredients:

  • 3 lbs of lean veal stewing meat cut into bite sized pieces
  • 1/4 cup of flour
  • 2 Tbsp of Olive oil
  • 1/2 teaspoon of fresh herbs – I like oregano chopped finely ( or you can used dried if that is all you have)
  • 1 can of tomatoes in puree – or home made tomato sauce about 16 ounces
  • 1 sweet potato and 1 yam
  • 4 medium sized carrots
  • About 16 ounces of chicken stock
  • Salt and pepper to taste

Directions:

  1. Season the meat with the salt, pepper and herbs. Kids love to do this.
  2. Dredge the meat pieces in the flour. Kids do this but with wonderful expressions on their faces with the consistency of the stickiness!
  3. Heat the oil in a frying pan until medium hot – this part you have to do!
  4. Saute the meat covered with flour until light brown on all sides and when done place the pieces into a slow cooker.
  5. Clean the carrots and potatoes and cut into bite sized pieces.
  6. Add the potatoes and carrots into the slow cooker
  7. Add the tomato sauce mixed with puree.
  8. Add the chicken stock – until all the ingredients are covered but no more – no need to use all the stock if not needed.
  9. Place the cooker on high and give the contents one big stir – and off you go to your day’s activities. When you come home the house will smell wonderful! I like to leave it on high for 6 hours or low for 10 or so.
  10. You can serve this with basmati rice, simmered in chicken stock until tender or cooked in a rice cooker which does all the work for you and keeps it warm! ENJOY!


Share
Posted in Blog, Family, Meat, Raising Children, Recipes, Recipes to Make with Children, Rice, Vegetables | Tagged , , , , , , , , , , , , , | Leave a comment

Sam the broken robot made his debut at the ZIMMER childrens museum – see his video !

Share

Sam was so nervous. Truly. But then he met all the great kids who were visiting and playing at the Zimmer Museum and he got dressed in front of them so that they were not scared of him – and it was all fine after that. Sam ( and RockinGrandmaMusic Larraine Segil) did lots of movements, gave out instruments and got the kids to jump around and dance and have fun with the many children there – it was a fun day for all. Take a look at our video – so many kid stories, much grandma music and more!

Share
Posted in Blog, Family, Live Events, Raising Children, Social media, Uncategorized | Tagged , , , , , , | Leave a comment

Cooking with kids – Stuffed French Toast – YUM!

Share

How to Make Stuffed and Crusted French Toast

If  you can make a sandwich, you can make stuffed and crusted French toast.  In fact, a peanut butter and jam sandwich made into French toast is quite good. And for my eldest grandson Jack – pbj is just about the best snack he can have! We like to play the Flying Cows song for this dish – its quite weird and fun!

To  make stuffed French toast, you literally make a sandwich, dip it into your egg  batter, and fry it on the griddle.  It’s  that simple.  The magic is in the  fillings.  You can use a cream cheese filling and fresh fruit. [Blueberry  Cream Cheese Stuffed French Toast ] All these fillings can also be ordered from Prepared Pantry one of the vendors that I use all the time.

You can use jam.   I make my own jam – so there is always a lot to choose from – all organic fruit home grown in our Little Farm, and then with sugar and sometimes vegetable pectin added. Also I love to add the zest of the citrus if it is a citrus jam, and a touch of lemon juice (meyer lemons always). We also use pastry fillings,  often Bavarian cream, to make fillings like strawberries and cream.

You cook your stuffed French toast exactly as you do “regular”  French toast except that you turn the heat down and cook it longer so that the  heat drives through both slices of bread.

When making stuffed and crusted French toast, after dipping your  sandwich in egg batter, you dredge it in chopped nuts or coconut.  I’m sure there are other things you can  dredge your French toast in.

We dredge French toast in a candied toasted coconut topping.  The sugar in the coconut melts creating a  crunchy coating.  We have also made pecan crusted French toast filled with either a cherry or  raspberry filling paired with Bavarian cream or cream cheese filling.  We simply squeeze some of the fruit filling  with some of the cream filling on the bread before sandwiching the two bread  slices together.  (See all our pastry fillings.) You can make breakfast exciting.


Pecan Crusted French Toast with  Cherry Cream Cheese Filling

You  can make this stuffed and crusted French toast either with premade pastry fillings or from scratch using  cream cheese and jam for your filling.   The scratch recipe follows.

Ingredients

  •  4  ounces cream cheese (regular or low fat)
  • 2 tablespoons sour cream
  •  1/2 teaspoon vanilla extract
  •  about 2/3 cup cherry  jam
  • bread slices
  • 3  large eggs
  • 2 tablespoons milk
  • 1  to 1 1/2 cups finely chopped pecans

Directions

  1. Finely  chop the pecans. We used a plunger-type nut  chopper. Set aside.
  2. In  a medium bowl, whip the cream cheese, sour cream, and extract. Fold in the jam.  Spread the cherry and cream cheese mixture between two slices of bread  sandwich-style.
  3. Whisk  the eggs and milk together. Dip the sandwiches in the egg mixture and then  dredge the egg-coated sandwiches in the crushed pecans.
  4. Cook  the coated sandwiches on a medium griddle or in a frying pan first on one side  and then the other. Serve immediately with the syrup of your choice.   Our preference is cherry  syrup.

Yield  is about four double French toast sandwiches. Yum!

Share
Posted in Blog, Desserts, Family, Jams, Raising Children, Recipes, Recipes to Make with Children | Tagged , , , , , , | Leave a comment

Pigs in a Blanket – Did your Mom make this when cooking with kids? I love them – not so healthy but yummy

Share

Many folks in our home town used sausages with pastry when cooking with kids. Only when I traveled to the UK did I hear the term “Pigs in a blanket”. It was used even more often when I came to the USA. So here is a recipe for that delicacy –  homemade biscuit dough  wrapped around sausages or hot dogs. In Johannesburg, we even used a South African Sausage called BOEREWORS made from spicy meat. We could add a salad and  maybe some chips and so we had a meal.  Now this is NOT the most healthy meal but once in a while not so terrible. Everything in moderation eh?

A  blanket wrapped around a hot dog—or better, a chicken and sun dried sausage —sure beats a store-bought  bun.  A narrow strip of cheddar down the  center of the dog makes them even better for some although that is not my preference.

       Nowadays, its easier – buy pizza dough ( frozen in the supermarket or from my favorite on line store – Prepared Pantry) and use chicken sausages which are at least a bit healthier and you are on your way! Don’t forget to put on music – makes cooking SOOOO much fun! We love the Tickle Me song for this one! By the way – if you click here you can download our coloring books – the first one is FREE!

How to Make Pigs in a Blanket with Bread  or Pizza Dough – have your kids help you do the wrapping – they will love it!

You’ll need sausages,  or  hot dogs plus bread or pizza dough.  Our pizza crust mixes are perfect because the dough  is soft and easy to work with without springback.

  1. Mix the dough per package instructions.  (With a stand type mixer and a dough hook,  add the water and yeast and mix for four minutes.)
  2. Roll the dough to 1/4-inch thickness and cut out the  shapes.  For little sausages, we used  2-inch diameter circles.  For hot  dogs—because they are longer—you’ll want rectangles or ovals.
  3. Spread mustard or another condiment on the dough.  Do not spread mustard where the two edges  will overlap.  I like all kinds of mustard.
  4. If you are using brats or hotdogs, consider splitting  them and placing a strip of cheese in the split.
  5. Wrap the dough around the meat pressing the two dough  edges together where they overlap.  Let  rest for 30 to 45 minutes or until the dough doubles in volume.
  6. Bake at 350 degrees for 7 minutes or until the  dough starts to brown.  Serve hot.

How to Make Pigs in a Blanket with Biscuit  Dough

I have used butter-based biscuit recipe and hot  dogs to make these pigs in a blanket.   You can use a good biscuit mix.  Prepared Pantry’s New England Cheddar Biscuit Mix works  great.

Ingredients

3 1/2 cups all-purpose flour

2 tablespoons sugar

1 tablespoon baking powder

3/4 teaspoon baking soda

1/4 teaspoon salt

8 tablespoons cold butter cut in pieces

1 1/3 cups buttermilk

hot dogs or sausages

Whipped mustard or other spreads

cheddar cheese (optional)

Directions           Preheat  the oven to 425 degrees.

  1. In a large  bowl, combine the flour, sugar, baking powder, baking soda, and salt.
  2. Using a pastry blender or 2 knives, cut in the butter until the mixture  forms coarse pieces.
  3. Add buttermilk and stir the mixture with a fork until most of the dry  ingredients have been moistened. Turn the ingredients onto the counter and  knead and fold until the dough is formed. Do not knead longer than necessary.
  4. Roll or pat the dough to about 1/4-inch thickness and cut into a circle with  a biscuit cutter for small sausages or into oblong or rectangular pieces for  hot dogs. (The tendency is to roll the dough too thick. Remember that the dough  will double in thickness when baked.)
  5. Spread mustard or another condiment on the dough.  Do not spread mustard where the two edges  will overlap.  One option is Elki  Maple Bacon Whipped Mustard Spread.
  6. Place a hot dog or sausage on each. For hot dogs, slice the dogs lengthwise  about half-way through the dog. Place mustard or a cheese stick in the opened  dog.
  7. Fold the dough around the dog or sausage. Place the biscuits on a greased  baking sheet.
  8. Bake for 9 minutes or until the tops are just golden brown and  biscuits sound hollow when gently tapped. Serve warm.
Prepared Pantry offers a bunch of different spreads for you to add. Here are just a few.

Meal Suggestions

To make your blanketed pigs a full meal, try biscuit-wrapped brats with steamed broccoli or fresh peas, and sliced tomato or a full salad. Here it is midwestern style – with corn on the cob!

Or how about an Italian Herb Pizza-dough-wrapped hot dog with a slice of cheese in the middle, accompanied by potato salad, corn on the cob, and fresh grapes.

 Use a bread mix to make pocket sandwiches and  piroshki.

Share
Posted in Blog, Family, Meat, Recipes, Recipes to Make with Children | Tagged , , , , , , | Leave a comment

Cooking with kids to make Chicken Fingers – Healthy and pretty much fat free!

Share

Our grandkids love chicken nuggets but most of those we find in restaurants are in batter and full of fat and carbohydrates that provide empty and unnecessary calories. This recipe is truly easy and lower in fat -using Panko breadcrumbs and cheese – and our little ones love them! I do too – so this is a dish that can feed the whole family – and makes cooking with kids a pleasure. This dish goes well with the song The Silly Kwela! We love to swing to the African beat! By the way – if you click here you can download our coloring books – the first one is FREE!

Ingredients:

  • 2 (6-ounce) skinless, boneless chicken breasts
  • 1/3 cup Panko breadcrumbs
  • 2 tablespoons grated Parmesan cheese ( you can get it ready grated but it tastes so much better if you grate as you use)
  • 2 tablespoons all-purpose flour
  • 1 egg white, whisked just a little
  • 1/4 teaspoon black pepper,
  • 2 Tblsp olive oil ( to make it even lower in fat you could use Pam Spray but the oil gives this a wonderful taste)
  • 2  lemon wedges

Directions:

1. Place chicken between 2 sheets of heavy-duty plastic wrap; pound to 1/2-inch thickness using a meat mallet or small heavy frying pan. This will make them like veal schnitzels! The kids LOVE to pound them – mind those fingers however! I find that I will give them a wooden spoon and let them pound away although I do the heavy pounding before or after that.

2. Combine breadcrumbs and cheese in a shallow dish.

3. Place flour in a shallow dish. Place egg white in a shallow dish. Sprinkle chicken with dash of salt and pepper. Place the chicken in the flour first then dip in egg white. Then put the chicken into the breadcrumb mixture. Place chicken on a wire rack; let stand 5 minutes. Our kids will do this – their facial expressions are fun – the texture of the chicken is certainly a bit yucky – but they like the sticky mess that the flour and eggwhite and breadcrumb makes. Prepare for a mess – put newspaper under the dishes – and enjoy!

4. Heat 1 tablespoon oil in a large nonstick skillet over medium-high heat. Add chicken; cook 3 minutes. Turn chicken over; cook 2 minutes or until browned and done.

5.  You can serve this with steamed broccoli or the wonderful peas and mint recipe that you can find by clicking here!https://littlefarmgrandma.com/?p=3191

6. Do you know that squeezing lemon onto almost any main dish just before serving makes the flavors pop out and taste better?

Share
Posted in Blog, Family, Poultry, Raising Children, Recipes, Recipes to Make with Children | Tagged , , , , , , , , , | Leave a comment

A very typical scene in Africa – it makes sense in a funny sort of way – for your daily giggle!

Share

This is one way to transport wheelbarrows when you have a two seater car.

Share
Posted in Blog | Tagged , , , , , | Leave a comment

Cake making – Streusel Cake with Fruit Filling – Cooking with Kids

Share

Pennsylvania  Dutch Streusel Cake with a  Fruit Filling

Have you ever made streusel  cake or streuselkuchen?  This is one of  the best.  Like most, this one has a  layer of fruit filling tucked under the streusel top.

Serve  it as a dessert or as a coffee cake.   It’s easy to make with premade pastry  fillings again which I get from Prepared Pantry.  The one in the  picture was made with a cherry filling but you can use any of the following  fillings:

  • Cherry
  • Apple
  • Blueberry
  • Lemon
  • Raspberry

You  can also mix a fruit filling with a Bavarian cream  filling or a cream cheese filling,  about half of the cream filling and about half of the fruit filling, to make  fillings like cherry cream cheese or raspberry cream. Everything tastes better with music – so be sure to put on some – we like grandma music – which includes Love Song For My Child. By the way – if you click here you can download our coloring books – the first one is FREE!

Premade pastry fillings come in 2-pound tube packages.  Simply cut the corner and squeeze what you  need.  You will use about half of the  filling.  Fold the cut corner over and  put a clip on it.  You can store the  unused portion for six months in the refrigerator.

We  make this cake in a 9-inch springform pan, our Candy  Apple Red Silicone Springform Pan, because it has a double seal that  makes it virtually leak proof and because of the glass base that we can cut and  serve on.  You can use another springform  pan as long as it has a tight seal.

                  Ingredients

  • 2  1/2 cups all-purpose flour
  • 3/4 cup brown sugar
  • 3/4 cup butter
  •  1/2  teaspoon baking soda
  •  1/2 teaspoon baking powder
  •  1/2 teaspoon cinnamon
  •   1/4 teaspoon nutmeg
  •   1/4 teaspoon salt
  •   3/4  cup buttermilk
  •   1 large egg, whisked
  •   1 teaspoon vanilla or 1/2 teaspoon almond extract
  •    2  cups premade pastry filling
  •   1/2  cup confectioners’ sugar
  •   1/2 teaspoon vanilla or 1/4 teaspoon almond extract
  •   1-2 tablespoons milk

                  Directions

Preheat  the oven to 350 degrees.

  1. Mix  the flour and brown sugar together. With a pastry knife, cut in the butter  until the mixture is granular in appearance.   Measure and set aside 3/4 cup of the crumb  mixture.
  2. Stir  the baking soda, baking powder, spices and salt into the remaining crumb  mixture. Form a well in the center of this dry mixture. Add the buttermilk to  the egg and add the extract. Pour the buttermilk mixture into the well in the  dry mixture. Stir with a fork until combined. Do not over mix. Some lumps will  remain. Set aside about one cup of this batter.
  3. Place  the batter (not the cup set aside) in the prepared pan. Spread it evenly across  the bottom and slightly up the sides with a rubber spatula.
  4. Spread  the premade pastry filling over the center of the batter. Spoon the set aside  batter on the pastry filling in drops—it will not cover the filling but will  spread while baking. Sprinkle the remaining 3/4 cup crumb mixture over the  batter. (You will have four layers: batter on the bottom, then fruit filling,  then batter, and finally the crumb topping.)
  5. Bake  for 45 to 50 minutes or until golden and the cake portion tests done with a  toothpick. Baking times will vary with different pans. Let the cake cool for  ten minutes in the pan on the rack. If you are using a springform pan, loosen  the edges and remove the ring after ten minutes.
  6. Mix  the confectioners’ sugar, extract and enough milk to form an icing of drizzling  consistency. Drizzle over the streusel cake.
Share
Posted in Blog, Desserts, Family, Other wonderful treats, Raising Children, Recipes, Recipes to Make with Children | Tagged , , , , , , , , , , , | Leave a comment

Quiche – Cooking with Kids – the Shortcut Way!

Share

Quiches are a food that our grandchildren love. The french name for this delightfully flexible ‘pie’ makes a fancy dish from simple cooking. Easy to make and serve – and always thrilling to eat – change the ingredients to meet your fancy and be sure to remember when cooking with kids – let them help you! Here is a picture of Jonah helping to prepare broccoli and green beans to add to the quiche that he likes the best -which is not the standard one below – but could be with the addition of his favorite vegetables! Of course we are listening to Grandma Music! He loves Sam, The Broken Robot Song. By the way – if you click here you can download our coloring books – the first one is FREE!

Ingredients:
One unbaked prepared pie crust ( there are lots of varieties in your supermarket)

3 Tbsp of Olive Oil

2 white onions chopped

Italian Parsley ( or if you prefer you could use Fresh Coriander/Cilantro which my grandson Jonah LOVES!)

Other ingredients like peppers, broccoli, green beans, mushrooms, bacon cooked crispy and dry, chopped cooked chicken breast, crumbled goat cheese and so on

4 eggs

3/4 cup of Half and Half ( or light cream)

1.5 cups of grated gruyere cheese

Salt and pepper to taste

Directions:

1. Heat the oven to 375 degrees while heating the oil in a deep frying pan, then saute the onions in the oil until soft.

2. Add the raw vegetables if any and let them soften/reduce. Stir gently.

3. Add the parsley or cilantro and saute for a few more minutes and season to taste with salt and pepper

4. Whisk the eggs with the half and half/cream and add the gruyere cheese and a touch of salt and pepper to taste. Add the vegetables and stir gently to mix.

5. Place the pie crust ( which normally comes in a tin) on a flat baking sheet in case of spillage – and pour the mixture into it – until very full.

6. Bake at 375 degrees for 40 minutes or until a toothpick inserted in the middle comes out clean. Serve with a fresh arugula and mint salad. YUM!


Share
Posted in Blog, Family, Raising Children, Recipes, Recipes to Make with Children, Vegetables, Vegetarian Mains | Tagged , , , , , , , , , , | Leave a comment

A vegetable kids will love – Green Peas with butter and mint – cooking with kids made easy – while playing Grandma Music!

Share

I love fresh peas. We used to grow them in South Africa and as a child I would go to the vegetable patch and stand and eat the sweet delicacies right out of the pod. In this recipe you will need to find fresh peas – which is the only difficult thing about it – the rest is easy. And cooking with kids means that they will open the pods and eat the peas as well as shelling them for you to cook! What fun.

Ingredients:

  • 1 tablespoon butter
  • 1 cup chopped chives
  • 2 garlic cloves, minced – fresh is best but when in a hurry I will use ready prepared from the store
  • 4 cups shelled green peas – this is fun to do with children but have extra on hand for snacking!
  • 1 cup water
  • 1 cup chicken broth – I use Better than Bouillon
  • 1 tablespoon honey – we use the honey from our bees – try to get pure organic honey since most honey is sugar water and NOT pure in stores
  • Salt to taste
  • Four large pieces of feta – crumbled (optional)
  • 1/4 cup chopped fresh mint – we grow this – and its easy to grow in a pot in your kitchen! Try it sometime!

Directions: Put on your favorite song – mine is grandma music –  Start the world all over again. By the way – if you click here you can download our coloring books – the first one is FREE!

1. Saute the chives and garlic in melted butter in a pan just for a few minutes.

2. Add all the other ingredients except the minte and bring to a boil then reduce heat, and simmer until peas are tender.

3. Dont overcook – you probably need only 10 minutes for really fresh peas – remove from heat and put into a serving dish – then stir in the chopped mint.

4, We make our own feta – so love to add crumbled feta to the top of the peas, toss slightly and then serve. Yum! This could be a vegetarian main for those who also eat cheese.

Share
Posted in Blog, Family, Recipes, Recipes to Make with Children, Vegetables, Vegetarian Mains | Tagged , , , , , , , , , | Leave a comment

Cooking with kids – making Cream Puffs! Tip = this is the EASIEST pastry that Children can make!

Share

A Very Simple Way to Make Very Good Cream Puffs

(Includes raspberry, cherry, and lemon variations)

If you can make cupcakes, you can make  cream puffs.  They’re that simple.  I don’t mean fancy, decorator cupcakes; I  mean bake-them-from-a-mix-and spread-frosting-on-them cupcakes.  They are not just amazingly good; they’re  easy. And again I am resourcing ingredients from my favorite supplier, The Prepared Pantry.

I  don’t remember when I had my first cream puff.   I was a kid.  I remember that they  were kind of mysterious—something magical.   I had no clue how they were made but I sure liked them.  Now I know how simple they are. And so you can make them with your children.

With  cream puffs, you can be a successful pastry chef—a magician in your own  kitchen.  They’re so easy, they’re  foolproof and so good that you’ll dazzle your family and friends. Of course its important to put on music while we cook – so we love to listen to the Happy Song which you can buy by clicking on this link – or buy the whole CD ( by download or in Sam’s Special Box) -makes us click our fingers and dance around the kitchen. What could be more fun than that! By the way – if you click here you can download our coloring books – the first one is FREE!

There  are three parts to cream puffs: the baked pastry shell, the Bavarian cream  filling, and the chocolate topping.  It’s  not just the combination of tastes; I love the crisp shell against the cool,  silky smooth Bavarian cream along with the melt-in-you-mouth chocolate.

Step 1:   The pastry shell.  The batter for the pastry is extremely  easy.  It’s only three ingredients excluding the water.  There is no  baking powder or yeast; these are leavened with steam.   The key in  baking the shells is to get your oven hot enough that the moisture will quickly  turn to steam expanding the dough until it triples in size and then baking them  just until they get a little caramel colored with crispy edges. I started making these when I was a child – and was thrilled and delighted that they came out every single time exactly as I wanted them to!

Step 2:   The filling.  Buy premade  Bavarian cream.  You can buy  it cheaper than you can make it and it’s a lot less trouble.  It comes in a two-pound squeeze pack.  Cut a quarter-inch off the plastic package,  insert the tube in the edge of a pastry, and squeeze.  You’ll feel the pastry become heavier and  start to swell as the Bavarian cream fills the pastry.  It’s the easy way to fill cream puffs.  It’s also the easy  way to fill cupcakes with pastry cream.        When  you’re through filling your cream puffs, fold the corner on the pastry bag  over, put a paper clip on it, and store the rest of your pastry cream in the  refrigerator for up to six months.  See what else you can make with pastry filings with this  free e-book.

Step 3: The chocolate.  You can use  any sweet, high-quality chocolate.  Chocolate wafers are made for candy making and  have a smoother grind and more cocoa butter than chocolate chips.  You can either dip your cream puffs in the  melted chocolate or spoon it over the top of each.  The hotter the chocolate, the thinner is the  coating.  If it is melted but not too  hot, you’ll get a thick layer of chocolate.

The Recipe

This  is the recipe for traditional cream puffs made with Bavarian cream and  chocolate.  Following are instructions  for making variations like raspberry, cherry, and lemon cream puffs.

Ingredients

1  cup water       1/2 cup butter (one cube)       1 cup all-purpose flour       4 large eggs Bavarian  pastry cream Chocolate  wafers or other good quality melting chocolate

Directions

  1. Mix       the dough.  In a medium       saucepan on medium-high heat, place one cup of water and one stick (1/2       cup) of butter.  After the butter is melted, turn off heat and add one       cup all-purpose flour all at once.  Stir until the dough forms a ball       and flour is absorbed.
  2. Place dough ball       in your stand-type mixer with the paddle attachment and mix on low speed until       the dough starts to cool, 1 to 2 minutes.  Add the  eggs all at       once and mix on low speed until the dough absorbs the eggs and the dough       becomes very sticky. This will take about 8 to10 minutes.
  3. Bake the cream puffs.  With a large       ice cream scoop (1/4 cup), spoon mounds of evenly spaced dough       onto a greased cookie sheet.  Bake       at 400 degrees for 20 minutes and then turn the oven down to 350 degrees       for another 10 minutes. You can also use a small cookie scoop as shown in the pictures. You’ll just need to lower the baking time to 15 minutes at 400 degrees and then turn down to 350 for another 7 minutes.
  4. Fill the cream puffs with Bavarian       cream.  If you are using a scratch recipe, make       a horizontal slit in the edge of each cream puff and slip a large spoonful       of cream into each cream puff.  If       you are using professional Bavarian cream,       insert the tip of the plastic bag into the edge of each cream puff and       squeeze.

Melt  the chocolate.  You can  do so in the microwave using 20 second bursts or in a chocolate melting pot.   Do not  overheat the chocolate.  You can either  dip the tops of the cream puffs into the chocolate or spoon chocolate over the  cream puffs.  Let the chocolate set  before serving.

The Family of Recipes:  Variations on  a Theme

Discover  a whole new world of cream puffs like raspberry cream, cherry cream cheese, and  lemon cream puffs.  You can make these by  simply varying the filling and the topping.

New Fillings for New  Cream Puffs

Professional  pastry fillings come in the following types:

Learn  more about professional pastry fillings.

While  you can fill your cream puffs with any of these pastry fillings, they just  don’t seem like “cream” puffs without the cream filling.  You can mix the cream fillings with the fruit  fillings to make a raspberry cream filling, a cherry cream cheese filling, or a  lemon cream filling.  You can do that two  ways.  You can mix raspberry and Bavarian  cream filling in a bowl and spoon your raspberry cream filling into the cream  puff pastries.  We don’t bother mixing  the two in a bowl.  Simply insert the  raspberry filling with a squeeze and then squirt Bavarian cream in through the same  hole.  The filling will be red streaked  with Bavarian cream but no one seems to mind; the streaks are attractive.

Adding a Frosting

The  topping doesn’t have to be melted chocolate.   You can top your cream puffs with melted white chocolate or with  frosting.  You can tint your frosting or  white chocolate with professional color gels and add flavors.

A  lemon cream cheese frosting on a lemon cream puff is delightful.  A raspberry cream filling and a raspberry  frosting tinted light pink is a favorite.   (We recommend Marsden and Bathe Flavors and Americolor Professional Food Color Gels to get your frosting the right flavor and color.  They are both reasonably priced and  Americolor comes in such a wide selection of colors like four shades of pink.)

We used this recipe:

3 oz. cream cheese       1 cup powdered sugar       1/2 t. vanilla or other flavor     milk

1. Whip the cream cheese until soft. Add the powdered sugar.     2. Stir in the flavor. Add enough milk and continue stirring until it reaches the desired consistency.


Share
Posted in Blog, Desserts, Family, Raising Children, Recipes, Recipes to Make with Children | Tagged , , , , , , , , , | Leave a comment