Meatballs -with pasta – orzo – or rice. Cooking with kids FOR kids!

Share

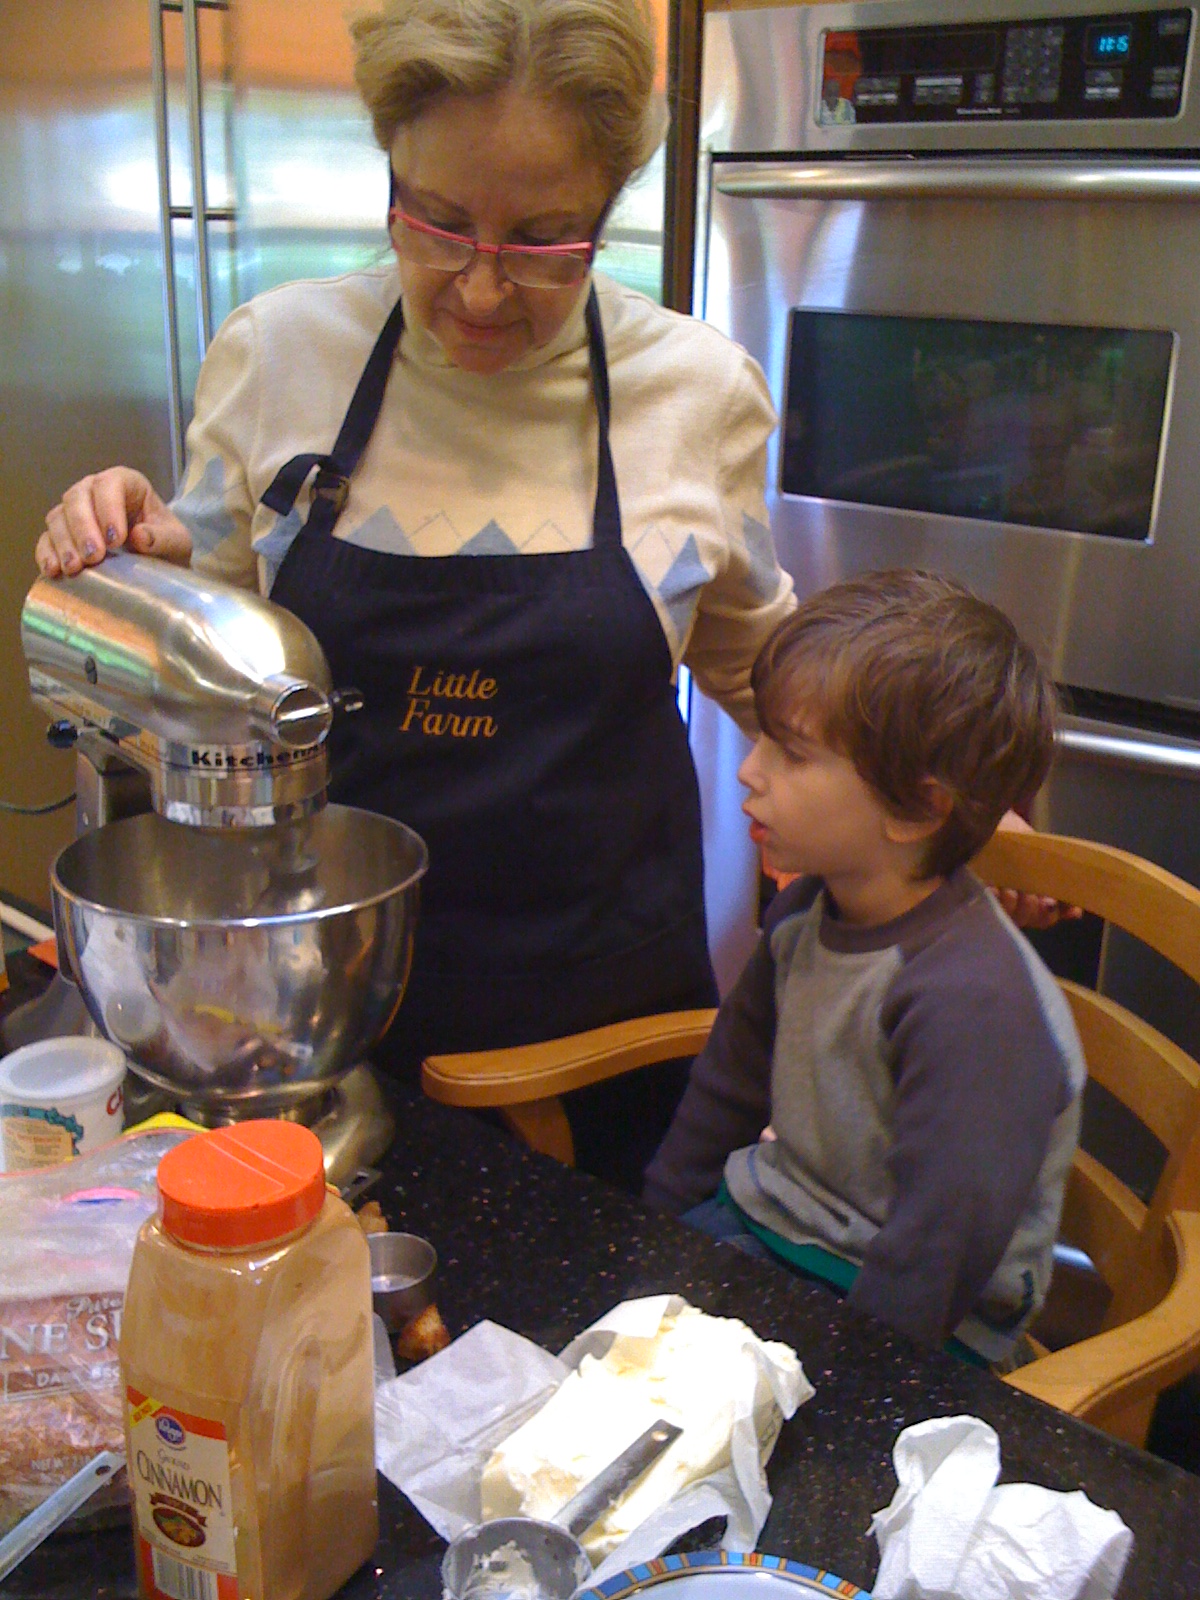
We make our own Feta. Cooking with kids using home made organic products is a thrill because the children can see the process from farm to table. And that teaches them to respect nature. Which is wonderful. So Jack and Jonah watch me milk our goats, turn that milk into Feta, age it over months, and then take it out to use with a delicious and fun dish such as this one. What could be better than that? Along with some terrific music of course – try Flying Cows Song! BTW I love Cooking Light and I adapted this recipe from their November 2009 one. They used ground lamb, I am using ground beef ( I find that the grandkids prefer the taste of beef to lamb). And my recipe prefers fresh herbs to dried ones as well as allowing rice instead of orzo!

Ingredients

  • 2 cups hot cooked orzo or any other pasta – this also works with rice!

  • 1/3 cup plain dry breadcrumbs – I use Panko

  • 1/2 teaspoon dried oregano – or fresh use 1 full teaspoon since its not as condensed as the dried one – but oh so much tastier!

  • 1/4 teaspoon salt – use sea salt if possible – its heavier and you may need to use less

  • 1/4 teaspoon ground cinnamon

  • 1/4 teaspoon freshly ground black pepper

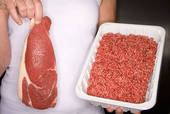
  • 1 pound lean ground beef ( or if you want it a little less lean you could use New York Steak as a special treat!)

  • 1  garlic clove, minced

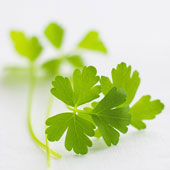
  • 2 tablespoons chopped fresh Italian parsley, divided

  • 2  large egg whites

  • 1 1/2 teaspoons olive oil

  • 2 cups jarred marinara sauce ( we prefer to make our own tomato sauce which I will give you in another post – I have a WHOLE pot of it cooking up right now!)

  • 3/4 cup (3 ounces) crumbled feta cheese

Directions:

  1. Preheat oven to 375°.

  2. Cook orzo or rice according to package directions; drain. Keep warm.

  3.  Combine breadcrumbs and next 6 ingredients (through garlic) in a medium bowl; stir in 1 1/2 tablespoons parsley.

  4. Add egg whites, stirring mixture until just combined.

  5. Shape mixture into 12 (1-inch) meatballs; cover and chill meatballs 5 minutes.

  6. Heat oil in a large ovenproof skillet over medium-high heat.

  7. Add meatballs to pan; cook 8 minutes, turning to brown on all sides.

  8. Drain well; wipe pan clean with paper towels.

  9. Return meatballs to pan.

  10. Spoon marinara sauce over meatballs; sprinkle with cheese.

  11.  Bake at 375° for 11 minutes or until meatballs are done.

  12. Sprinkle with remaining 1 1/2 teaspoons parsley.

  13. Serve over orzo or rice.

Share
Posted in Blog, Meat, Recipes, Recipes to Make with Children, Rice | Tagged , , , , , , , , | Leave a comment

Chicken Thai Style Easy Mid Week Dinner for Cooking with Kids

Share

Chicken pieces with thai seasonings makes for a great easy low cal meal that your kids or grandkids can help prepare. The rule in our home is that you have to taste everything once – and if you don’t like it you don’t have to eat it. Unsurprisingly our little ones have found that they like unusual fruits like sapote and cherimoya, and unusual foods like camembert and goat cheese. They also love music – Jack in particular is a huge classical music fan – and so our home rings with Beethoven, Mozart, Handel and of course Grandma Music!

Ingredients:

  • 1/4 cup rice vinegar
  • 2 tablespoons brown sugar
  • 2 tablespoons fresh lime juice ( limes from our little farm picked by the grandkids)
  • 2 teaspoons red curry paste (most supermarkets have these if not specialty stores or on line)
  • 1 pound skinless, boneless chicken breast, cut into bite-sized pieces
  • 1 1/2 tablespoons canola or light olive oil, divided
  • 1 cup chopped onion
  • 1 cup chopped carrot
  • 1 (8-ounce) package mushrooms any kind ( you can get them sliced but they cost more)
  • 1/2 cup light coconut milk
  • 1 tablespoon fish sauce ( also available in most supermarkets or specialty stores or on line)
  • 1/2 teaspoon salt
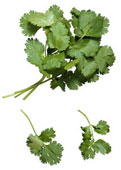
  • 1/4 cup chopped fresh cilantro

Directions:

  1. Combine rice vinegar, brown sugar, lime juice, red curry paste,in a large zip-top plastic bag. The children can squeeze the bag once its all in – or if they are into measuring, you can have them measure and add ingredients to the bag.
  2. Add chicken; seal and marinate in refrigerator 15 minutes, turning once.Marinading this way is easy and tidy – and works like a charm!
  3. Remove chicken from the bag, reserving marinade.
  4. Heat 1 tablespoon oil in a large nonstick skillet or wok over medium-high heat. Add chicken; stir-fry 4 minutes.
  5. Remove chicken from pan; keep warm.
  6. Add remaining 1 1/2 teaspoons oil to pan.
  7.  Add onion and carrot; stir-fry 2 minutes.
  8. Add mushrooms; stir-fry 3 minutes.
  9.  Add reserved marinade, scraping pan to loosen browned bits.
  10. Add coconut milk and fish sauce; bring to a boil.
  11. Reduce heat, and simmer 1 minute.
  12. Stir in chicken and salt; cook 1 minute.
  13.  Top with cilantro.

I like to serve this with basmati rice cooked in a rice cooker – another opportunity for the children to do some simple math, measuring and adding ingredients to the cooker.

Share
Posted in Blog, Poultry, Recipes to Make with Children, Rice, Uncategorized | Tagged , , , , , , | Leave a comment

Using my Slow Cooker – the best! Cooking with kids is such fun – try it!

Share

I am definitely in love with my slow cooker – it makes the house smell divine, is so easy and labor free – and just sits there all day doing its work without my  having to supervise, worry or get involved. Now what could be better than that!
Try out this great and easy recipe – and let me know how you like it! Of course put on some music to make the preparation fly by. Try The Sleepy Song since after making this you will have time for a nap! ( YEAH Right…..) Below are Jack and Jonah in their soccer uniforms – hugging and Jack is pulling his ‘photo’ face. They are why I love to cook!

Ingredients:

The kids can help you do all of this – let them cut the breasts (holding your hand as I have spoken about in my blog before), they will love mixing all the other ingredients and pouring it over the chicken in the slow cooker, and they can turn it on too! Who knows maybe one day they will make YOU dinner!

  • 6 Boneless, skinless Chicken Breasts cut in half ( we only use organic)
  • 1 Tbsp of Olive Oil
  • 1/2 cup of wine ( any leftover wine is good – white is better if you have it)
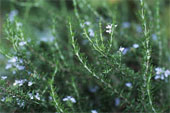
  • Two sprigs of chopped rosemary (remember you can grow rosemary very easily indoors in a small pot in your kitchen or in a small space on a patio in a pot or in your garden and it gives a lovely blue flower once a year in summer as an added bonus!)
  • 1 sprig of chopped tarragon or 1/4 tsp of dried tarragon
  • I can of cream of mushroom soup
  • 1 Tbsp of worcestershire sauce
  • 1 cup of chopped mushrooms – any kind just be sure you wash them well
  • 1 tsp of Garlic Salt or to taste
  • Rice ( basmati) in a slow cooker – and raisins optional

Directions:

  1.  Place the chicken pieces in a slow cooker.
  2. Mix all ingredients and heat stirring until smooth.
  3. Pour over the chicken in the cooker,
  4. Turn the heat to low to cook for 8-10 hours or high to cook for 6 hours.
  5. Serve with rice in a rice cooker ( the easiest way to make rice and it stays hot that way). I like to add raisins to my rice – but that is optional

Enjoy – now what could be easier than this?


Share
Posted in Blog, Family, Poultry, Recipes, Recipes to Make with Children, Rice | Tagged , , , , , , , , , , | Leave a comment

Making great summer beverages – use fresh fruit and keep everyone hydrated! Fun when cooking with kids too

Share

How to Make Great Summer Beverages

In the heat of the summer, it’s important to drink plenty of liquids. That’s especially so for children as they play in the sun. Cooking with kids is fun and making these drinks is terrific. Our grandkids LOVE pushing the button on the blender. Do yours? Put on some great grandma music such as the Tickle me song!

Water is still the best drink there is. And sugary drinks are not good for your health. I am delighted that our grandkids love water so I am always reluctant to offer them sugary drinks.

So we reserve these drinks for parties around the pool when folks are looking for something different.

These are a few ways to help the party goers stay hydrated this summer:

• Puree fruits and freeze them into ice cubes. Use the ice cubes in lemonade or other drinks. Peaches, raspberries, and cherries work well. Strain the fruit puree before freezing to make it smooth.

• If you don’t want to go to the work of pureeing and straining fruit, use a fruit pancake syrup. We made ice cubes from blueberry syrup and used them in lemonade, as shown in the picture above. Dilute the syrup with two parts water for one part syrup before freezing the ice cubes. Other syrup choices include boysenberry, cherry, raspberry, peach, and strawberry.

• Add pancake syrup to your lemonade to make cherry lemonade, strawberry lemonade, and so forth.

• Add fruit juices or fruit syrup to soda water.

• Add fruit juices or fruit syrup to lemonade.

Still need help? How about trying some of these beverage recipes:

Strawberry Lemonade Slush

Fresh is always better. If you have a food processor or blender, here is a great way to convert a couple lemons and a tub of strawberries into a wonderful, fresh beverage.

Ingredients

  • 1/2 cup fresh lemon juice (juice from approximately two lemons)
  • 1/2 cup granulated sugar
  • 2 cups strawberries
  • a few drops red food coloring
  • ice

Directions

  • Puree the lemon juice, sugar, and, strawberries together in a blender or food processor. Add the food coloring.
  • Add the ice cubes one at a time and process until smooth. (If you are using a blender, you can remove the round handle from the lid and drop the ice cubes in the blender one at a time.) Continue adding ice cubes until the mixture is diluted to the desired taste. Add more sugar for a sweeter drink.

Extra notes: If you add enough ice you will have a slush. If you desire a more frozen beverage, place the blender jar in the freezer and in a half hour, scrape the forming crystals from the sides. Repeat if desired.

Tropical Breeze Smoothie

As with all smoothies, this is quick and easy to make. And as with all smoothies, you can vary the quantities of ingredients to fit your taste.

Ingredients

Directions

Mix all ingredients together in a blender. Add more honey if desired. You can buy pina colada flavored yogurt in individual serving-sized cups at the grocery.

The Best Strawberry Shake

What could be better than a tall strawberry shake? You’ll find that you can deliver a better shake than the local car hop. This is a thick strawberry shake made with plump, ripe berries and premium ice cream. It’s topped with sweetened, flavored whipped cream.

The following recipe makes two shakes.  So as to not overfill the blender, make a half at a time.

Ingredients

  • 2 1/2 cups of ripe, fresh strawberries
  • 1/2 cup granulated sugar
  • about 3 cups premium vanilla ice cream
  • 2/3 cup half and half (or a 50:50 mixture of milk and whipping cream)
  • sweetened whipped cream for topping

Directions

  1. Wash, trim, and slice the berries. Sprinkle the sugar on the berries and let them soak at room temperate for two hours or overnight in the refrigerator.
  2. Place half the strawberries and half the ice cream in a blender plus half the juice from the berries. Puree until smooth and combined. Add half of the half and half and mix.
  3. Put the shake in a tall, chilled glass while you make the second shake.
  4. Top the shakes with whipped cream and an optional strawberry and serve.
  5. There are some tricks to making a very good strawberry shake.  Start with the very best berries.  If they are not fully ripe, they won’t be flavorful but if they are starting to get mushy, they may have an off-taste.  And put the right amount of berries in the shake.  Judge the amount by the color of the shake; it should be a rich but pastel pink.  If it’s too light, add more berries.
  6. Taste the shake before you serve it.  If it does not have enough strawberry taste, add some strawberry flavor.
  7. Before making the shakes, chill the blender and glasses in the freezer.  It’s hard to make a thick shake in a warm blender; it melts the ice cream.  Your ice cream should be rock hard.  (Use an ice cream spade, not scoop, to pry out hard frozen ice cream.)  Don’t mix the shake any longer than necessary; the friction from the motor causes heat that will melt the ice cream.

For the whipped cream topping

  • 1 cup heavy whipping cream (the fat content should be 35% or more)
  • 1/4 cup powdered sugar
  • 1/2 teaspoon vanilla or other flavor

1. Chill the cream, the utensils, and bowl that you will be using. 2. Beat the cream at medium speed until soft peaks form.  3. Add the powdered sugar and flavor and continue beating until stiff peaks form.  Do not over whip.

Instead of vanilla, try a different flavor. Strawberry of course works but any of the “warm” flavors will do.  French vanilla, brown sugar, and caramel flavors are all good choices.

Italian Sodas

Summer Sunrise Soda 1 tbsp (1/2 oz) Torani Peach Syrup 1/2 tbsp (1/4 oz) Torani Mango Syrup 1 cup sparkling water or club soda ice

Instructions: Pour sparkling water into tall glass filled with ice. Add Torani syrup and stir well.

Berry Blast Soda 1 tbsp (1/2 oz) Torani Blackberry Syrup 1 tbsp (1/2 oz) Torani Raspberry Syrup 1 cup (8oz) sparkling water or club soda ice

Instructions: Pour sparkling water into tall glass filled with ice. Add Torani syrup and stir well.

Raspberry Cream Soda 2 tbsp (1 oz) Torani Red Raspberry Syrup 1/2 tbsp (1/4 oz) Torani Vanilla Syrup 1 cup (8oz) sparkling water or club soda 2 tbsp (1 oz) cold milk or half &half ice

Instructions: Pour sparkling water into tall glass filled with ice. Add Torani and stir well. Slowly top with milk


Share
Posted in Blog, Family, Recipes, Recipes to Make with Children | Tagged , , , , | Leave a comment

How to Dress …….a CAKE!! Cooking with kids is SUCH fun.

Share

How to Dress a  Cake that’s Easier and Quicker than Frosting – and put on some music to entertain yourself when cooking with kids or grandkids. Try Silly Kwela!

Flourless Chocolate Cake MixIt’s not necessary to  frost a cake.  It’s quicker and easier to  top it.  And better.  Whether you’re making a sheet cake or a round  cake, something as simple as a scoop of ice cream and a sauce can transform it  into a terrific, fancy dessert.

The  pictures in this article are of flourless chocolate cakes—they’re dense and  moist and luscious—but you can do the same with your favorite cake recipe.  If you would like to make a great flourless  chocolate cake, try this easy flourless chocolate  cake mix.

We  suggest three choices—or a combination : ice cream, whipped cream, and  dessert sauces.  To these, you can add  fruit or nuts—or even get a little crazy with things like peanut butter. Just use your imagination.

Your  grocer’s ice cream freezer has a dozen good choices. You  can make your own sauces—and we share some recipes in this article—but we sell a  very nice selection of professional dessert sauces.  You can use ice  cream toppings.  You can use fruit or cream pancake syrups.

But  where it starts getting really wild is when you start making flavored whipped  cream. The basic flavored whipped cream  substitutes another flavor or extract for vanilla and usually brown sugar for  the white sugar.  From there you can add  cinnamon or ginger—maybe some pumpkin pie spice.  We often add an ounce of cream cheese for  every cup of cream.  It adds flavor and  stabilizes the whipped cream.  You can add  nuts or peanut butter.  Try adding pureed strawberries along with the sugar, or pureed cherries ( without pits of course!)

Use the recipes below as templates to get  your creative juices flowing.  Here are additional recipe ideas to try:

Cherry Cream Cheesecake  Flourless Chocolate Cake ( what a mouthful in more ways than one!):

Top  the cake with cream cheese filling Add cherry cream cheese whipped cream ( whipped cream mixed with a dollop of cream chees, pureed cherries and sugar to taste).

Cherry Pineapple Cream Cheese  Flourless Chocolate Cake.

Cream cheese filling and pineapple filling is a wonderful combination. Top your cake with cream cheese filling and  then pineapple filling.  For color and flavor, chop maraschino cherries  and sprinkle them over the top.


Turtle Flourless Chocolate Cake.

Cover the top of your cake with caramel ice cream sauce.  If it’s too  thick, heat it just a bit in the microwave.  Sprinkle with pecans and  drizzle with chocolate ganache.    Add a scoop of ice cream.

Rocky Road Flourless Chocolate Cake.  When the cake comes out of the oven,  immediately sprinkle it with miniature marshmallows.  They should  partially melt.  If they don’t put the cake bake in the oven for a couple  minutes.  Remove the cake and drizzle with chocolate  ice cream sauce or ganache and sprinkle with chopped nuts.

Flourless German Chocolate Cake

Everyone loves German chocolate cake.  This is a simple version  made with a flourless chocolate cake.                    One flourless  chocolate cake, cooled German chocolate cake topping (recipe follows) whipped cream or ice cream

Top  the chocolate cake with the German chocolate cake topping.  Cut into  slices and serve with caramel whipped cream or ice cream.  Top with chocolate ice  cream sauce.

German Chocolate Cake Topping

Ingredients:     

3/4  cup canned evaporated milk

1/2 cup brown sugar

1/2 cup butter

1 1/3 cups sweetened shredded coconut

1 cup chopped pecans
Directions:

  1. In a small pan, bring the evaporated milk, brown sugar, and butter to a  boil.
  2. Boil for three minutes.
  3. Remove the pan from the heat.
  4. Stir in  the coconut and pecans.
  5. Set aside to cool to room temperature.

Strawberries  and Cream Flourless Chocolate Cake

This is a wonderful flourless chocolate  cake to serve in the spring when the strawberries are in season. It is  topped with Bavarian cream and fresh strawberries, then drizzled with strawberry  sauce, and topped with strawberry cream cheese whipped cream.

Ingredients:

Directions:

  1. Top the chocolate cake  with Bavarian cream filling.
  2. To serve, cut the cake  into slices and place on dessert plates. Top each slice with  strawberries.
  3. Drizzle with the strawberry sauce.
  4. Top with the whipped  cream and serve immediately.

Strawberry Sauce

  •  12 ounces, about 3  cups frozen, unsweetened strawberries
  •  2/3 cup red currant jelly
  • about 1/4 cup sugar
  1. Thaw  and puree the strawberries. Place the puree in a small saucepan. Add the jelly.
  2. Cook,  stirring occasionally, until the jelly is completely melted and blended with  the fruit.
  3. Sweeten to taste with the sugar while it is still hot.
  4. Stir to make sure that the sugar is dissolved.
  5.  Let cool.

Strawberry Cream  Cheese Whipped Cream

Ingredients: 

2  cups whipping cream

1  teaspoon strawberry flavor

2  ounces cream cheese, softened

1/3  cup granulated sugar

Directions:

With  an electric mixer, whip the sugar and cream cheese together.  Add the flavor and whipping cream and continue  whipping until soft peaks form.                   You  can add pink food coloring to this recipe if you choose.

Tin Roof Sundae Flourless Chocolate  Cake

This is another fancy  flourless chocolate cake fit for a special occasion.  It is made with a  combination of Bavarian cream, peanut butter, and chopped peanuts all atop a  flourless chocolate cake.

Ingredients:

Directions:

  1. Warm the peanut butter in the  microwave until it is soft and easy to stir.
  2. Mix the Bavarian cream and  peanut butter together in small bowl.
  3. Top the chocolate cake with the  peanut butter filling.
  4. To serve, cut the cake into  slices and place on dessert plates.
  5. Drizzle with the peanut butter  chocolate sauce.
  6. Top with whipped cream and serve  immediately.

Peanut Butter Chocolate  Sauce

Ingredients: 

Directions:

  1. Heat the cream.
  2. In a medium bowl, pour the hot cream over the chocolate.
  3. Stir until the chocolate  is melted.
  4. Stir in the peanut butter.
  5. Let the sauce cool enough for  serving.
  6. If the sauce becomes too thick, reheat the sauce or stir in more  cream.

Chocolate Cherry Cordial Flourless Chocolate  Cake

This   makes a gorgeous, very fancy flourless chocolate  cake—certainly fit   for a special occasion and yet it is not very much  work.  It is an easy   flourless cake  topped with a cherry pastry filling and drizzled with a   chocolate amaretto  sauce. (Amaretto is a flavor commonly  used in   cherry chocolate cordials.)

Ingredients:

Directions:

  1. Top the chocolate cake with the cherry pastry  filling.
  2. To serve, cut the cake into  slices and place on   dessert plates.
  3. Dust  each slice with powdered sugar.
  4. Drizzle  with   the chocolate amaretto sauce.
  5. Top  with whipped cream and serve   immediately.

Note to YOU from ME:  Pastry filling is more   intensely  flavored and a finer texture than is pie filling.  In a pie,   there is more filling than crust  and the filling must be pleasing by   itself.   In a pastry, there is more of balance between filling and   pastry and  hence the filling has more flavor. 

Chocolate  Amaretto Sauce

Ingredients:

Directions:

  1. Bring the cream to  a boil.
  2. In a medium   bowl, pour the hot cream over the chocolate.
  3. Stir until the  chocolate   is melted.
  4. Stir in the flavor and butter.
  5. Let the sauce cool enough for    serving.
  6. If the sauce becomes too thick,  reheat the sauce or stir in   more cream.

Raspberry Flourless Chocolate Cake

This cake will please a crowd. Top the cake with a delicious raspberry sauce, fresh raspberries, and ice cream. Raspberries alone are not tart and not flavored enough for a dessert    sauce even when thickened with a starch.  There are two possible solutions:  Cooking the fruit down to concentrate the flavors or adding a jelly for thickness and flavor.  This recipe uses the latter.
Ingredients:

  • One flourless chocolate cake
  • 12 ounces, about 3 cups  frozen, unsweetened raspberries
  •  2/3 cup red currant jelly
  • about 1/4 cup sugar

Directions:

  1. Thaw  and puree the raspberries.  Strain them twice   through a sieve/strainer or until  nearly all of the seeds are removed.    Place the puree in a small  saucepan.  Add the jelly.
  2. Cook,  stirring occasionally, until the jelly is   completely melted and blended with  the fruit.  Sweeten to taste with   the sugar while it is still hot.   Stir to make sure that the sugar is   dissolved.  Let cool.
  3. Drizzle on the flourless cake and garnish with fresh raspberries.

Yield: About 1 1/3 cups of raspberry sauce.

ENJOY!!

Share
Posted in Blog, Desserts, Family, Recipes to Make with Children | Tagged , , , , , , , | Leave a comment

Cherry Pie – the short cut way when cooking with kids

Share

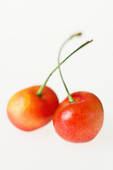
I love to use store bought pie crust or frozen pie dough – its easy and tastes good. This pie becomes sooooo easy when you do it this way.. and those amazing Rainer ( the yellow ones) cherries are abundant at this time of year. I love them and get them at Costco since we do not grow them at our little farm.

Ingredients

  • 1/2  (14.1-ounce) package refrigerated pie dough (such as Pillsbury)
  • 3 tablespoons sugar, divided
  • 1 1/2 teaspoons cornstarch
  • 3 1/2 cups pitted fresh Rainier cherries (about 1 1/4 pounds)
  • 1/2 teaspoon grated lemon rind
  • 2 teaspoons fresh lemon juice
  • 1 1/2 tablespoons buttermilk ( remember that you can create buttermilk from regular 2% milk with a few tablespoons of white vinegar added)
  • 1 tablespoon turbinado or brown sugar

Directions:

1. Preheat oven to 400°.

2. Line a baking sheet with parchment paper. Unroll pie dough onto parchment, and roll to a 12 1/2-inch circle. Combine 1 tablespoon sugar and 1 1/2 teaspoons cornstarch, stirring with a whisk. Sprinkle cornstarch mixture over dough, leaving a 2-inch border.

3. Combine the cherries, remaining 2 tablespoons granulated sugar, rind, and juice; toss well to coat. Arrange cherry mixture over dough, leaving a 2-inch border.

4. Fold dough border over cherries, pressing gently to seal (dough will only partially cover cherries). Brush edges of dough with buttermilk.

5. Sprinkle turbinado sugar over cherries and edges of dough. Bake at 400° for 25 minutes or until dough is browned and juices are bubbly.

6. Remove from oven; cool on pan at least 20 minutes before serving.

Adapted from Ann Taylor Pittman, and my favorite magazine given to me by my God-Daughter Shana – thank you Shana!  Cooking Light JULY 2012

Share
Posted in Blog, Desserts, Recipes to Make with Children | Tagged , , , , , , , , | Leave a comment

Blackberry Pie – heaven! A great summer dish for cooking with kids

Share

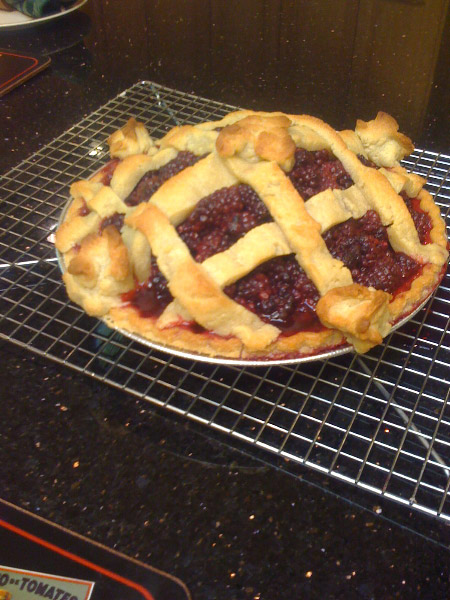
I like using store ready pie crusts – both for the top and bottom. Cooking with kids when using store bought materials is a good idea since they can learn that there are good things that can be bought – as long as you read the labels! Although a cobbler is made with only a top crust, you can crumble it ( hence crumble!) or lattice it and it becomes a wonderful pie if it has a pie base to it – of course it all tastes great. In this pie I am using a bottom crust which is cooked first according to the package instructions, and then am cutting the top crust into strips so as to lattice it. It comes out delicious and attractive. Looks pretty much home made begining to end doesn’t it? Enjoy!

Ingredients

  • 2 Store bought pie crusts
  • 2/3 cup granulated sugar
  • 10 cup fresh blackberries (about 5 [12-ounce] packages – we use the freshly picked ones from our farm)
  • 3 tablespoons cornstarch
  • 1 tablespoon fresh lemon juice
  • 2 tablespoons turbinado sugar

Preparation

1. Preheat oven to 375° or whatever the store-bought crust tells you

2. Prick holes with a fork gently into the crust so that the hot air can escape while it is baking

3. Place the crust in its pan in the oven and let it bake for the time indicated on the label – normally about 10-12 minutes. Keep checking through the oven window since you don’t want the crust to get brown – just lightly colored. Then take it out and let it cool.

4. Combine 2/3 cup granulated sugar, blackberries, cornstarch, and lemon juice; toss gently. Arrange berry mixture in a 13 x 9-inch glass or ceramic baking dish coated with cooking spray.

5. Take out the second store bought crust and carefully take it out of its pan.

6. Roll it into a rectangle on a lightly floured surface. Cut it in half. Take the one rectangle and cut it, crosswise, into (1-inch-wide) strips. Cut remaining rectangle, lengthwise, into (1-inch-wide) strips. Arrange strips in a lattice pattern over fruit mixture; sprinkle top of fruit and dough with turbinado sugar. Bake at 375° for 50 minutes or until golden. Let stand 10 minutes.

7. Serve with ice cream!

Share
Posted in Blog, Desserts, Family, Recipes to Make with Children | Tagged , , , , , , , , , | Leave a comment

We LOVE Corn – do you? How about cooking with kids to make Corn Cake and fruit? YUM!

Share

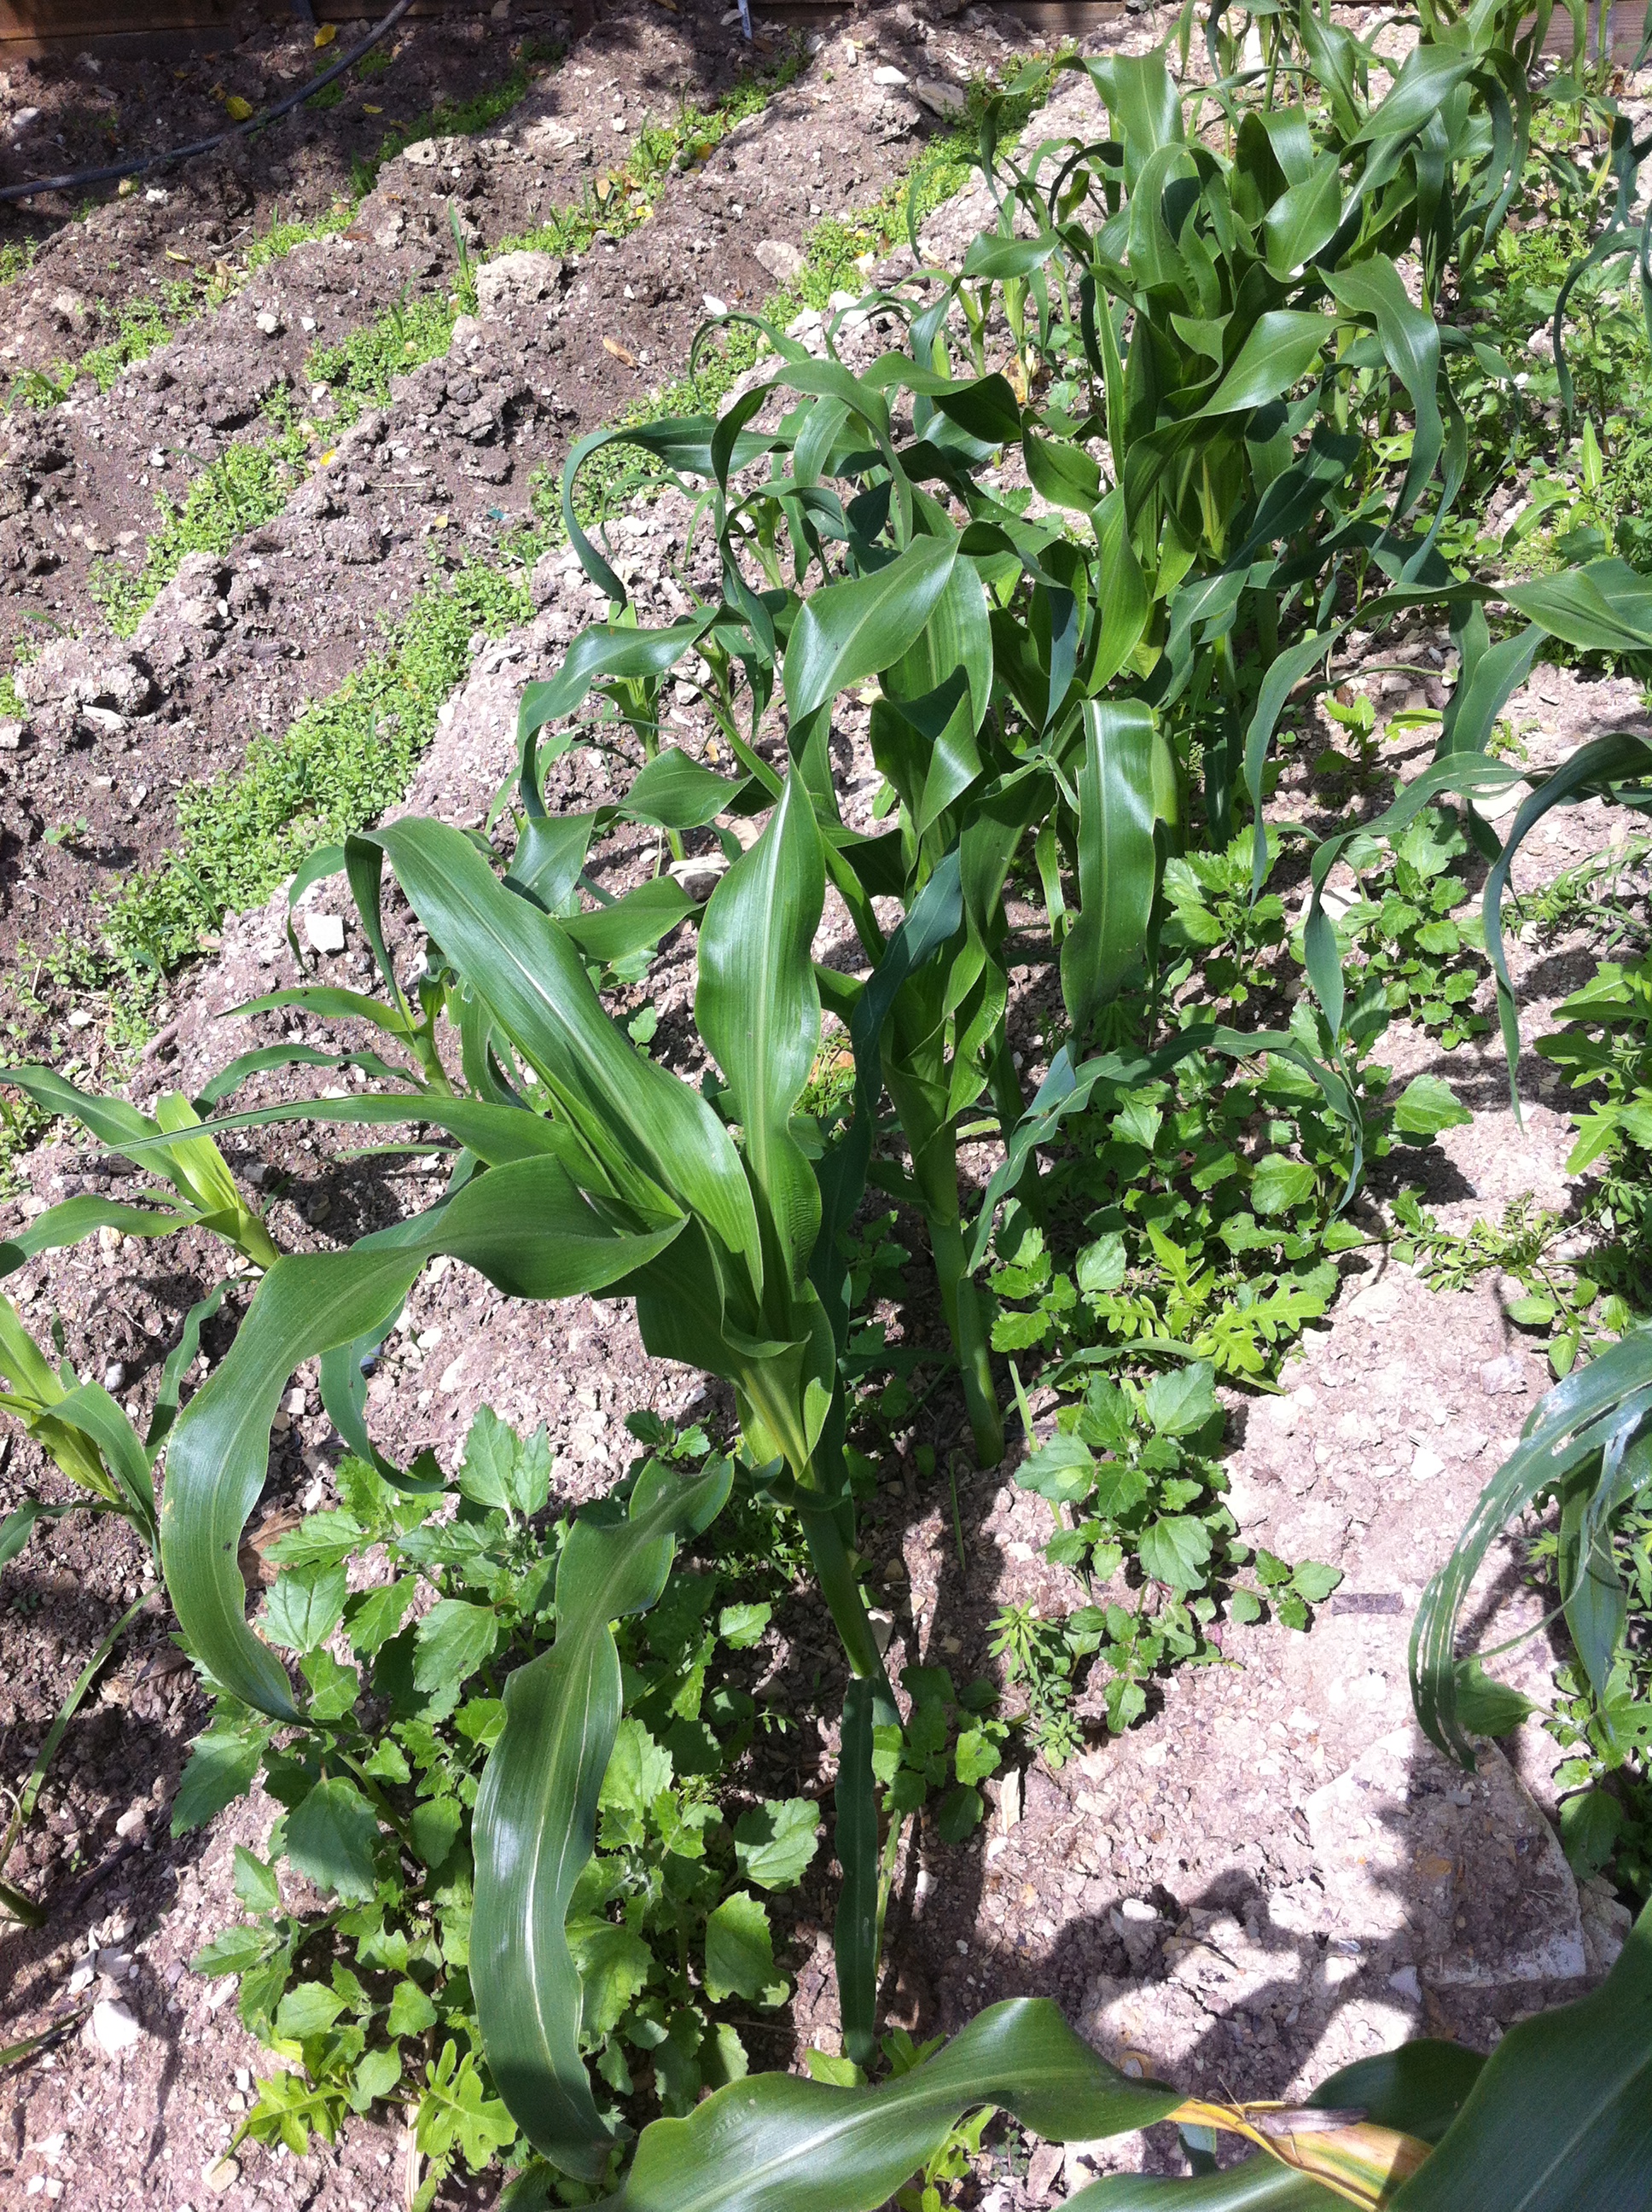
Cooking with kids using fresh ingredients is the best. We love corn and grow our own – so summer fun includes not only throwing corn into boiling water for just a few minutes after picking – or finishing corn on the BBQ, but also making corn cakes. It tastes a bit like sweet corn bread with fruit and the kids love it. Of course cook with music – makes life happier all day – try my inspirational song  ” Start the world all over again”. By the way in the picture of our corn in the early stage of growth below – you will see flax seed growing too. That is because we feed our chickens and quails flax seed to make their eggs more alpha omega rich – and so the manure that we use for fertilizing our vegetables and corn, has some of the seed in it – and voila – flax grows alongside our corn! Don’t you love and appreciate the miracles of nature and urban farming? We certainly do!

Ingredients:

  • 1 cup fresh corn kernels (about 2 ears)
  • 6 tablespoons unsalted butter, melted and cooled
  • 1/3 cup water
  • 2 teaspoons fresh lemon juice
  • 2 teaspoons vanilla extract
  • 2  large eggs
  • 2 cups all-purpose flour
  • 1 1/4 cups sugar
  • 2 teaspoons baking powder
  • 1 teaspoon salt
  • 1/2 teaspoon baking soda
  • 2 cups fresh strawberries cut into slices
  • 2 tablespoons all-purpose flour
  • 1 tablespoon powdered sugar (optional)

Directions:

  1. Preheat oven to 325°.
  2. Coat a 9-inch round cake pan with cooking spray; line bottom of pan with wax paper. Coat wax paper with cooking spray.
  3. Combine corn and next 5 ingredients (corn through eggs) in a blender or food processor; process until smooth. The kids can do this – and love to turn the blender on and off. Careful of those little fingers!
  4. Lightly spoon 2 cups flour into dry measuring cups; level with a knife. Kids learn to do this quite well after a few tries.
  5.  Combine 2 cups flour, granulated sugar, baking powder, salt, and baking soda in a large bowl; stir well with a whisk. This is definitely a kids job!
  6. Add corn mixture to flour mixture, stirring just until combined. Kids love this too. Expect some finger dipping for tasting here!
  7. Toss strawberries with 2 tablespoons flour; fold into batter.  Of course a snack or two on strawberries on the side is to be expected when cooking with kids!
  8. Pour batter into prepared pan.
  9. Bake at 325° for 1 hour or until a wooden toothpick inserted in center comes out clean.
  10. Cool in pan 10 minutes on a wire rack.
  11. Remove from pan and carefully peel off wax paper.
  12. Cool completely on wire rack.
  13. Sprinkle with powdered sugar, if desired.

Adapted from a recipe in Cooking Light July 2002

Share
Posted in Blog, Desserts, Family, Fruit, Recipes to Make with Children | Tagged , , , , , , , , , | Leave a comment

Yogurt – so many ways to use this healthy dish – cooking with kids especially!

Share

We make our own yogurt from our goats milk and use it in many dishes when cooking with kids. It is creamy and delicious. I also enjoy FAGE non fat yogurt when I am looking for a lower calorie dish. There are SO many ways to use yogurt – here are just a few:

As an accompaniment to fish – mixed with chopped fresh mint – by the way did you know that mint grows like a weed? You can grow it indoors in a pot or outdoors in a garden. Delicious!

Along with any kind of berries – blueberries and blackberries look especially good – but strawberries work well. And if you want to take your berries, cook them with some sugar and a tablespoon of lemon juice until syrupy, you can swirl them with the yogurt for an attractive dessert.

A dollop of yogurt on top of a rich meat or chicken stew – especially one you make with paprika softens the flavors and is a low calorie way to have a creamy gravy when mixed in ( rather than using whole cream).

With chopped cilantro mixed into the yogurt served with any fish or chicken dish.

With cucumbers chopped along with mint into a creamy salad – or leave out the mint and add minced garlic instead to make a quick Indian Raita.

And of course the wonderful Greek dish that we had every day while travelling to the Greek Islands some years ago – a dish of yogurt with heaping tablespoons of honey swirled in. YUM! Try some as dessert, or for breakfast with or without muesli.

Here Jack and I are making cookies using yogurt to make the dough moist. Of course we are listening to Grandma Music while doing it! On this occasion it was the Flying Cows Song!

Share
Posted in Blog, Desserts, Fish, Gluten Free, Other wonderful treats, Recipes, Recipes to Make with Children, Tips | Tagged , , , , , , , , , , , , , , | Leave a comment

Strawberry Cheesecake IceCream Recipe – Truly Delicious! Make it Cooking with Kids – with LOTS of tasting!

Share

This is a most delicious ( sadly not low cal) recipe. My grandkids loved making it with me. There was lots of snacking on healthy strawberries while we whisked and stirred together. Alas the end product has a lot of calories, but portion control will mean that you enjoy but don’t over indulge!. I found this recipe from KRAFT FOODS – as a promotion for their Philadelphia Cream Cheese – which is super to cook with. Thanks KRAFT FOODS! Remember to put on the music – and ROCK! Try The Silly Kwela!

Ingredients:


1 package of Philadelphia Cream Cheese ( made by Kraft Foods) softened

1 can of sweetended condensed milk

1/3 cup of whipping cream

2 tsp of lemon zest ( remember my tip on freezing some lemons so that you always have lemon zest just a step away in your freezer!)

1.5 cups of fresh hulled strawberries

3 HONEY MAID Honey Grahams coarsely chopped

Directions:

  1. Mix the first four ingredients with mixer until well blended.
  2. Freeze for four hours or until almost solid
  3. Beat the cream cheese mixture with mixer until creamy.
  4. Blend the berries in the blender until smooth
  5. Add to the cream cheese mixture with chopped grahams.
  6. Mix well.
  7. Freeze for 8 hours or until firm
  8. Remove dessert from teh freezer 15 minutes before serving and let stand at room temperature to soften slightly before scooping into dishes.

YUM!

Share
Posted in Blog, Desserts, Family, Recipes, Recipes to Make with Children | Tagged , , , , , , , | Leave a comment

A really easy Quiche- cooking with kids – they loved it!

Share

Spinach Cheese Quiche

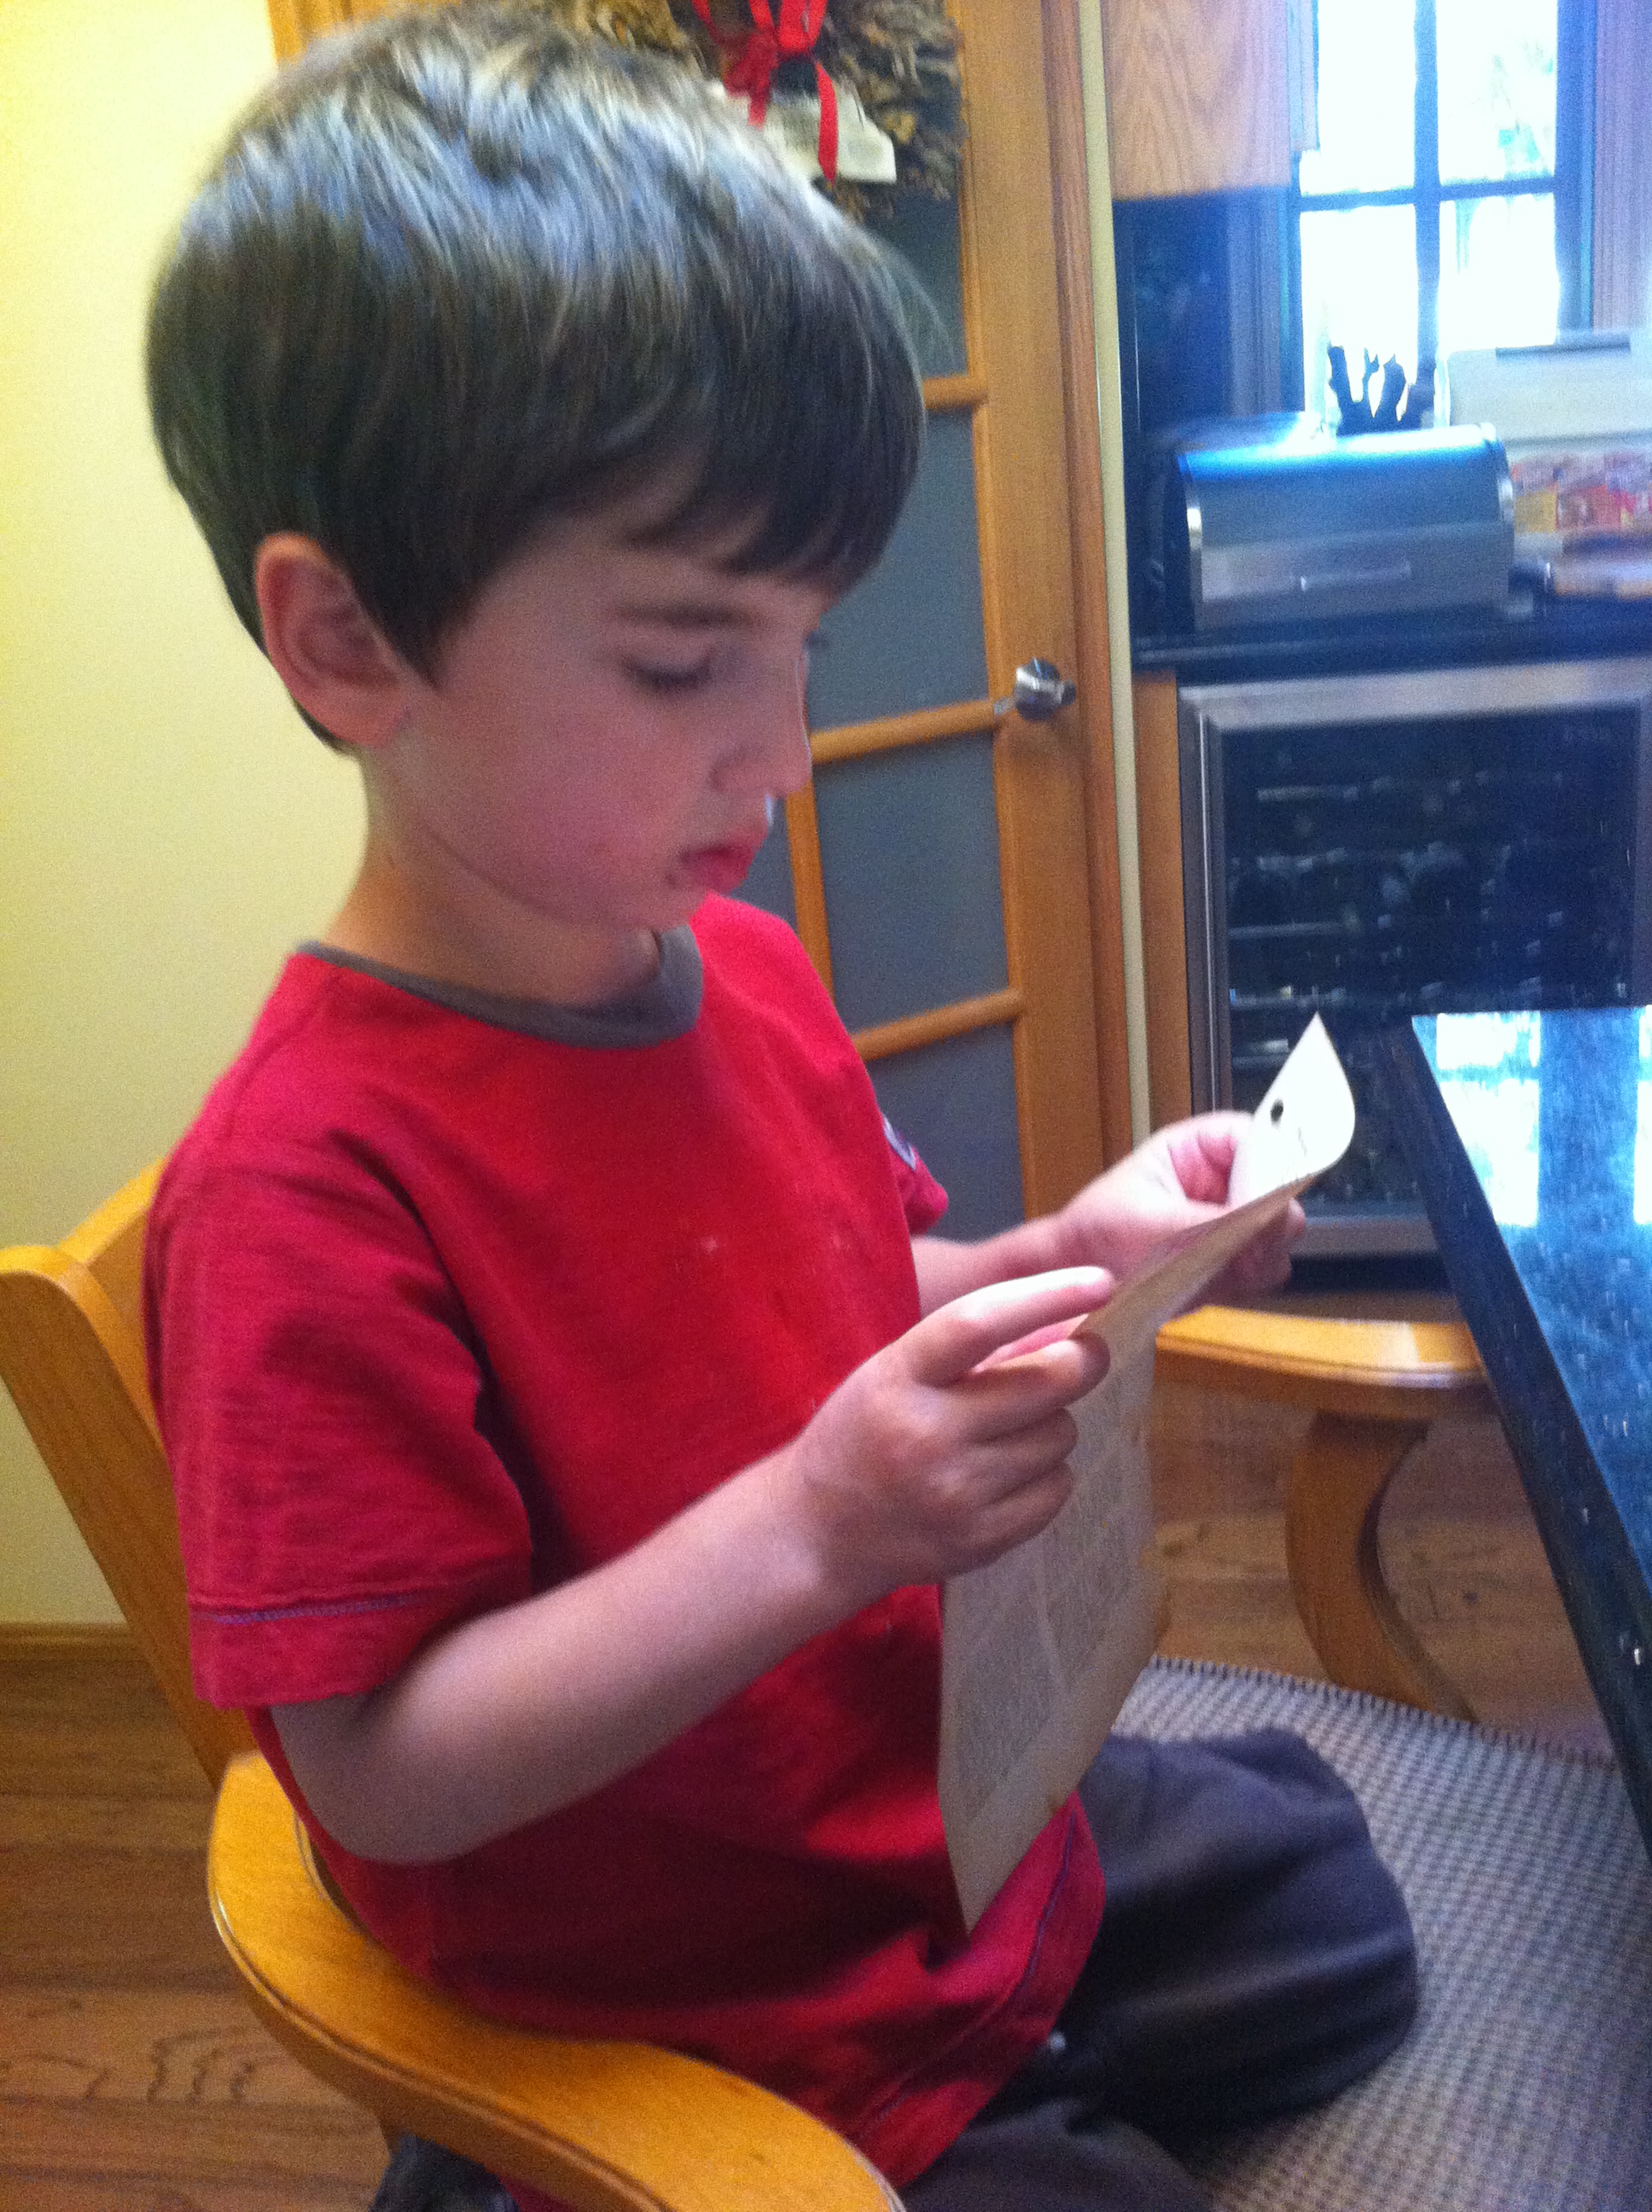
This is a wonderful recipe and here is Jack reading this recipe to me – he taught himself to read at 4 – and is very keen on cooking!

Ingredients

Crust:

  • 6  tablespoons butter, softened
  • 2 tablespoons 1% low-fat milk
  • 1/4  teaspoon salt
  • 1   egg yolk
  • 1 and 1/4 cups of flour

Filling:

  • 1  tablespoon extra-virgin olive oil
  • 3  cups fresh baby spinach
  • 1  cup 2% milk
  • 3/4  cup (3 ounces) grated cheese – any kind – we like Mozzarella
  • 3/4 teaspoon salt
  • 3  eggs

Directions:

  1. Beat the butter in your mixer at medium speed until light and fluffy.
  2. Mix the milk, salt, and egg yolk in a small bowl; stir well with a whisk. This is where the kids get involved – they loved whisking ( and turning the mixer on and off too! Careful those fingers!)
  3. Add milk mixture to butter, a little at a time, beating after each addition.
  4. Add flour in small amounts (the kids love to do this too) beat just until combined. Press mixture into a 4-inch circle on plastic wrap; little fingers like to do this step as well – then cover. Chill for 1 hour.
  5. Preheat oven to 350°.
  6. Unwrap and place chilled dough on a lightly floured surface. Roll dough into a 10-inch circle. I love to show the children how to do this – it is messy but the fine motor skills required to do it are excellent and worth learning.
  7. Fit dough into a 9-inch pie plate. Freeze 15 minutes. Bake at 350° for 25 minutes or until lightly browned. Cool.
  8. Now heat oil in a large frying pan to medium heat.
  9. Add onions; sauté until translucent – not too long – about 5-6 minutes.
  10. Add the spinach and sauté a few more minutes. ( Spinach cooks VERY fast)
  11. Combine 1 cup milk and remaining ingredients in a bowl; stir well with a whisk. ( This is the kids’ job!)
  12. Stir in spinach mixture. Pour filling into crust. Bake at 350° for 35 minutes. Cut into 10 wedges. YUMMY!
  13. This is delicious accompanied by a simple salad.
Share
Posted in Family, Raising Children, Recipes, Recipes to Make with Children, Starters, Vegetables, Vegetarian Mains | Tagged , , , , , | Leave a comment

Fennel – an amazing herb – cooking with kids and teaching them the value of herbs in adding flavor (instead of salt) – also a Sugar Cookie Recipe

Share

Fennel is a wonderful herb that grows wild in California. If you ride horses, during the spring time in California, there is an abundance of wild mustard and fennel that grows along with sage and your steed will love to nibble as you ride along through the mountains of California. And there are many wilder areas where you can ride your horse!

I love to cook with Fennel and a new craze lately has been the use of Fennel Pollen in cooking. I have only tried it in cookies and it worked really well. The problem is that I have only been able to find it commercially on line – at Zingermans.com and PollenRanch.com.

We use the pollen from our own fennel that grows at our little farm. It is easy to use – just take your normal cookie recipe and sprinkle the pollen on top of the raw cookie dough just before you put it into the oven – it adds and enhances flavor sort of like lemon zest. It is particularly well matched to cinnamon and oatmeal based cookies. Of course cooking with kids – especially cookies – is always fun and adding something that you just harvested from your own backyard makes it even more special. I also like to help the children taste different flavors – so that they can reduce their salt usage and experiment more with herbs in food.

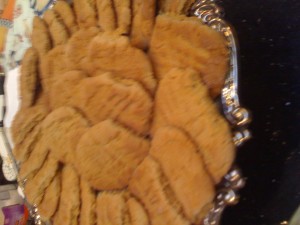
Here is  a picture of the sugar cookies to which I added the fennel pollen. Note the pollen is a little bit sweet and harvested from the flowers of the fennel plants which means if you harvest it fresh, you will only be able to do so in the spring. We believe in buy local and think global – and this is a good example of it.

Sugar Cookies ( remember baking is better with music! How about The First Day At School Song!)


Ingredients

2 1/4 cups (11 1/4 ounces) all purpose flour
1/2 teaspoon baking soda
1 teaspoon of baking powder
1/2 teaspoon salt
1 1/2 cups (10 1/2 ounces) sugar , plus   1/3 cup for rolling
2 ounces cream cheese  , cut into 8 pieces
6 tablespoons (3/4 stick) unsalted   butter , melted and still warm
1/3 cup vegetable oil
1 large egg
1 tablespoon milk
22 tablespoons of fennel pollen ( if you have it and wish to use it!)teaspoons vanilla extract

Directions

  1. Adjust oven rack to middle position and heat oven to 350 degrees. Line 2 large rimmed baking sheets with parchment paper. Whisk flour, baking soda, baking powder, and salt together in medium bowl. Set aside.
  2. Place 1½ cups sugar and cream cheese in large bowl.
  3. Place remaining 1/3 cup sugar in shallow baking dish or pie plate and set      aside. Pour warm butter over sugar and cream cheese and whisk to combine      (some small lumps of cream cheese will remain but will smooth out later).      Whisk in oil until incorporated. Add egg, milk, and vanilla; continue to whisk until smooth. Add flour mixture and mix with rubber spatula until soft homogeneous dough forms.
  4. Divide dough into 24 equal pieces, about 2  tablespoons each (or use #40 portion scoop). Using hands, roll dough into balls.
  5. Working in batches, roll balls in reserved sugar  mixed with the fennel pollen ( if you wish to use it and have it handy) to coat and evenly space on prepared baking sheet, 12 dough balls per sheet. Using bottom of  drinking glass, flatten dough balls until 2 inches in diameter. Sprinkle tops evenly with 4 teaspoons of sugar remaining in shallow dish (2 teaspoons per tray), discarding any remaining sugar.
  6. Bake, 1 tray at a time, until edges are set and just beginning to brown, 11 to 13 minutes, rotating tray after 7 minutes. Cool  cookies on baking sheets 5 minutes. Using wide metal spatula, transfer cookies to wire rack and cool to room temperature.


Share
Posted in Blog, Desserts, Raising Children, Recipes, Recipes to Make with Children, Snacks, Tips | Tagged , , , , , , , , , , , , | Leave a comment

A tip worth remembering – removing Red Wine from fabric

Share

Red wine spills are the worst kind to remove. I came across this tip but have not trie dit.  I must admit to leaving stains and sending them to our cleaners who tend to work miracles. They are L&S cleaners and just a few weeks ago I found on a business trip to my horror that my nail polish had exploded in my case and poured all over a blouse which was brand new. I called L&S and asked for ideas – we tried some polish remover but it only made it worse. Sigh. However when I got home the cleaners worked their magic and got it all out! YAY.

So here is the tip for the removal of red wine when you dont have a reliable dry cleaners nearby! Proceed at your own risk! Of course put on some soothing music while you work! Try Love Song For my Child.

On delicate fabrics – soak the spot with denatured alchohol ( of course they presumes that you have denatured alchohol hanging around – I never do) and then flush with white vinegar to remove the residual stain.

On sturdy fabrics – coat the stain with salt ( haven’t you seen that happen at dinner parties? I have done it myself and always wondered if it helped!). Let it stand for five minutes. Stretch the stained area over a bowl. Secure it with a rubber band. Place it in the sink and carefully pour boiling water over the stain from a height of at least a foot.

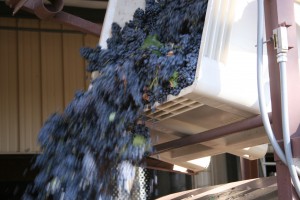
Well there is the tip for what it is worth. I still recommend leaving stain removal up to the professionals!  Below is a picture of those gorgeous grapes getting ready to become cabernet.

Share
Posted in Blog, Tips | Tagged , , , , , , | Leave a comment

Burning Calories – for computer users and golfers….

Share

Walking the golf course for 18 holes while carrying your golf clubs burns 1442 calories on average.

This compares to 517 calories sitting at your computer for four hours, according to a study by Neil Wolkodoff director of the Rose Center for Health and Sports Scinee.

Playing 18 holes and riding in a cart is a little less healthy burning 822 calories.

The same study also says that golfers who walk and transport their own clubs score SIX strokes better on average than peoiple who ride. They also score four strokes better than those who let someone else carry their bag.

Dont blame it on your caddy however. People who carry or use pull carts tend to be fitter to begin with.

I have to confess that I use the services of the best caddy in the world Greg Lambert, and do ride around in  a cart in which I place my clubs. Sigh. Oh well. I do so love the game – just have to spend more time doing it!

We decided to start our grandkids YOUNG playing golf – its so much easier than starting like I did in my sixties! Here is Jack at his first golf lesson.march april 2012 071 – of course with my loud encouragement!

Share
Posted in Blog, Family, Raising Children | Tagged , , , , , | Leave a comment

Chicken Tortilla Soup Short cut style – with Vegetables – Cooking with Kids and family meals make me so happy – how about you?

Share

Chicken Tortilla Soup Little Farm Style ( short cut) – and do be sure to put on music – try the Tickle Me song this time!

Ingredients ( this will serve 4-6)

  • 1 tablespoon butter ( it does make a difference to the taste of the onion)
  • 1/2 cup chopped onion
  • 2 cups chopped skinless, boneless chicken breasts
  • 1 cup of broccoli florets cut into smaller florets
  • 1 cup of baby carrots chopped into three pieces each
  • 1 1/2 cups water
  • 1 tablespoon all-purpose flour
  • 1  (14-ounce) can  chicken broth or reconstituted Better Than Bouillon
  • 1/4 teaspoon black pepper
  • 8  medium sized flour tortillas, cut into 1/2-inch strips
  • 1 tablespoon chopped fresh Italian parsley

Directions:

  1. Melt butter in a large pot over medium-high heat.
  2. Add onion; sauté until translucent.
  3.  Stir in vegetables; cook 9-10 minutes or until soft
  4. Add chicken pieces and cook for another 5-8 minutes until cooked
  5. Skim the top of the water in case there is any foam that has collected there from the fresh vegetables
  6. While this is cooking mix the water, flour, and chicken broth.
  7. Gradually stir broth mixture into chicken mixture and bring to a boil.
  8. Reduce heat, and simmer  for about 5 minutes.
  9. Stir in tortilla strips, and cook 2 minutes or until tortilla strips soften.
  10. Remove from heat; stir in parsley. Serve immediately.

OK this is not the traditional tortilla soup – ie broccoli, carrots and tortilla strips don’t really make it traditional – but we like it and it is low cal – you can vary the vegetables of course – we just happen to like broccoli and carrots!

Share
Posted in Blog, Family, Poultry, Recipes, Recipes to Make with Children, Vegetables | Tagged , , , , , , , , , | Leave a comment

Chicken and Almonds – yum! Cooking with kids to make this easy low cal dish with Butternut Squash Mash and Oven Fries

Share

I love nuts and chicken together – especially when cooking with kids – along with my favorite Panko breadcrumbs this makes for a low cal quick weektime dish – which is no fuss so you could easily do this on the days after a holiday (like the fourth of July) when no one really wants to cook. Cooking with kids is always fun and they will like some of the steps in this recipe. In fact, here are THREE recipes in one! Of course put on that grandma music try The Happy Song!

Ingredients:

  • 1/4 cup low-fat buttermilk which is easily made by putting a teaspoon of white vinegar into 1/4 cup of 2% milk
  • 2 tablespoons Dijon mustard – or ground mustard whichever you prefer
  • 4 (6-ounce) chicken breasts which are boneless and skinless and pounded into larger flatter pieces
  • 1/3 cup panko (Japanese breadcrumbs)
  • 1/3 cup finely chopped almonds (easy way to do this is to put them into a plastic bag and pound them with a can of something)
  • 2 tablespoons grated fresh Parmesan cheese ( freshly grated TRULY tastes SOOO much better than the store bought grated one – try it if you haven’t done this before)
  • 3/4 teaspoon finely chopped fresh rosemary
  • 1/4 teaspoon kosher salt
  • 1/4 teaspoon freshly ground black pepper
  •   Pam or another Cooking spray
  •   Rosemary sprigs (optional) – It is really easy to grow rosemary in your garden or even in a pot in your kitchen – try it – its worth it – we don’t use that much and just a few sprigs freshly cut will make your smile ! I guarrantee it – the smell permeates the home.

Directions:

1. Preheat oven to 425°.

2. Combine buttermilk and mustard in a shallow dish, and this is when you let the kids use their personal whisks. Did I mention that each of our grandkids have their own kitchen tools ? That is a spoon and a whisk each – and measuring cups and teaspoons. And they get to wash them and put them away safely every cooking session

2. Add the chicken pieces to your buttermilk mixture, turning them so that all sides are coated. Our grandkids are not crazy about the consistency of raw chicken! Who can blame them!

3. Heat a frying pan over medium heat. Add panko to pan; cook until golden, stirring frequently. Combine panko, nuts, cheese rosemary salt and pepper in a shallow dish – the kids can do this and learn to measure as well.

4. Remove chicken from buttermilk mixture which you can throw out. Cover the chicken on all sides with the panko mixture.

4. Place a wire rack on a large baking sheet; coat rack with cooking spray. Put the pieces of  chicken on the rack; coat chicken with cooking spray.  This is to be sure that the chicken bakes on all sides – pretty much fat free!

5. Bake at 425° for 13 minutes or until when pricked, the juice that runs out the chicken is clear. Decorate with rosemary sprigs and serve with mashed butternut squash  ( bake a butternut squash in the oven whole for 1.5 hours – then cut in half, remove the pits, scrape out the flesh, add salt and butter to taste and its ready to serve!) or oven baked potato fries. ( SOO Simple – just take a mixture of Yukon gold, yams, russets and sweet potatoes ( with or without the skin – if you leave the skin on be sure to wash them well. )

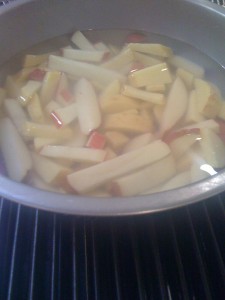
TIP: Did you know that soaking the cut potatoes in ICED water will make them stay the same color and cook up better?cut into steak cut fries ie thick, sprinkle with Lawry’s salt sparingly and even with a few chopped sprigs of rosemary, spray all over with Pam spray ( Olive oil kind) and put onto another rack on a baking sheet in the same oven – and cook along with the chicken! The potatoes may take a bit longer than the chicken – so you can put them in BEFORE you start preparing the chicken – ie 30 minutes, and they should be ready when the chicken is ready). ENJOY!

Share
Posted in Blog, Family, Poultry, Recipes, Recipes to Make with Children, Tips, Vegetables | Tagged , , , , , , , , , | Leave a comment

Making Ice Cream Sandwiches – at home! Cooking with Kids on the day AFTER The Fourth!

Share

How to Make Ice Cream Sandwiches Three Ways

You can make ice cream sandwiches three ways. Any way you choose, you can make far better ice cream  sandwiches than you can get at the store down the street.  And you can be creative mixing and  matching cookies with ice cream flavors and maybe dipping them in chocolate or frosting  them.

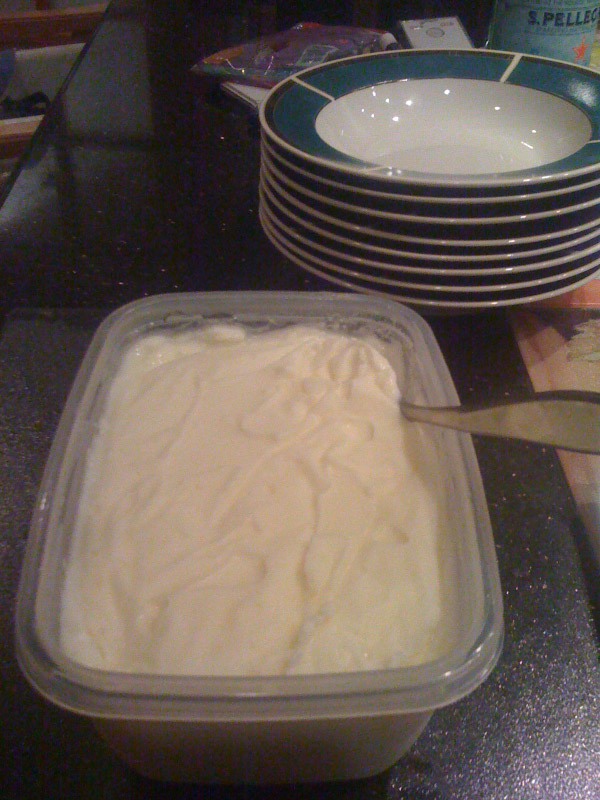
No matter what method you use – cooking with kids – when it comes to this recipe – is a blast! Our little ones LOVE to taste everything we make in this one – every step too! So plan on a fair amount of serious spoon and pan licking! Below is a picture of home made vanilla icecream – that we then added to the recipes for Ice Cream Sandwiches below. YUM! Of course we listen to music all the time – especially Love Song for My Child.

We’ll  show you all three ways and give you the advantages of each so that you can  choose the way that is best for you.

Method 1:  Making Ice Cream Sandwiches with an Ice Cream  Sandwich Maker

This  method uses a slick ice cream sandwich maker to make uniform and professional looking  ice cream sandwiches.  The tool cuts a  cookie sheet into uniform rectangles.  A  cookie is placed in the tool, ice cream is spread on top of the cookie, and second  cookie is placed over the ice cream.  Using  the tool, the ice cream and the two cookies are compressed together.

Read on to see how to make ice cream sandwiches with an ice cream  sandwich maker.

HOWEVER you dont need to use this. You can use the sheet method below – which is what I use.

Method 2:  Making Ice Cream Sandwiches with the Sheet  Method

This  method uses two sugar cookie sheets with ice cream frozen between the  sheets.  The sheets are sawed into  individual sandwiches using a serrated knife.

The  sugar cookies are baked in pans lined with parchment paper.  After the cookies are cooled, they are lifted  from the pans by grasping the edges of the paper.  You can use nearly any sugar cookie recipe or  mix.   (We use the sugar cookie mixes in  flavors like Huckleberry, Raspberry Lemon, and Cinnamon Banana from our favorite supplier The Prepared Pantry.)

Once  you learn the methodology, you can use any sugar cookie mix or recipe.  Our sugar cookie mixes are perfectly sized to  make a 9 x 13-inch sheet.  You can use  the frosting mix that comes with the mix to decorate or frost you ice cream  sandwiches.

What you’ll need:

  • sugar cookie mix  or recipe
  • 2 baking pans, 9 x 13 if you are using our mixes but other pans may accommodate other mixes or recipes
  • ice cream
  • parchment paper or aluminum foil

Step one:  Making the Sugar Cookie Sheets

Mix  the cookie dough according to the package instructions.  Roll the dough into two parchment lined pans  to a thickness of just less that 1/4-inch.   It is easiest to do this with a pastry  roller or pony roller.  For  this cookie mix, two 9 x13-inch pans were perfect.  Save any leftover dough to make sugar  cookies.   Bake for nine minutes or until done.  Dark pans will bake more quickly than light  pans.

Let  the cookies cool in the pans on a rack.   Once cool, lift one of the sheets from the pan and set it on a cooling  rack.  Leave the other in the pan.

Step two:  Putting Ice Cream between the Two Sugar Cookie  Sheets

Soften  the ice cream on the counter until it is no longer hard.  Spread the ice cream with the back of an ice  cream spade or spatula.  For a 9 x13-inch  pan, nearly a quart of ice cream is the right amount.  Place the pan with the ice cream in the  freezer.

Place  plastic cutting board over the cookie sheet on the rack.  Grasping the cutting board and cooling rack  together, invert the cookie sheet onto the cutting board.  Peel off the parchment paper. You will now  have a whole cookie sheet upside down on the cutting board.  Replace the cooling rack, hold the cutting  board and rack together, and invert the combination.  You will now have the cookie sheet on the  rack right side up.

Carefully  slide the cookie sheet off the rack onto the frozen ice cream.  Gently press the cookie onto the ice  cream.  Place the pan with the cookies  and ice cream into the freezer to freeze solid.

Step three:  Cutting and Finishing Your Ice Cream  Sandwiches

Remove  the pan from the freezer.  Lift the  cookie and ice cream sheet from the pan by grasping the edges of the parchment  paper.

Use  a ruler to determine cut lines.  Score  lines in the cookie where you want the cuts to be.  Use a stiff-bladed serrated knife to saw the  sheet into ice cream sandwiches returning each to the freezer once cut.  If the ice cream starts to soften before all  the cuts are made, refreeze the ice cream.

You  may dip your ice cream sandwiches in melted chocolate coating one end.  As you remove the ice cream sandwiches from  the chocolate, you may dip the soft chocolate end in sprinkles or other  decorations.

You  may also chose to frost the top of your ice cream sandwiches and sprinkle  decorations onto the frosting.

Method 3:  Making Ice Cream Sandwiches Using the Cookie  Cutter Method

This  method is the simplest and requires no tools but without a form to hold the ice  cream in and tool to uniformly cut the cookies and compress the ice cream, the  ice cream sandwiches are not as neat and professional looking.

You  need some solid cookies like gingersnaps or Snickerdoodles, not dainty cookies,  to absorb the moisture and not come apart when you bite them.  Our favorites are chocolate  sugarsnaps, gingersnaps, and Pennsylvania Dutch sugar cookies.

What you’ll need:

  • cookie mix or recipe
  • a baking pan
  • ice cream
  • parchment paper or aluminum foil

Step one:  Baking the Cookies

Bake  the cookies according to package directions and let cool.  Try to make the cookies the same shape and  size.  Match the cookies in pairs and set  aside.

Step two:  Preparing the Ice Cream

Line  a 9 x13-inch baking pan with foil or parchment paper.

The  ice cream needs to be barely softened enough to squish into the foil or  parchment paper lined pan.  If you let it  get too soft, ice crystals will form.  If  you use a spatula or the back of an ice cream spade, you can squish the  ice cream into a layer while it is still frozen.  Smooth the ice cream into a 1/2-inch thick  layer.  Refreeze the ice cream.


Step three:  Cutting the Ice Cream and Assembling the  Sandwiches

Once  the ice cream is frozen hard, remove the pan form the freezer.  Lift the ice cream from the pan by grabbing  the edges of the foil or paper and lifting.

Cut  round circles of ice cream with a cookie cutter.  Place each ice cream circle between a cookie  pair.  Press firmly together and then  refreeze.

Share
Posted in Blog, Desserts, Family, Other wonderful treats, Recipes to Make with Children | Tagged , , , , , , | Leave a comment

July Fourth! Cooking with kids – cooking for family! An EASY FAST ONE!

Share

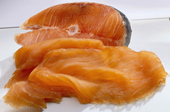
We have family members who eat fish – not chicken or meat. So for the Fourth we always have a delicious grilled salmon dish for them. The one below is easily assembled, unusual in flavor and can be bbq’d along with the burgers and hot dogs. I always have the grandkids help me with fish preparation too – to get them used to the fact that life is NOT all about cheeseburgers. Sigh – its a lost cause for Jack however – although Jonah will eat anything! Of course music is obligatory! Try the Sleepy Song to relax everyone who may be over excited about the celebration!

Grilled Salmon

Ingredients

  • 1/2 cup fresh lemon juice
  • 1/4 cup olive oil
  • 1/2 cup chopped fresh cilantro
  • 2 tablespoons paprika
  • 1 tablespoon ground cumin
  • 2 teaspoons ground coriander
  • 3 fresh  cloves garlic, peeled and minced
  • 4-6 boned salmon fillets with skin (to serve 4 people since someone will always want seconds…)
  •   Lemons cut into wedges for serving

Directions:

1. Mix  lemon juice, olive oil, cilantro, paprika, cumin, coriander, garlic. ( You can add salt and pepper but we prefer to keep the spices front and center). The children love to do the mixing here.

2. Rinse salmon and pat dry.

2. Line a baking sheet with foil and place the fish with the skin down onto it. The children can do the lining of the baking sheet.

3. Fold the edges of the foil over to make a rim and spread the spice/lemon/olive oil mixture over it. You can do this the night before the big celebration and leave the fish marinading in the fridge – or just do it in the morning early before anyone arrives – and it will be ready within 3 hours. Again the kids are great at spreading stuff and will love doing this.

4. When you are ready to start the meal, heat up the grill first.

5. Slide salmon on foil off baking sheet onto grill, ( still on the foil) not directly over heat and cook the fish until you can see it is cooked but is not dry – I always cut out a bit to test from one of the filets. It is going to take about 25 minutes – but it will all depend on the thickness of your filets, so you will need to test. DO NOT OVERCOOK!

6. Slide two to three wide spatulas under foil and fish to transfer to a server and to make it look more attractive, curl the edges of the foil under the salmon until not visible. Now place your lemon wedges around the fish and serve with a great rice salad.

Share
Posted in Blog, Family, Fish, Gluten Free, Raising Children, Recipes, Recipes to Make with Children | Tagged , , , , , , , | Leave a comment

Brownies GALORE! Great for cooking with kids – they can join YOU in licking the bowls! Great for the FOURTH OF JULY!

Share

Ten Ways to Fancy Up Your Brownies (or Other Desserts) Remember to put on MUSIC to make it fun! Try The Happy Song!

Here  are ten great ideas to transform your brownies into fancy desserts that will  impress your friends and delight your family.   Again with our partner The Prepared Panty, we used a number of their products for these yummy concoctions.

You’ll want to keep these ideas and recipes handy.  You’ll refer to them often for other  desserts. I used the New York Dessert Brownie mix because it makes brownies that are more cake-like, so they easily cut into nice, neat squares.

  1. Sundae Brownies.  Make sundaes out of your brownies with ice cream, whipped cream, a syrup, chopped nuts, and a cherry.
  2. Banana Split Brownies. Make it a banana split with sliced bananas, ice cream, whipped cream, nuts, and a syrup. 
  3. Strawberry Shortcake Brownies.  Add fresh sliced strawberries and       whipped cream.  Consider Orange Cloud Whipped Cream.  Orange and chocolate is a surprisingly delightful combination.
  4. Raspberry Cheesecake Brownies.  Top your brownies with our raspberry dessert sauce or make your own with fresh raspberries.  Add Raspberry Cream Cheese Whipped Cream.
  5. Strawberry Cream Brownies.  Top your brownies with a strawberry dessert sauce made with fresh strawberries and a squiggle of Bavarian cream.  Add Strawberry Cream Cheese Whipped       Cream.
  6. Chubby Cherry Brownies.  Top your brownies with Chubby Cherry Topping and French Vanilla       Whipped Cream.
  7. Peanut Butter Cream Brownies.  Add Bavarian cream, Peanut Butter Fudge Sauce, and Salted Peanut Butter  Whipped Cream.
  8. Le Grande Brownies.  Drizzle your brownies with chocolate       dessert sauce and pile them high with meringue.  Brown the meringue with a kitchen torch.
  9. Caramel Brownies.  Drizzle your brownies with caramel dessert sauce or make your own       caramel sauce.  Top them with       Caramel Nut Whipped Cream.
  10. Mint Brownies.  Add mint chips to the batter.  Top       your brownies with Mint Chocolate Sauce.        Add French Vanilla Whipped Cream.

See all  the Designer Dessert Sauces from Prepared Pantry.  This is what the pros use to make those fancy  desserts you find in better restaurants.


Recipes  for Sauces, Toppings, and Whipped Creams


Orange  Cloud Whipped Cream

Ingredients:

2 cups  whipping cream

1/2 cup granulated sugar

2 teaspoons orange  flavor

1 tablespoon orange zest

Directions          

  1. Whip the  cream to soft peaks.
  2. Add the sugar, flavor, and zest and continue  whipping.

Lemon Cloud Whipped Cream

Ingredients:

2  cups whipping cream

1/2 cup granulated sugar

2 teaspoons lemon  flavor

1 tablespoon lemon zest

Directions          

  1. Whip  the cream to soft peaks.
  2. Add the sugar, flavor, and zest and continue  whipping.

Fresh Raspberry Sauce

Raspberries  alone are not tart and flavored enough for a dessert sauce even when thickened  with a starch. There are two possible solutions: Cooking the fruit down to concentrate  the flavors or adding a jelly for thickness and flavor. This recipe uses the latter.

Ingredients:

12  ounces, about 3 cups frozen, unsweetened raspberries

2/3 cup red  currant jelly

about 1/4  cup sugar

Directions          

  1. Thaw  and puree the raspberries.
  2. Strain them twice through a sieve/strainer or until  nearly all of the seeds are removed.
  3. Place the puree in a small saucepan.
  4. Add  the jelly.
  5. Cook,  stirring occasionally, until the jelly is completely melted and blended with  the fruit.
  6. Sweeten to taste with the sugar while it is still hot.
  7. Stir to  make sure that the sugar is dissolved.
  8. Let cool.

Yield: About 1 1/3 cups of raspberry sauce.

Strawberry Sauce

Strawberries  alone are not tart and flavored enough for a dessert sauce even when thickened  with a starch.  There are two possible solutions:  Cooking the fruit  down to concentrate the flavors or adding a jelly for thickness and  flavor.  This recipe uses the latter.

Ingredients:

12 ounces,  about 3 cups frozen, unsweetened strawberries

2/3 cup red currant jelly

about 1/4 cup sugar

Directions          

  1. Thaw and puree the strawberries.
  2. Place the puree in a small saucepan.
  3. Add the jelly.
  4. Cook, stirring occasionally, until the jelly is completely melted and blended with the fruit.
  5. Sweeten to taste with the sugar while it is still hot.  Stir to make sure that  the sugar is dissolved.
  6. Let cool.

Yield: About  1 1/3 cups of strawberry sauce.

Raspberry Cream Cheese Whipped Cream

Consider this  as a colorful topping for any raspberry dessert.  It’s also a nice  alternative to whipped cream in fruit salads calling for whipped cream

Ingredients:

1/3 cup  sugar

4 ounces cream cheese

2 cups whipping cream

2 drops deep  pink Americolor food color gel or equal (optional)

1 teaspoon raspberry flavor

Directions          

  1. Place the sugar and cream cheese in the bowl of your stand-type mixer.  Beat until the sugar is creamed through the cream cheese into a soft, consistent mixture.
  2. Add the cream, color, and flavor.
  3. Beat until soft peaks form.
  4. Hold the  whipped cream in the refrigerator until you are ready to use it.  It can  be rewhipped as long as you don’t over-beat it.

Strawberry Cream Cheese Whipped Cream

Consider  this as a colorful topping for any strawberry dessert.  It’s also a nice  alternative to whipped cream in fruit salads calling for whipped cream

Ingredients:

1/3 cup sugar

4 ounces cream cheese

2 cups whipping cream

2 drops deep pink Americolor  food color gel or equal (optional)

1 teaspoon strawberry flavor

Directions          

1. Place  the sugar and cream cheese in the bowl of your stand-type mixer.  Beat  until the sugar is creamed through the cream cheese into a soft, consistent  mixture.

2. Add the cream, color, and flavor. Beat until soft peaks form.

3. Hold the  whipped cream in the refrigerator until you are ready to use it.  It can  be rewhipped as long as you don’t over-beat it.

French Vanilla Whipped Cream

You can make  this with or without the cream cheese.   The cream cheese will help stabilize the whipped cream so that it does  not melt as quickly.

Ingredients:

1/3 cup  sugar

4 ounces cream cheese

2 cups whipping cream

1 teaspoon French vanilla flavor

Directions          

  1. Place the sugar and cream cheese in the bowl of your stand-type mixer.  Beat until the sugar is creamed through the cream cheese into a soft, consistent mixture.
  2. Add the cream, color, and flavor. Beat until soft peaks form.
  3. Hold the  whipped cream in the refrigerator until you are ready to use it.  It can  be rewhipped as long as you don’t over-beat it.

Chocolate Whipped Cream

Ingredients:

2  cups whipping cream

1/2 cup milk chocolate chips or 1/2 cup semi-sweet chocolate chips

1/2 cup granulated sugar or to taste           1/2 teaspoon vanilla  extract

Directions          

  1. Whip the cream until soft peaks       form.  (See tips in the next section.)
  2. Melt the chocolate in the microwave for one minute at high heat, stir, and continue heating until melted.
  3. Let the chocolate cool for three to five minutes.  The chocolate       should be warm and still liquid but not hot.
  4. Stir 1/3 of the whipped cream into the chocolate.
  5. Stir the chocolate mixture and the extract (along with the sugar, if used) into the remaining whipped cream.

Caramel Sauce ( this is my personal fav)

Ingredients:

1  12-ounce can of evaporated milk

1 1/4 cup brown sugar

6 tablespoons butter

1 teaspoon vanilla extract

Directions:

  1. Mix  all the ingredients except the extract in a heavy saucepan.
  2. Heat over medium  heat, stirring often, until the mixture boils.
  3. Gently boil for eight to ten  minutes or until the mixture thickens.
  4. Remove from the heat and stir in the  extract.
  5. Cool until the sauce thickens to serving consistency.

Chocolate Sauce

This is an example of a cooked sugar sauce  with corn syrup added to reduce the chances of crystallization.

Ingredients:

2 cups sugar

1 cup water

2 tablespoons corn syrup

3 ounces unsweetened baker’s chocolate (for a  very dark sauce, use 4 ounces)           4 tablespoons butter

Directions:

  1. Measure  the sugar and water into a clean saucepan.
  2. Over  medium heat, stir and cook until the sugar is dissolved and the solution  comes to a boil. Cook for one minute.
  3. Melt  the chocolate and butter in the microwave in a medium bowl.
  4. Very slowly hot syrup into the chocolate mixture. Pour the chocolate sauce back  into the saucepan.
  5. Bring the sauce back to a boil. After it reaches the boiling point, cook for       four more minutes. Let cool.

Store in a covered container in the  refrigerator.

Chocolate Ganache

Ganache is a simple  chocolate sauce that is luscious, easy to make, and very versatile. By altering  the ratio of whipping cream to chocolate, you can make it thin for an ice cream  topping, thick like a paste for a sandwich filling between two cookies, or  somewhere in between to drizzle over a cake. Light corn syrup is sometimes  added to create glaze for drizzling.           The following recipe  will yield a thick, paste like ganache. You may thin your ganache with more  cream.
Ingredients

1 cup heavy cream

1 teaspoon vanilla

8 ounces semisweet or bittersweet chocolate, cut into pieces

4 tablespoons butter
Directions

Bring the cream and  vanilla to a boil.

In a medium bowl, pour the hot cream over the chocolate.

Stir until the chocolate is melted.

Stir in the butter.

Let the ganache cool  until it reaches the desired consistency.

Caramel Nut Whipped Cream

Ingredients:

1  cup whipping cream

2 tablespoons brown sugar

1/2 teaspoon caramel  flavor

1/3 cup salted snacking nuts, chopped

Directions          

Whip  the cream, sugar, and flavor together in your stand-type mixer with a whip  attachment.  Continue beating until stiff peaks form.  Fold in the  nuts.

Notes:   Whipped cream will melt as it sits, especially if not refrigerated.  A  half teaspoon Instant  Clearjel per cup of whipping cream will help it hold up.  Whipped  cream can be whipped again to revive it.

Salted Peanut Butter Whipped Cream

Ingredients

2  cups whipping cream

1/3 cup brown sugar

1/3 cup peanut butter

1/3 cup salted peanuts, chopped

Directions          

Whip  the cream, sugar, and peanut butter together in your stand-type mixer with a  whip attachment.  Continue beating until stiff peaks form.  Fold in  the peanuts.

Peanut Butter Fudge Sauce

Ingredients

This  is simply a ganache with peanut butter added.

3/4  cup heavy cream

9 ounces dark chocolate wafers

1/3 cup peanut butter

Directions          

Bring  the cream to a boil. In a medium bowl, pour the hot cream over the chocolate.  Stir until the chocolate is melted. Stir in the peanut butter. Let the sauce  cool enough for serving.  If the sauce becomes too thick, reheat the sauce  or stir in more cream.

Mint Fudge Sauce

Ingredients

1 cup cream

12 ounces mint  chocolate chips

3 tablespoons butter

Directions          

Place the  cream in a heavy saucepan.

Add the chips.

Cook and stir until the  chips are melted and the mixture is smooth.

Stir in the butter.

Let cool for  ten minutes before using.  Store in the refrigerator for up to one  month.  Reheat in the microwave before serving again.


Share
Posted in Blog, Desserts, Family, Raising Children, Recipes, Recipes to Make with Children | Tagged , , , , , , , , , , , , , | Leave a comment

Make a Banana Cream Pie in 20 minutes! Great for cooking with kids! On Tasty Thursdays

Share

How to Make a Banana Cream Pie—in as Little as  20 Minutes

We nearly always have bananas around  our house.  We actually grow our own so in the season we have more than we can eat. Most of the time, they get  eaten before they are too ripe.  When  they do get too ripe, they end up in banana bread, a smoothie, or the  freezer.   (To freeze bananas, peel them  and put them in zip lock.  They’ll last  for months.) When the season is over, we buy organic bananas from the market. They don’t taste as good as ours but work certainly for this pie!

There’s  no such thing as too ripe for baking but for the perfect banana pie, you want  them ripe but still firm. Try to  catch them just before they get soft.

Today,  I’ll tell you how to make a traditional banana pie with a cooked cream filling  as well as a banana pie made with Bavarian cream.   You can make the Bavarian cream from scratch or use premade Bavarian  cream.

About the Crust

Regardless  of the pie you choose, you’ll need a premade pie crust.  I don’t remember the last time that I made a  pie crust from scratch; it’s too easy to grab a just-add-water  pie crust mix.   I can throw  it in the mixer with the water for no more than a minute and my dough is ready  to go.  The crust is every bit as good as  I can make from scratch.  I form the  crust, fill it with pie weights and  bake it for about ten minutes in a 400 degree oven.  While it’s baking, I work on the  filling.  I only let the crust cool for a  few minutes before loading in the filling. Or you can buy ready made pie crusts in the market that are really quite good.

Traditional Banana Cream Pie

premade pie crust, baked

3 small to medium-sized bananas

2/3 cup sugar

1/4 cup flour

1 tablespoon cornstarch

1/4 teaspoons salt

2 cups milk or light cream

4 large egg yolks

1 teaspoon vanilla

2 tablespoons butter

Directions:

  1. Place  the dry ingredients in a saucepan. Add the milk or light cream and whisk  together. Add the egg yolks and whisk those in. Kids love to do the whisking and I have a separate little whisk for each grandchild.
  2. Heat  over low heat, stirring regularly, until the mixture is thick and just begins  to bubble. Add the butter and vanilla and stir.
  3. Let  the mixture cool for fifteen minutes. Spread the banana slices evenly across  the bottom of the pie shell. The children can do this part. They could even help you pour the filling over the banana slices. Chill for  several hours. Garnish with whipped  cream.

A Banana Cream Pie Made with Bavarian Cream

You  can make a banana cream pie exactly the same way with Bavarian cream. Bavarian cream is softer, not as firm, as the  cooked filling above and so the slices are not as neat and clean. We compensate for that by adding more bananas  and interspersing the bananas with the cream—a layer of bananas, then a layer  of cream then a layer of bananas again topped with cream filling.

If  you have a really good nonstick pan,  you can slide your pie out of the pan onto a cutting board. (See the picture of the pie at the top of  this article.) It’s easier to slice and  serve a nice neat slice from a cutting board.  If you do slip your pie from the pan, first twist it just a bit to make  sure the crust isn’t sticking anywhere.

You  can make your Bavarian cream from scratch or buy premade  Bavarian cream filling.  Bavarian cream comes in two-pound plastic tubes.  Simply clip the corner and squeeze out what  you need.  Fold the corner over, put a  paper clip on it, and store the rest in the refrigerator for up to six  months.  Bavarian cream is also used as a  filling in pastries and donuts, for filling cupcakes, between cake layers, in  crepes, and in many other applications.

To make your own  Bavarian cream

1  packet unflavored gelatin, about one tablespoon

3 tablespoons milk

1/4 cup sugar

5 large egg yolks

1 1/4 cups whipped cream

1 tablespoon good quality vanilla extract

1 1/4 cups whipped cream (second measure)

  1. Place the milk in a small bowl.
  2. Sprinkle the gelatin into the milk and set aside. Children can do this part.
  3. Whisk the sugar and egg yolks together. My grandkids LOVE whisking!
  4. Heat the cream until it just starts to simmer.  Do not boil.
  5. Slowly whisk the hot cream into the egg mixture to temper the eggs.
  6. Cook the mixture in a double boiler or over simmering water, stirring, until it starts to thicken and simmer.
  7. Remove the cream mixture from heat and stir in the milk and gelatin mixture.
  8. Add the vanilla. The kids can do this part.
  9. Pour the cream mixture into a bowl and  place bowl in an ice bath and stir until the mixture cools to room temperature.
  10. Whip the second measure of whipped cream. Fold in the whipped cream. Refrigerate until you are ready to use the Bavarian Cream.

Banana Cream Pie Variations

To  make a Black Bottom Banana Cream Pie,  make as above except add a layer of chocolate ganache across the bottom of the  pie crust, a chocolate layer under the banana filling. Ganache is  wonderful, all-purpose, chocolate filling that is used in pastries, cake coatings,  and as filling between cake layers.  Here’s how to make it:

Chocolate  Ganache

1  cup dark  chocolate wafers or dark chocolate chips

1/4 cup heavy cream

2 tablespoons butter

Put  all three ingredients in a medium, microwave-safe bowl.  Microwave it in  30 second intervals until the chocolate is melted, stirring between  intervals.  The ganache will thicken as it cools.  You may thin it  further with additional cream. Of course the kids will be right there to lick the bowl along with you!

To  make a Chocolate Banana Cream Pie Make  your pie as above but use Chocolate  Bavarian Cream.


Share
Posted in Blog, Desserts, Family, Recipes, Recipes to Make with Children | Tagged , , , , , , , , , | Leave a comment